OIL PUMP REMOVAL

-
REMOVE ENGINE ASSEMBLY
-
Remove the engine Click here.
-
-
REMOVE NO. 1 COMPRESSOR MOUNTING BRACKET
-
Remove the 4 bolts and compressor mounting bracket.
-
-
REMOVE TIMING BELT
-
Remove the timing belt Click here.
-
-
REMOVE INJECTION PUMP ASSEMBLY
-
Remove the injection pump Click here.
-
-
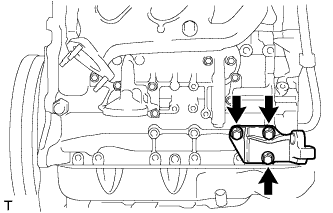
REMOVE WATER OUTLET HOUSING
-

Remove the 3 bolts, outlet housing and gasket.
-
-
REMOVE WATER BY-PASS HOSE UNION
-
Remove the water by-pass hose union.
-
-
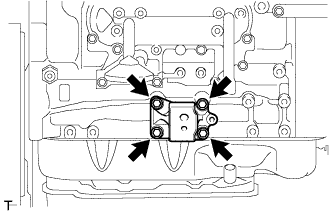
REMOVE PUMP BRACKET
-
Remove the 3 bolts and pump bracket.
-
-
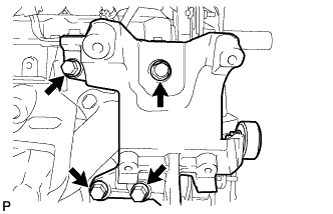
REMOVE NO. 1 FRONT ENGINE MOUNTING BRACKET RH
-
Remove the 4 bolts and engine mounting bracket.
-
-
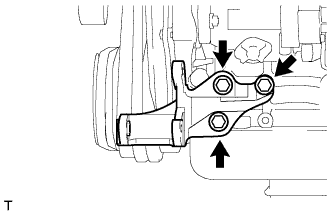
REMOVE NO. 1 FRONT ENGINE MOUNTING BRACKET LH
-
Remove the 4 bolts and engine mounting bracket.
-
-
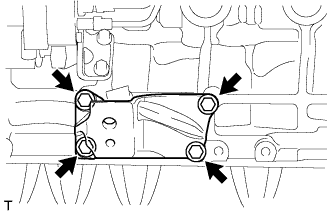
REMOVE NO. 1 GENERATOR BRACKET
-
Remove the 3 bolts and No. 1 generator bracket.
-
-
REMOVE CAMSHAFT TIMING PULLEY
-
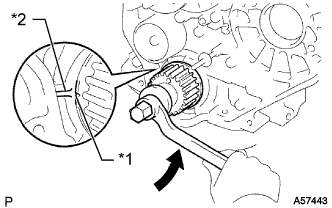
Text in Illustration 
Turn *1 Timing Mark *2 Protrusion Using the crankshaft pulley bolt, turn the crankshaft 90° counterclockwise and align the timing mark of the crankshaft timing pulley with the protrusion of the timing belt case.
Tech Tips
Set the No. 1 cylinder to 90° BTDC/compression to avoid interference with the piston top and valve head.
-
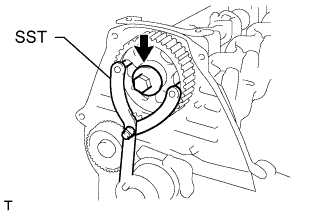
Using SST, loosen the pulley bolt.
- SST
- 09960-10010 ( 09962-01000, 09963-01000 )
-
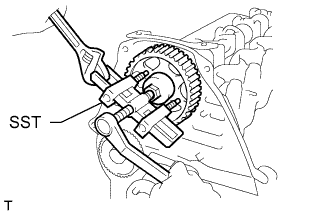
Using SST, separate the timing pulley from the camshaft.
- SST
- 09950-50013 ( 09951-05010, 09952-05010, 09953-05010, 09954-05021 )
-
Remove the pulley bolt and timing pulley.
-
Remove the timing pulley woodruff key.
-
-
REMOVE NO. 2 TIMING BELT COVER
-
Remove the 4 bolts and timing belt cover.
-
-
REMOVE WATER PUMP ASSEMBLY
-
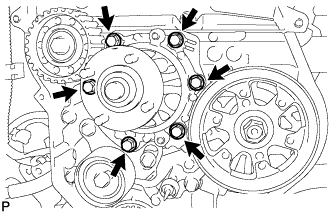
Remove the 6 bolts and tension spring bracket.
-
Remove the water pump and gasket.
-
-
REMOVE NO. 1 TIMING BELT IDLER SUB-ASSEMBLY
-
Remove the 2 bolts (A and B).
-
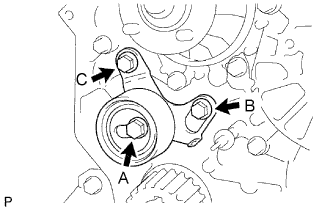
Loosen the bolt (C), and remove the No. 1 timing belt idler.
-
-
REMOVE NO. 2 TIMING BELT IDLER SUB-ASSEMBLY
-
Remove the bolt, No. 2 timing belt idler and spacer.
-
-
REMOVE CRANKSHAFT TIMING PULLEY
-
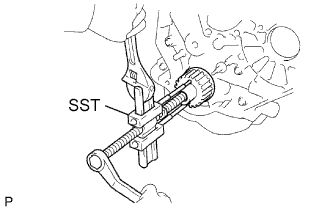
Using a screwdriver, remove the crankshaft timing pulley.
- SST
- 09950-50013 ( 09951-05010, 09952-05010, 09953-05010, 09953-05020, 09954-05010 )
Tech Tips
If the timing pulley cannot be removed by using a screwdriver, remove it with SST.
-
-
REMOVE OIL PAN SUB-ASSEMBLY
-
Remove the 16 bolts and 2 nuts.
-
Insert the blade of an oil pan seal cutter between the oil pan and cylinder block, cut off the applied sealer and remove the oil pan.
Note
-
Do not use an oil pan seal cutter for the timing belt case side and rear oil seal retainer.
-
Be careful not to damage the oil pan flange.
-
-
-
REMOVE OIL STRAINER SUB-ASSEMBLY
-
Remove the 2 bolts, 2 nuts, oil strainer and gasket.
-
-
REMOVE TIMING BELT CASE SUB-ASSEMBLY
-

Remove the 5 bolts, timing belt case and gasket.
-
-
REMOVE FRONT CRANKSHAFT OIL SEAL
-
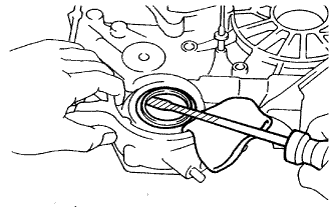
Using a screwdriver, pry out the oil seal.
Note
Tape the screwdriver tip before use.
-