ENGINE OIL COOLER (w/o DPF) REMOVAL

-
REMOVE FRONT BUMPER LOWER COVER
-
Remove the clip, 5 bolts and front bumper lower cover.
-
-
REMOVE NO. 1 ENGINE UNDER COVER SUB-ASSEMBLY
-
Remove the 4 bolts and No. 1 engine under cover.
-
-
DRAIN ENGINE COOLANT
CAUTION:
Do not remove the radiator cap while the engine and radiator are still hot. Pressurized, hot engine coolant and steam may be released and cause serious burns.
-
Loosen the radiator drain cock plug.
Tech Tips
Collect the coolant in a container and dispose of it according to the regulations in your area.
-
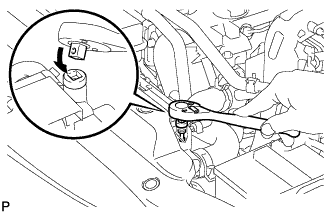
Drain the coolant by removing the reservoir cap and, using a wrench, remove the vent plug.
-
Loosen the cylinder block drain cock plug.
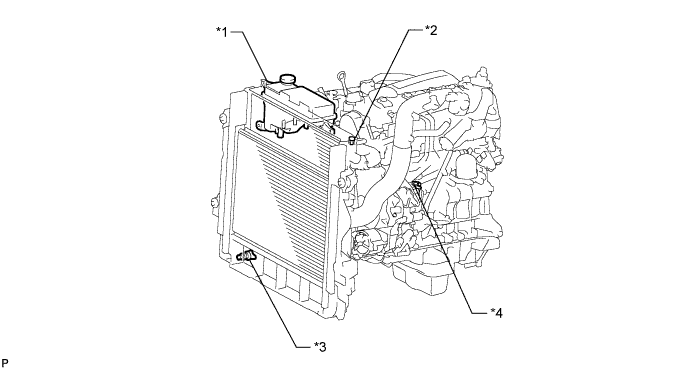
Text in Illustration *1 Radiator Reservoir *2 Vent Plug *3 Radiator Drain Cock Plug *4 Cylinder Block Drain Cock Plug
-
-
DRAIN ENGINE OIL
-
Remove the oil filler cap.
-
Remove the oil pan drain plug and gasket, and then drain the engine oil into a container.
-
Wipe the oil pan and drain plug.
-
Install a new gasket and the oil pan drain plug.
- Torque:
- 34 N*m { 347 kgf*cm, 25 ft.*lbf }
-
-
REMOVE STARTER ASSEMBLY
-
for 2.2 kW Type:
Remove the starter Click here.
-
for 2.7 kW Type:
Remove the starter Click here.
-
for 3.0 kW Type:
Remove the starter Click here.
-
-
REMOVE COMMON RAIL ASSEMBLY
-
Remove the common rail Click here.
-
-
REMOVE SUPPLY PUMP ASSEMBLY
-
Remove the supply pump Click here.
-
-
REMOVE VACUUM CONTROL VALVE SET
-
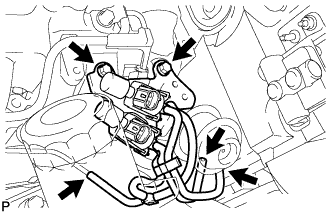
Disconnect the 2 VSV connectors and 3 vacuum hoses.
-
Remove the 2 bolts and vacuum control valve set.
-
-
DISCONNECT NO. 3 WATER BY-PASS HOSE (w/ EGR Cooler)
-
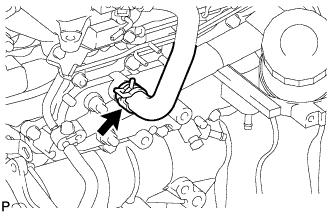
Disconnect the No. 3 water by-pass hose.
-
-
REMOVE OIL FILTER SUB-ASSEMBLY
-
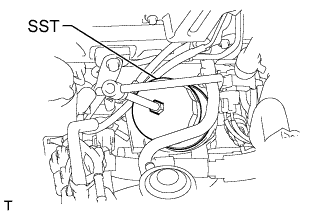
Using SST, remove the oil filter.
- SST
- 09228-07501
-
-
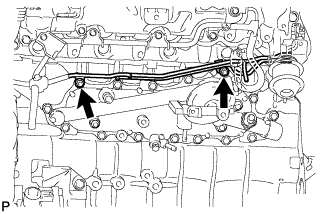
REMOVE OIL COOLER COVER SUB-ASSEMBLY
-
Disconnect the oil pressure switch connector.
-
Disconnect the vinyl tube.
-
Remove the 2 nuts and disconnect the No. 2 vacuum transmitting pipe from the oil cooler cover.
-
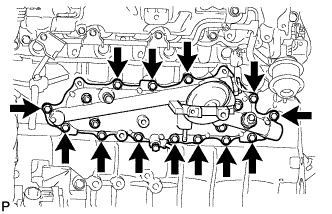
Remove the 13 bolts and oil cooler cover.
-
-
REMOVE OIL COOLER ASSEMBLY
-

Loosen the 4 nuts.
-
Partially tap out the oil cooler by tapping each nut head with a plastic-faced hammer.
-
Remove the 4 nuts, oil cooler and 2 gaskets.
-