RADIATOR REMOVAL

-
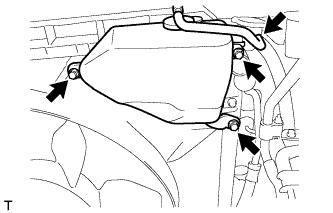
REMOVE UPPER RADIATOR SUPPORT SEAL
-
Remove the 13 clips and upper radiator support seal.
-
-
REMOVE FRONT BUMPER COVER LOWER
-
Remove the clip, 5 bolts and front bumper cover lower.
-
-
REMOVE NO. 1 ENGINE UNDER COVER SUB-ASSEMBLY
-
Remove the 4 bolts.
-
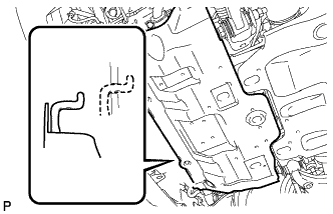
Unhook the engine under cover from the vehicle body as shown in the illustration.
-
-
DRAIN ENGINE COOLANT
CAUTION:
Do not remove the radiator reservoir cap while the engine and radiator are still hot. Pressurized, hot engine coolant and steam may be released and cause serious burns.
-
Loosen the radiator drain cock plug.
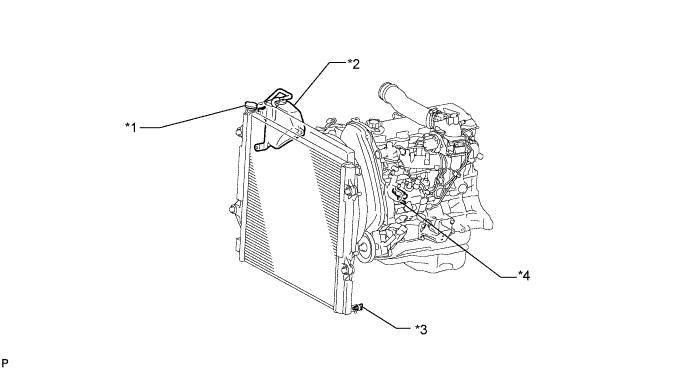
Text in Illustration *1 Radiator Cap *2 Radiator Reservoir *3 Radiator Drain Cock Plug *4 Cylinder Block Drain Cock Plug Tech Tips
Collect the coolant in a container and dispose of it according to the regulations in your area.
-
Drain the coolant by removing the radiator cap.
-
Loosen the cylinder block drain cock plug.
-
Loosen the cylinder block drain cock plug and drain the coolant from the engine.
Note
If coolant is not drained from the radiator drain cock plug, cylinder block drain cock plugs and radiator reservoir, clogging in the radiator or coolant leakage from the seal of the water pump may result.
-
-
REMOVE FRONT BUMPER COVER
-
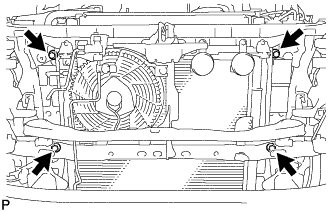
REMOVE FRONT BUMPER UPPER RETAINER
-
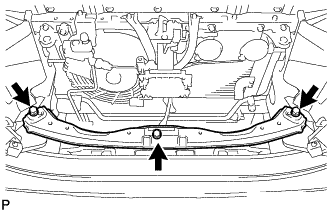
Remove the 3 bolts and front bumper upper retainer.
-
-
REMOVE RADIATOR SIDE DEFLECTOR LH
-
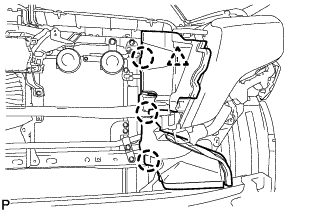
Using a clip remover, detach the 3 claws and remove the clip. Then move the radiator side deflector LH so that the radiator can be removed in the step below.
-
-
REMOVE RADIATOR SIDE DEFLECTOR RH
-
Using a clip remover, detach the 3 claws and remove the clip. Then move the radiator side deflector RH so that the radiator can be removed in the step below.
-
-
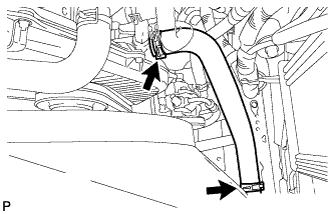
REMOVE NO. 1 RADIATOR HOSE
-
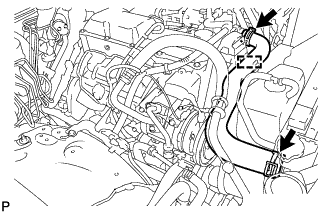
Detach the clamp and remove the No. 1 radiator hose.
-
Remove the 2 nuts and hose clamp.
-
-
DISCONNECT NO. 2 RADIATOR HOSE
-
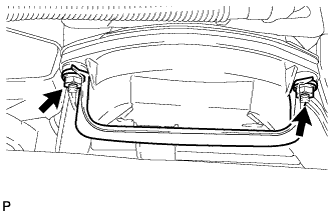
REMOVE RADIATOR RESERVOIR
-
Disconnect the reservoir hose from the upper side of the radiator tank.
-
Remove the 3 bolts and radiator reservoir.
-
-
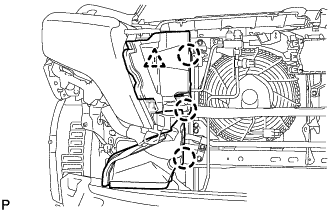
REMOVE FAN SHROUD
-
Loosen the 4 nuts holding the fluid coupling fan.
-
Remove the vane pump V belt and the fan and generator V belt Click here.
-

Remove the 2 bolts holding the fan shroud.
-
Remove the 4 nuts of the fluid coupling fan, and then remove the shroud together with the coupling fan.
Note
Be careful not to damage the radiator core.
-
Remove the fan pulley from the water pump.
-
-
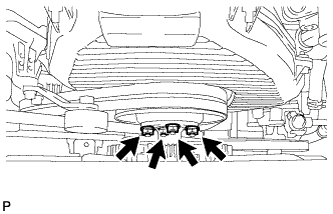
REMOVE RADIATOR ASSEMBLY
-
Remove the 4 bolts and radiator assembly from the radiator support.
-
-
REMOVE NO. 1 RADIATOR SUPPORT
-
Remove the 2 No. 1 radiator supports and 2 No. 1 radiator support bushes from the radiator assembly.
-
-
REMOVE NO. 2 RADIATOR SUPPORT
-
Remove the 2 No. 2 radiator supports and 2 No. 1 radiator support bushes from the radiator assembly.
-
-
REMOVE NO. 2 RADIATOR SUPPORT SEAL
-
Remove the No. 2 radiator support seal from the radiator assembly.
-
-
REMOVE NO. 1 RADIATOR SUPPORT SEAL
-
Remove the No. 1 radiator support seal from the radiator assembly.
-