RADIATOR REMOVAL

-
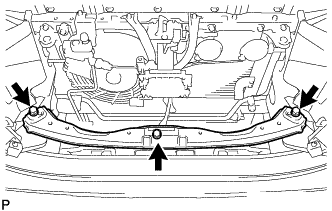
REMOVE UPPER RADIATOR SUPPORT SEAL
-
Remove the 13 clips and upper radiator support seal.
-
-
REMOVE FRONT BUMPER COVER LOWER
-
Remove the clip, 5 bolts and front bumper cover lower.
-
-
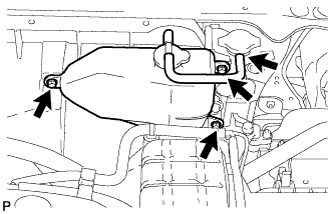
REMOVE NO. 1 ENGINE UNDER COVER SUB-ASSEMBLY
-
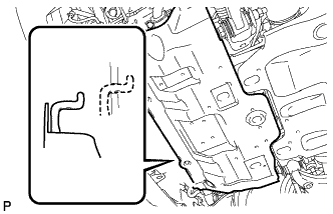
Remove the 4 bolts.
-
Unhook the engine under cover from the vehicle body as shown in the illustration.
-
-
DRAIN ENGINE COOLANT
CAUTION:
Do not remove the radiator cap while the engine and radiator are still hot. Pressurized, hot engine coolant and steam may be released and cause serious burns.
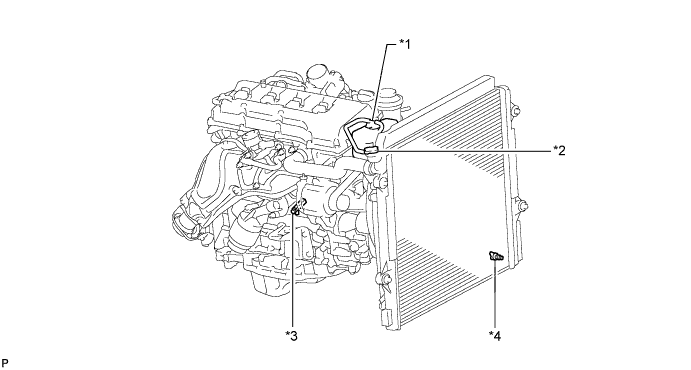
Text in Illustration *1 Reservoir Cap *2 Radiator Cap *3 Cylinder Block Drain Cock Plug *4 Radiator Drain Cock Plug
-

Text in Illustration *1 Vinyl Hose Install a vinyl hose to the radiator side.
-
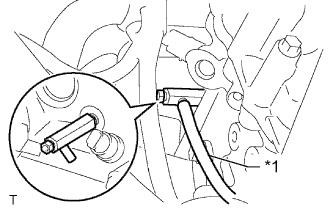
Text in Illustration *1 Vinyl Hose Install a vinyl hose to the engine side.
-
Loosen the radiator drain cock plug.
-
Remove the radiator cap and drain the coolant.
Tech Tips
Collect the coolant in a container and dispose of it according to the regulations in your area.
-
Loosen the cylinder block drain cock plug and drain the coolant from the engine.
-
-
REMOVE FRONT BUMPER COVER
-
Remove the front bumper cover Click here.
-
-
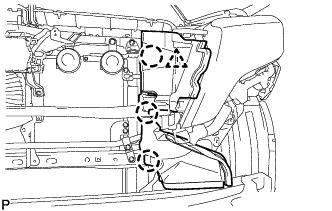
REMOVE UPPER FRONT BUMPER RETAINER
-
Remove the 3 bolts and retainer.
-
-
REMOVE RADIATOR SIDE DEFLECTOR RH
-
Using a clip remover, detach the 3 claws and remove the clip. Then move the side deflector so that the radiator can be removed in the step below.
-
-
REMOVE RADIATOR SIDE DEFLECTOR LH
-
Using a clip remover, detach the 3 claws and remove the clip. Then move the side deflector so that the radiator can be removed in the step below.
-
-
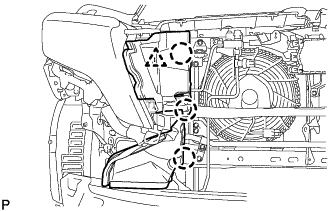
REMOVE RADIATOR RESERVOIR
-
Disconnect the reservoir hose from the radiator.
-
Remove the 3 bolts and radiator reservoir.
-
-
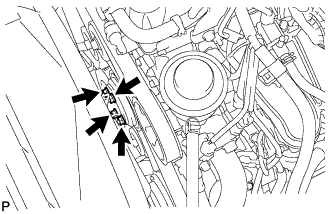
REMOVE FAN SHROUD
-
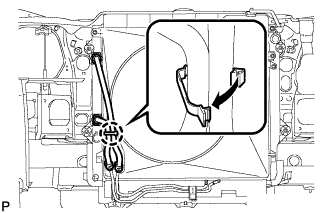
Detach the claw to open the flexible hose clamp.
-
Loosen the 4 nuts holding the fluid coupling fan.
-
Remove the fan and generator V-belt Click here.
-
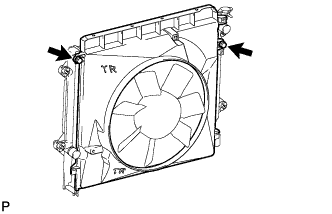
Remove the 2 bolts holding the fan shroud.
-
Remove the 4 nuts of the fluid coupling fan, and then remove the shroud together with the coupling fan.
Note
Be careful not to damage the radiator core.
-
-
DISCONNECT NO. 1 RADIATOR HOSE
-
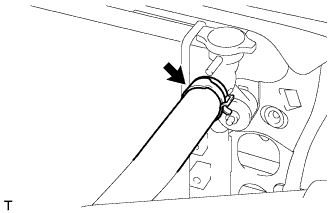
Disconnect the No. 1 radiator hose from the radiator.
-
-
DISCONNECT NO. 2 RADIATOR HOSE
-
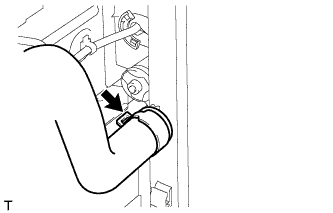
Disconnect the No. 2 radiator hose from the radiator.
-
-
DISCONNECT OIL COOLER INLET HOSE (for Automatic Transmission)
-
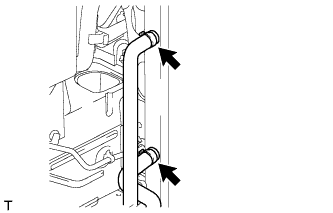
Disconnect the oil cooler inlet hose from the radiator.
-
-
DISCONNECT OIL COOLER OUTLET HOSE (for Automatic Transmission)
-
Disconnect the oil cooler outlet hose from the radiator.
-
-
REMOVE RADIATOR ASSEMBLY
-

Remove the 4 bolts and radiator.
-
-
REMOVE NO. 1 RADIATOR SUPPORT
-
Remove the 2 radiator supports and 2 No. 1 radiator support bushes.
-
-
REMOVE NO. 2 RADIATOR SUPPORT
-
Remove the 2 radiator supports and 2 No. 1 radiator support bushes.
-
-
REMOVE NO. 1 RADIATOR TO SUPPORT SEAL
-
Remove the seal from the radiator assembly.
-
-
REMOVE NO. 2 RADIATOR TO SUPPORT SEAL
-
Remove the seal from the radiator assembly.
-