WATER PUMP (w/o DPF) ON-VEHICLE INSPECTION

-
INSPECT FOR COOLANT LEAK
Tech Tips
-
The sliding surface inside the engine water pump assembly is lubricated by engine coolant. As some engine coolant is discharged during normal operation, coolant residue (solids) may be found on the drain plug or the bottom of the engine water pump assembly. Engine coolant may leak if foreign matter enters the engine water pump assembly, however the sealing performance will recover when the foreign matter is pushed out or breaks into fine pieces. In this case, check the area around the engine water pump assembly.
-
Before performing this inspection, check that there are no engine coolant leaks from any parts other than the engine water pump assembly. If there are leaks, inspect those areas first.
-
Perform this inspection when the engine is cold.
-
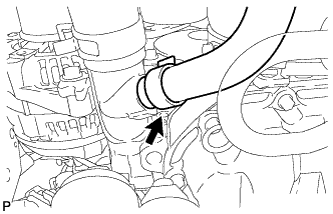
Visually check the engine water pump assembly.
-
Check that engine coolant is not dripping from the engine water pump assembly.
Tech Tips
-
If engine coolant is dripping, replace the engine water pump assembly.
-
If engine coolant is not dripping, perform the following check.
-
-
-
-
REMOVE FAN SHROUD
-
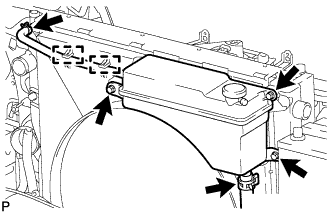
Disconnect the No. 1 water by-pass hose and detach the 2 clamps from the fan shroud.
-
Disconnect the No. 2 water by-pass hose from the radiator reservoir.
-
Remove the 3 bolts and radiator reservoir.
-
for Automatic Transmission:
-
Remove the inlet and outlet oil cooler hoses and detach the clamp from the fan shroud.
-
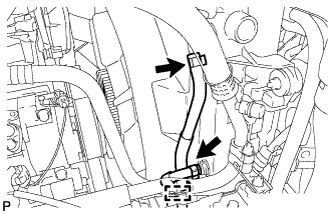
Disconnect the 2 oil cooler hoses from the radiator.
-
-
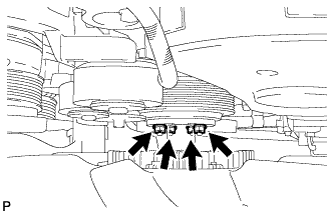
Loosen the 4 nuts holding the fluid coupling and fan.
-
Remove the fan and generator V belt Click here.
-
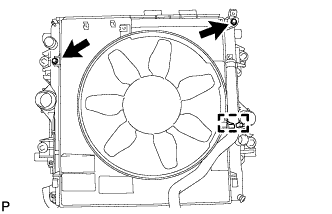
Remove the 2 bolts holding the fan shroud.
-
Remove the 4 nuts for the fan with fluid coupling fan, and then remove the shroud together with the coupling fan.
Note
Be careful not to damage the radiator core.
-
Detach the No. 2 water by-pass hose from the hose clamp on the fan shroud.
-
Remove the No. 2 water by-pass hose from the water inlet.
-
Remove the fan pulley from the water pump.
-
-
INSPECT ENGINE WATER PUMP ASSEMBLY
-
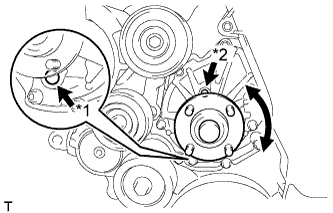
Text in Illustration *1 Water Hole *2 Air Hole Visually check the water hole and air hole for coolant leakage.
If leakage is found, replace the engine water pump assembly.
-
Turn the pulley and check that the pump bearing moves smoothly and quietly.
If the bearing moves roughly or noisily, replace the engine water pump assembly.
-
-
INSPECT FLUID COUPLING
-
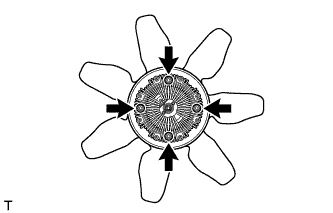
Remove the 4 nuts and fan.
-
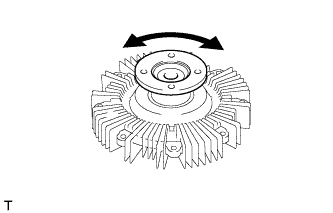
Check the fluid coupling for damage or silicon oil leaks. If necessary, replace the fluid coupling.
-
Install the fan with the 4 nuts.
- Torque:
- 6.0 N*m { 61 kgf*cm, 53 in.*lbf }
-
-
INSTALL FAN SHROUD
-
Install the fan pulley to the engine water pump assembly.
-
Install the No. 2 water by-pass hose to the water inlet.
-
Temporarily install the shroud together with the coupling fan to the engine water pump assembly with the 4 nuts. Tighten the nuts as much as possible by hand.
-
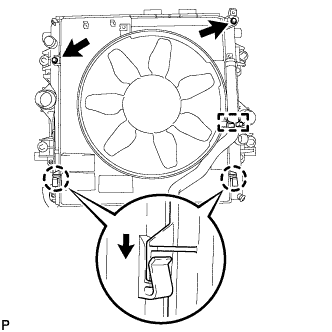
Attach the claws of the shroud to the radiator as shown in the illustration.
-
Install the fan shroud to the radiator with the 2 bolts.
- Torque:
- 5.0 N*m { 51 kgf*cm, 44 in.*lbf }
-
Install the fan and generator V belt Click here.
-
Install the fan with fluid coupling assembly to the engine water pump assembly with the 4 nuts.
- Torque:
- 23 N*m { 235 kgf*cm, 17 ft.*lbf }
-
Attach the No. 2 water by-pass hose to the clamp on the fan shroud.
-
for Automatic Transmission:
-
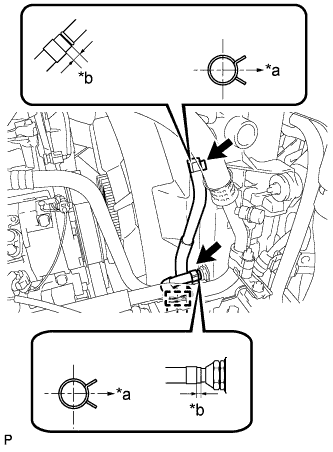
Text in Illustration *a RH Side *b 2 to 7 mm Connect the 2 oil cooler hoses.
Tech Tips
-
Position the hose clamps as shown in the illustration.
-
Position the clips so that the distance from the end of hose is 2 to 7 mm (0.0787 to 0.275 in.).
-
-
Attach the 2 oil cooler hoses to the clamp on the fan shroud.
-
-
Connect the No. 2 water by-pass hose to the radiator reservoir.
-
Connect the No. 1 water by-pass hose to the fan shroud and attach the 2 clamps.
-
Install the radiator reservoir assembly with the 3 bolts.
- Torque:
- 5.0 N*m { 51 kgf*cm, 44 in.*lbf }
-