THERMOSTAT REMOVAL

-
REMOVE UPPER RADIATOR SUPPORT SEAL
-
Remove the 13 clips and upper radiator support seal.
-
-
REMOVE FRONT BUMPER COVER LOWER
-
Remove the clip, 5 bolts and front bumper cover lower.
-
-
REMOVE NO. 1 ENGINE UNDER COVER SUB-ASSEMBLY
-
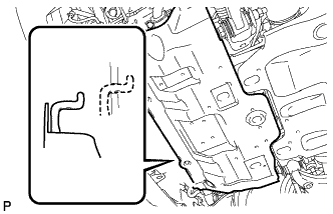
Remove the 4 bolts.
-
Unhook the engine under cover from the vehicle body as shown in the illustration.
-
-
DRAIN ENGINE COOLANT
CAUTION:
Do not remove the radiator cap while the engine and radiator are still hot. Pressurized, hot engine coolant and steam may be released and cause serious burns.
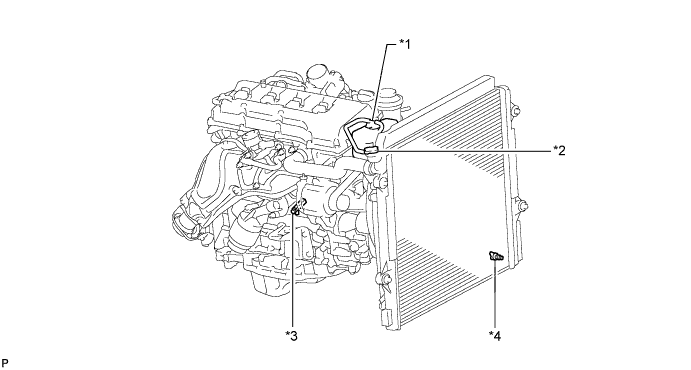
Text in Illustration *1 Reservoir Cap *2 Radiator Cap *3 Cylinder Block Drain Cock Plug *4 Radiator Drain Cock Plug
-

Text in Illustration *1 Vinyl Hose Install a vinyl hose to the radiator side.
-
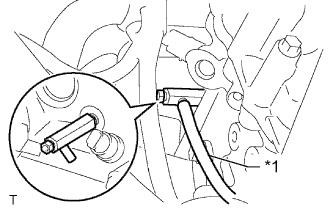
Text in Illustration *1 Vinyl Hose Install a vinyl hose to the engine side.
-
Loosen the radiator drain cock plug.
-
Remove the radiator cap and drain the coolant.
Tech Tips
Collect the coolant in a container and dispose of it according to the regulations in your area.
-
Loosen the cylinder block drain cock plug and drain the coolant from the engine.
-
-
REMOVE FAN AND GENERATOR V BELT
-
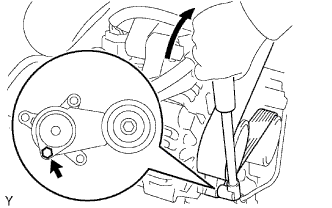
Use the hexagonal part indicated by the arrow in the illustration to move the tensioner pulley downward and decrease the tension in the V belt. Then remove the V belt.
Note
When removing the V belt, do not use the bolt of the idle pulley.
Tech Tips
After removing the drive belt, move the tensioner upward to the maximum amount.
-
-
DISCONNECT VANE PUMP ASSEMBLY
-
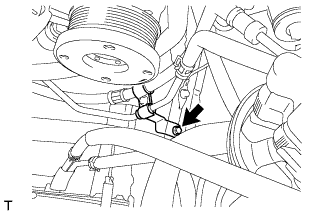
Remove the bolt and disconnect the pressure feed tube.
-
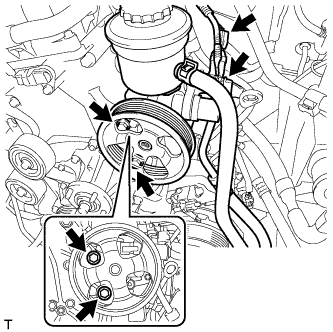
Disconnect the 2 connectors.
-
Remove the 2 bolts and disconnect the vane pump.
Tech Tips
It is not necessary to completely remove the vane pump. With the hoses connected to the vane pump, hang the vane pump on the vehicle body with a rope.
-
-
DISCONNECT NO. 2 RADIATOR HOSE
-
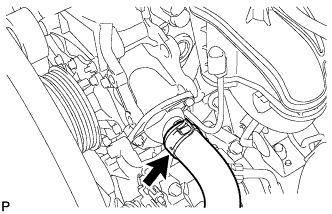
Disconnect the No. 2 radiator hose.
-
-
REMOVE WATER INLET
-
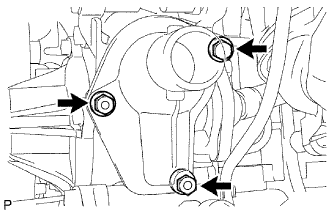
Remove the bolt and 2 nuts, and then remove the water inlet.
-
Remove the gasket from the timing chain cover.
-
-
REMOVE THERMOSTAT
-
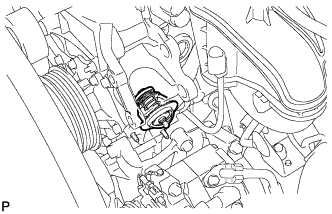
Remove the thermostat from the timing chain cover.
-