ULTRASONIC SENSOR (for Rear) REMOVAL

-
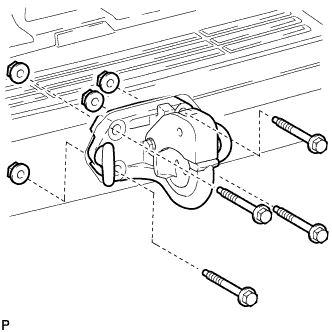
REMOVE PINTLE HOOK ASSEMBLY (w/ Pintle Hook)
-
For vehicles with a spare tire installed to the underbody, remove the spare tire.
-
Remove the 4 nuts.
-
Remove the 4 bolts and pintle hook.
-
-
REMOVE JACK BOX HOLE COVER

Text in Illustration *1 Protective Tape
-
Using a screwdriver, detach the 2 claws and remove the jack box hole cover.
Tech Tips
Tape the screwdriver tip before use.
-
-
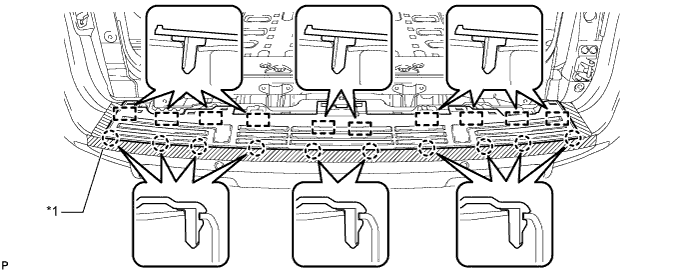
REMOVE REAR BUMPER BAR PLATE
-
Put protective tape around the rear bumper bar plate.
-
Detach the 14 claws and remove the rear bumper bar plate.
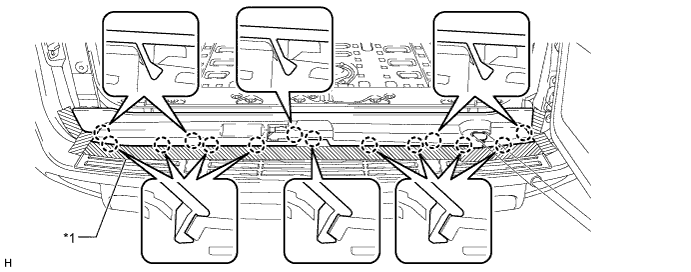
Text in Illustration *1 Protective Tape - -
-
-
REMOVE BACK DOOR CHECK
Note
-
If the back door check is detached from a ball joint, do not reuse it as the connection with the ball joint will be loose, resulting in the back door check falling off.
-
If the back door check is detached from a ball joint, it becomes non-reusable. Therefore, do not detach the back door check from a ball joint unless replacing it.
-
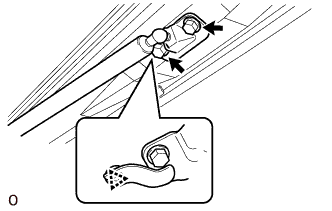
Remove the 2 bolts.
-
Using a clip remover, detach the clip and remove the back door check with back door lower damper stay bracket.
-
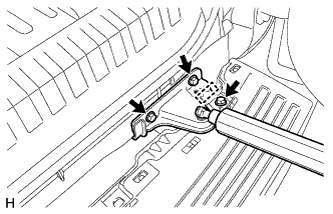
Detach the wire harness clamp.
-
Remove the 3 bolts and back door check with back door lower damper stay bracket.
-
-
REMOVE NO. 1 REAR BUMPER PLATE
-
Put protective tape around the No. 1 rear bumper plate.
-
Detach the 10 claws and 10 guides and remove the No. 1 rear bumper plate.
Text in Illustration *1 Protective Tape - -
-
-
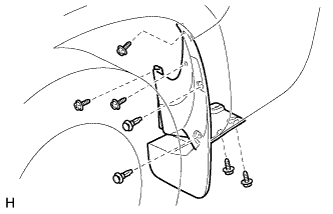
REMOVE REAR QUARTER PANEL MUDGUARD LH
-
Remove the 2 clips and 5 screws.
-
Remove the rear quarter panel mudguard.
-
-
REMOVE REAR QUARTER PANEL MUDGUARD RH
Tech Tips
Use the same procedure described for the LH side.
-
REMOVE REAR BUMPER COVER (for 5 Door)
-
Put protective tape around the rear bumper cover.
-
Remove the 2 clips and 6 bolts.
-
Detach the 14 claws.
-
w/ TOYOTA Parking Assist-sensor System, w/ Rear Fog Light:
Disconnect the 4 connectors.
-
w/ TOYOTA Parking Assist-sensor System, w/o Rear Fog Light:
Disconnect the 2 connectors.
-
w/o TOYOTA Parking Assist-sensor System, w/ Rear Fog Light:
Disconnect the 2 connectors.
-
Remove the rear bumper cover.
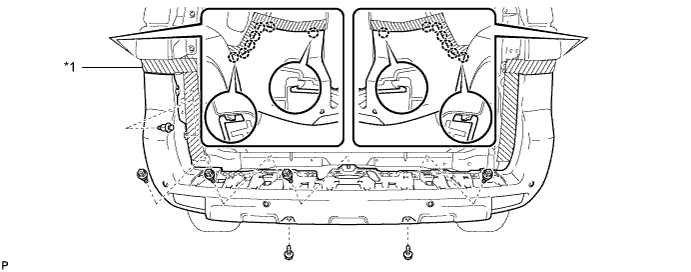
Text in Illustration *1 Protective Tape - -
-
-
REMOVE REAR BUMPER COVER (for 3 Door)
-
Put protective tape around the rear bumper cover.
-
Remove the 2 clips and 7 bolts.
-
Detach the 10 claws.
-
w/ TOYOTA Parking Assist-sensor System, w/ Rear Fog Light:
Disconnect the 4 connectors.
-
w/ TOYOTA Parking Assist-sensor System, w/o Rear Fog Light:
Disconnect the 2 connectors.
-
w/o TOYOTA Parking Assist-sensor System, w/ Rear Fog Light:
Disconnect the 2 connectors.
-
Remove the rear bumper cover.
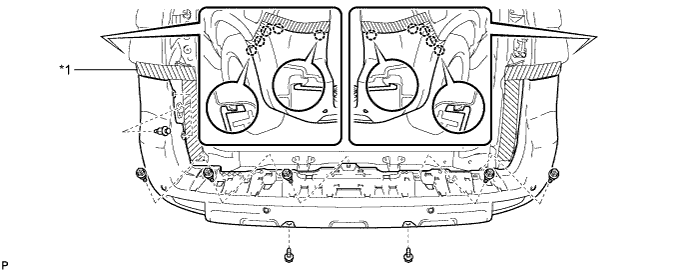
Text in Illustration *1 Protective Tape - -
-
-
REMOVE ULTRASONIC SENSOR CLIP
Tech Tips
Use the same procedure to remove the ultrasonic sensor clip on the other side.
-
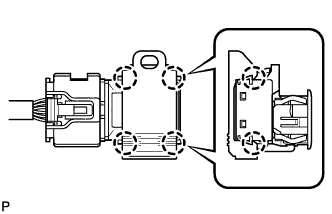
Detach the 4 claws and remove the ultrasonic sensor clip.
-
-
REMOVE NO. 1 ULTRASONIC SENSOR
Tech Tips
Use the same procedure to remove the No. 1 ultrasonic sensor on the other side.
-
Disconnect the connector.
-
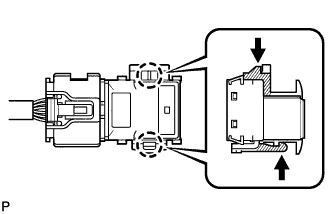
Detach the 2 claws and remove the No. 1 ultrasonic sensor.
-
-
REMOVE NO. 2 ULTRASONIC SENSOR RETAINER
Tech Tips
Use the same procedure to remove the No. 2 ultrasonic sensor retainer on the other side.
-
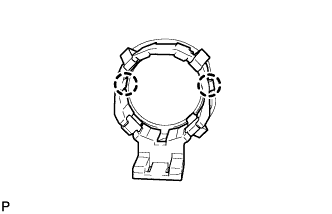
Detach the 2 claws and remove the No. 2 ultrasonic sensor retainer.
-