COMPRESSOR (for 2AR) REMOVAL

-
RECOVER REFRIGERANT FROM AIR CONDITIONING SYSTEM
-
Turn the A/C switch on.
-
Operate the air conditioning with a set temperature of 25°C (77°F) and the blower at low for 10 minutes to circulate the refrigerant. This causes most of the compressor oil from the various components of the air conditioning system to collect in the air conditioning compressor.
-
Turn the ignition switch off.
-
Recover the refrigerant from the air conditioning system using a refrigerant recovery unit.
-
-
REMOVE RADIATOR ASSEMBLY
-
REMOVE FRONT FENDER APRON SEAL RH
-
REMOVE V-RIBBED BELT
-
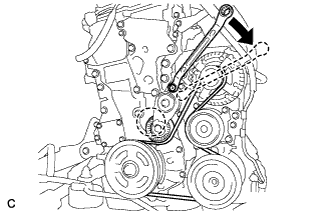
Attach a wrench to the hexagonal portion of the belt tensioner as shown in the illustration, rotate the belt tensioner clockwise, and remove the V-ribbed belt.
-
-
DISCONNECT NO. 1 COOLER REFRIGERANT DISCHARGE HOSE
-
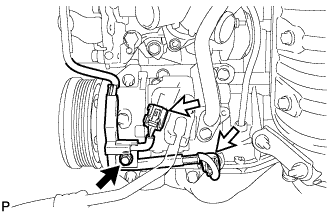
Remove the bolt.
-
Disconnect the 2 connectors.
-
Remove the bolt and disconnect the No. 1 cooler refrigerant discharge hose from the compressor assembly with pulley.
-
Remove the O-ring from the No. 1 cooler refrigerant discharge hose.
Note
Seal the openings of the disconnected parts using vinyl tape to prevent entry of moisture and foreign matter.
-
-
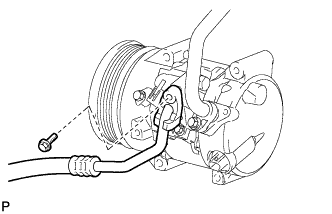
DISCONNECT SUCTION HOSE SUB-ASSEMBLY (for TMMK Made)
-
Remove the bolt and disconnect the suction hose sub-assembly from the compressor assembly with pulley.
-
Remove the O-ring from the suction hose sub-assembly.
Note
Seal the openings of the disconnected parts using vinyl tape to prevent entry of moisture and foreign matter.
-
-
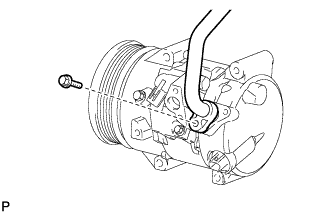
DISCONNECT NO. 1 COOLER REFRIGERANT SUCTION HOSE (for SIA Made)
-
Remove the bolt and disconnect the No. 1 cooler refrigerant suction hose from the compressor assembly with pulley.
-
Remove the O-ring from the No. 1 cooler refrigerant suction hose.
Note
Seal the openings of the disconnected parts using vinyl tape to prevent entry of moisture and foreign matter.
-
-
REMOVE COMPRESSOR ASSEMBLY WITH PULLEY
-
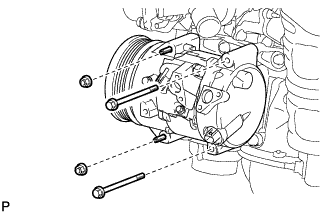
Remove the 2 bolts and 2 nuts.
-
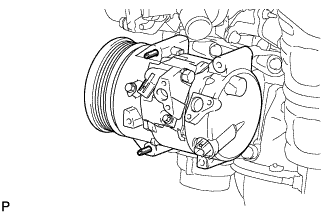
Using an E8 "TORX" socket, remove the 2 stud bolts and compressor assembly with pulley.
Tech Tips
Leave the 2 stud bolts in the vehicle with the remaining in the compressor assembly with pulley.
-