OIL COOLER REMOVAL

-
DRAIN AUTOMATIC TRANSAXLE FLUID
-
Remove the front wheel opening extension pad LH, engine under cover LH and front fender apron seal LH.
-

Remove the refill plug and gasket from the automatic transaxle.
-
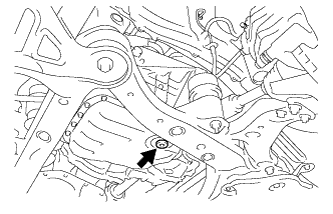
Using a 6 mm hexagon socket wrench, remove the overflow plug and gasket from the automatic transaxle.
-
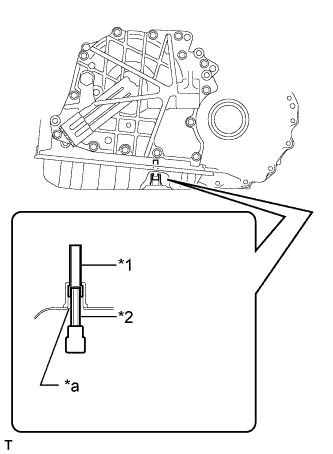
Text in Illustration *1 No. 1 Transmission Oil Filler Tube *2 Hexagon Socket Wrench *a Overflow Plug Hole Using a 6 mm hexagon socket wrench, remove the No. 1 transmission oil filler tube from the automatic transaxle.
-
Drain automatic transaxle fluid from the automatic transaxle.
-
Text in Illustration *1 No. 1 Transmission Oil Filler Tube *2 Hexagon Socket Wrench *a Overflow Plug Hole Using a 6 mm hexagon socket wrench, install the No. 1 transmission oil filler tube to the automatic transaxle.
- Torque:
- 1.7 N*m { 17 kgf*cm, 15 in.*lbf }
-
Using a 6 mm hexagon socket wrench, install a new gasket and the overflow plug to the automatic transaxle.
- Torque:
- 40 N*m { 408 kgf*cm, 30 ft.*lbf }
-
Temporarily install the gasket and refill plug to the automatic transaxle.
-
-
DRAIN ENGINE COOLANT
Note
Do not remove the radiator cap sub-assembly, cylinder block drain cock plugs and radiator drain cock plug while the engine and radiator are still hot. Pressurized, hot engine coolant and steam may be released and cause serious burns.
-
Loosen the radiator drain cock plug.
-
Loosen the 2 cylinder block drain cock plugs.
-
Remove the radiator cap sub-assembly.
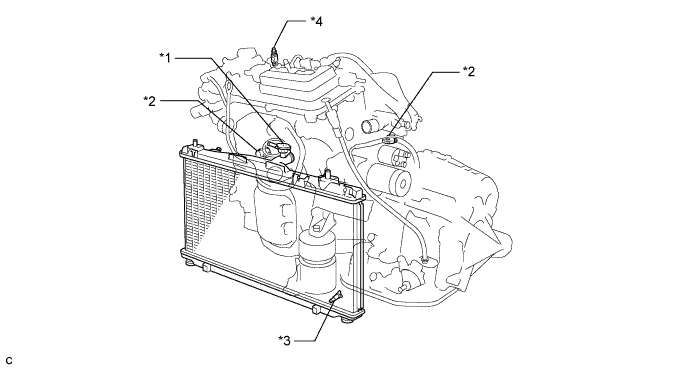
Text in Illustration *1 Radiator Cap Sub-assembly *2 Cylinder Block Drain Cock Plug *3 Radiator Drain Cock Plug *4 Air Drain Cock Plug Tech Tips
Collect the coolant in a container and dispose of it according to the regulations in your area.
-
-
REMOVE COOL AIR INTAKE DUCT SEAL
-
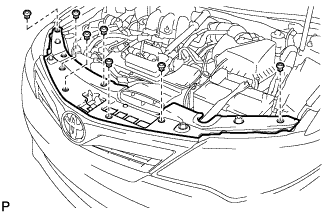
Remove the 7 clips and cool air intake duct seal.
-
-
REMOVE INLET NO. 2 AIR CLEANER
-
Disconnect the 2 wire harness clamps and vacuum hose clamp.
-
Remove the 2 bolts and inlet No. 2 air cleaner.
-
-
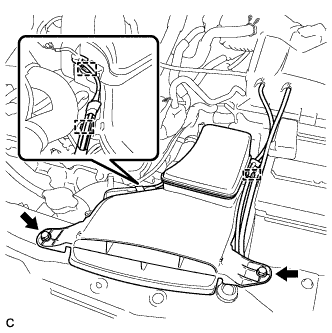
REMOVE AIR CLEANER CAP SUB-ASSEMBLY
-
Disconnect the mass air flow meter connector and wire harness clamp.
-
Disconnect the 3 hoses.
-
Separate the ventilation hose.
-

Loosen the hose clamp and separate the air cleaner cap sub-assembly from the throttle with motor body assembly.
-
Release the 2 clamps and remove the air cleaner cap with hose.
-
-
REMOVE AIR CLEANER FILTER ELEMENT SUB-ASSEMBLY
-
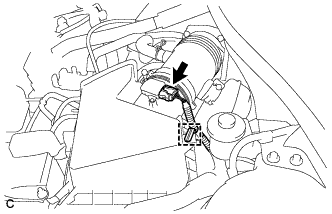
REMOVE AIR CLEANER CASE SUB-ASSEMBLY
-
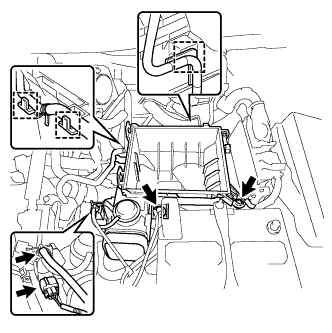
Disconnect the wire harness clamp, connector, vacuum hose and No. 1 fuel vapor feed hose.
-
Remove the 2 bolts and air cleaner case sub-assembly.
-
-
REMOVE INLET NO. 1 AIR CLEANER
-
Disengage the pin and remove the inlet No. 1 air cleaner.
-
-
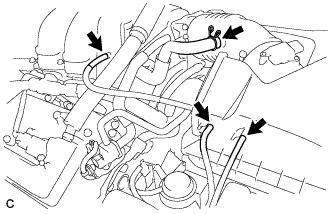
REMOVE TRANSMISSION OIL COOLER
-
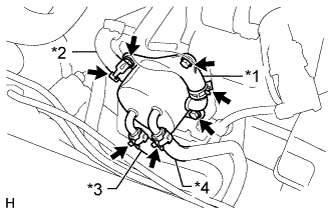
Text in Illustration *1 No. 3 Water By-pass Hose *2 No. 4 Water By-pass Hose *3 No. 1 Oil Cooler Outlet Hose *4 No. 1 Oil Cooler Inlet Hose Disconnect the No. 3 water by-pass hose, No. 4 water by-pass hose, No. 1 oil cooler outlet hose and No. 1 oil cooler inlet hose from the transmission oil cooler.
-
Remove the 3 bolts, transmission oil cooler and transmission oil cooler stay from the front engine mounting bracket.
-