- Click here
INSTALL OIL PRESSURE SENDER GAUGE ASSEMBLY
-
Apply adhesive to 2 or 3 threads of the oil pressure sender gauge.
Adhesive Toyota Genuine Adhesive 1344, Three Bond 1344 or equivalent Note: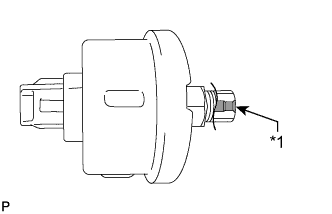
Do not apply adhesive to the oil inlet port of the oil pressure sender gauge.
Table 1. Text in Illustration *1 Oil Inlet Port -
Install the oil pressure sender gauge.
15 N*m 153 kgf*cm 11 ft.*lbf Note:Do not start the engine within 1 hour after installation.
-
Connect the oil pressure sender gauge connector.
-
- Click here
INSPECT ENGINE OIL LEVEL
-
Warm up the engine. Then stop the engine and wait for 5 minutes.
-
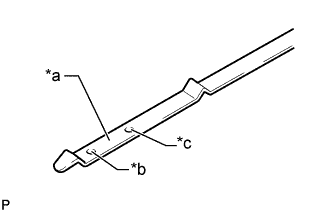
Check that the engine oil level is between the dipstick low level mark and full level mark.
Table 2. Text in Illustration *a Measuring Surface *b Low Level Mark *c Full Level Mark If the level is low, check for leakage and add oil up to the full level mark.
Note:Do not fill engine oil above the full level mark.
Tip:A certain amount of engine oil will be consumed while driving. In the following situations, oil consumption may increase, and engine oil may need to be refilled in between oil maintenance intervals.
-
When the engine is new, for example directly after purchasing the vehicle or after replacing the engine.
-
If low quality oil or oil of an inappropriate viscosity is used.
-
When driving at high engine speed or with a heavy load, (when towing, or), when driving while accelerating or decelerating frequently.
-
When leaving the idling for a long time, or when driving frequently through heavy traffic.
When judging the amount of oil consumption, keep in mind that the oil may have become diluted, making it difficult to judge the true level accurately.
-
-
- Click here
INSPECT FOR OIL LEAK
-
Запустите двигатель. Убедитесь, что утечки масла отсутствуют в узлах, на которых выполнялись работы.
-
- Click here
INSTALL NO. 1 ENGINE UNDER COVER SUB-ASSEMBLY
-
Закрепите защиту картера двигателя № 1 в сборе 10 болтами.
29 Н*м 296 кгс*см 21 фунт-сила-фут
-
- Click here
INSTALL FRONT FENDER SPLASH SHIELD SUB-ASSEMBLY LH
-
Вставьте фиксатор, чтобы закрепить брызговик левого переднего крыла в сборе.
-
Вверните 3 болта и 2 винта.
-
- Click here
INSTALL FRONT FENDER SPLASH SHIELD SUB-ASSEMBLY RH
Tip:Порядок выполнения работ такой же, как для левой стороны.