- Click here
DISCHARGE FUEL SYSTEM PRESSURE
CAUTION:
-
Do not disconnect any part of the fuel system until you have discharged the fuel system pressure.
-
After discharging the fuel pressure, place a cloth or equivalent over fittings as you separate them to reduce the risk of fuel spray on yourself or in the engine compartment.
-
Disconnect the fuel pump ECU connector (Click here).
-
Start the engine. After the engine stops, turn the engine switch off.
Tip:DTC P0171/0174 (system too lean) may be stored.
-
Crank the engine again, and then check that the engine does not start.
-
Loosen the fuel tank cap, and then discharge the pressure in the fuel tank completely.
-
Disconnect the cable from the negative (-) battery terminal.
Note:
-
w/ Navigation System:
After the engine switch is turned off, the HDD navigation system requires approximately 6 minutes to record various types of memory and settings. As a result, after turning the engine switch off, wait 6 minutes or more before disconnecting the cable from the negative (-) battery terminal.
-
When disconnecting the cable, some systems need to be initialized after the cable is reconnected (Click here).
-
-
Connect the fuel pump ECU connector (Click here).
-
- Click here
DISCONNECT CABLE FROM NEGATIVE BATTERY TERMINAL
Note:
-
w/ Navigation System:
After the engine switch is turned off, the HDD navigation system requires approximately 6 minutes to record various types of memory and settings. As a result, after turning the engine switch off, wait 6 minutes or more before disconnecting the cable from the negative (-) battery terminal.
-
When disconnecting the cable, some systems need to be initialized after the cable is reconnected (Click here).
-
- Click here
REMOVE SPARE TIRE
- Click here
REMOVE TAILPIPE ASSEMBLY
-
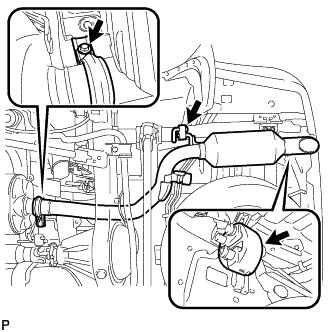
Выверните болт и снимите зажим выхлопной трубы.
-
Снимите 2 опоры выпускной трубы, прокладку и выхлопную трубу.
-
- Click here
REMOVE SPARE WHEEL CARRIER CROSSMEMBER AND SPARE WHEEL CARRIER BRACKET
-
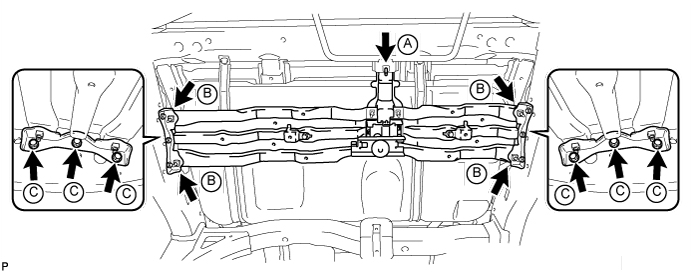
Remove the bolt labeled A, and then loosen the 4 bolts labeled B.
-
Slightly raise the spare wheel carrier crossmember, and then remove the 6 bolts labeled C, spare wheel carrier crossmember and 2 brackets.
-
- Click here
REMOVE NO. 1 SPARE WHEEL STOPPER
-
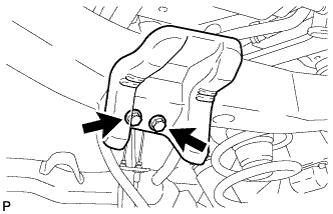
Remove the 2 bolts and spare wheel stopper.
-
- Click here
REMOVE FUEL TANK CAP ASSEMBLY
- Click here
DISCONNECT FUEL TANK EVAPORATION VENT TUBE SUB-ASSEMBLY
-
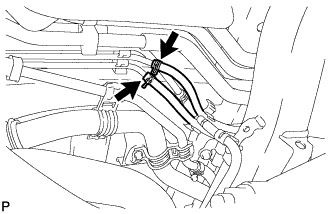
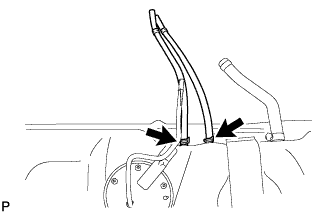
Disconnect the 2 fuel tank evaporation vent tubes.
-
-
Click here
DISCONNECT FUEL HOSE
- Click here
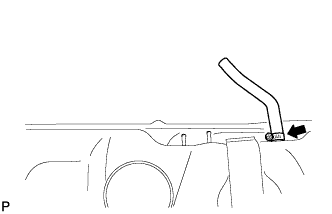
DISCONNECT FUEL TANK BREATHER HOSE
-
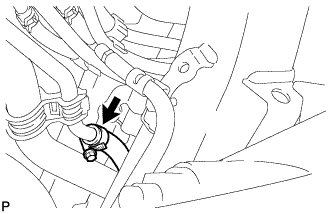
Disconnect the breather hose from the filler pipe.
-
- Click here
DISCONNECT NO. 3 FUEL HOSE
-
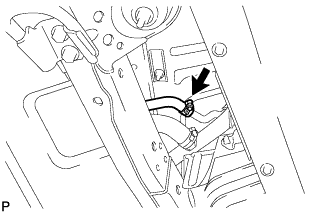
Disconnect the fuel hose from the filler pipe.
-
- Click here
DISCONNECT FUEL TANK TO FILLER PIPE HOSE
-
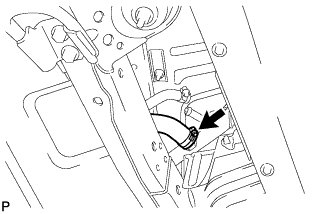
Disconnect the hose from the filler pipe.
-
- Click here
REMOVE FUEL SUB TANK SUB-ASSEMBLY
-
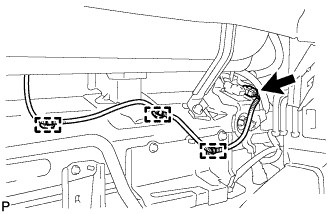
Disconnect the floor No. 3 wire connector.
-
Using a clip remover, detach the 3 wire harness clamps.
-
Set an engine lifter underneath the fuel sub tank.
-
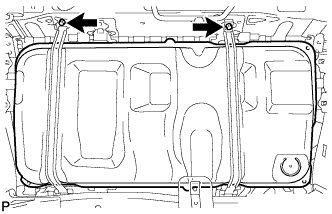
Remove the 2 bolts and disconnect the 2 fuel tank bands.
-
Remove the fuel sub tank.
-
- Click here
REMOVE FLOOR NO. 3 WIRE
-
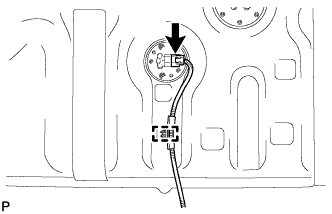
Disconnect the sender gauge connector.
-
Using a clip remover, detach the wire harness clamp.
-
- Click here
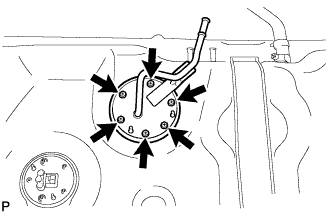
REMOVE FUEL SENDER GAUGE ASSEMBLY
-
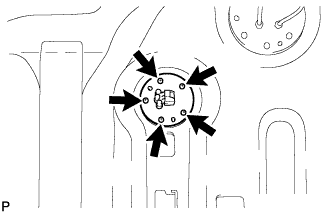
Remove the 5 screws and sender gauge.
Note:Be careful not to bend the arm of the fuel sender gauge.
-
Remove the gasket from the sender gauge.
-
-
Click here
REMOVE FUEL HOSE
- Click here
REMOVE FUEL TANK EVAPORATION VENT TUBE SUB-ASSEMBLY
-
Remove the 2 fuel tank evaporation vent tubes.
-
- Click here
REMOVE FUEL AND EVAPORATION VENT TUBE SUB-ASSEMBLY
-
Remove the 6 bolts and the fuel and evaporation vent tube.
-
Remove the gasket from the fuel and evaporation vent tube.
-
- Click here
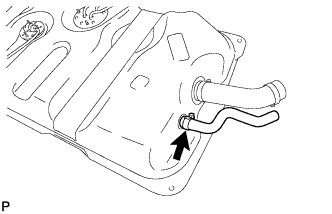
REMOVE FUEL TANK BREATHER HOSE
-
Remove the breather hose from the fuel sub tank.
-
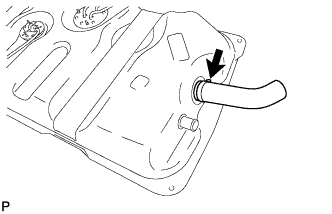
- Click here
REMOVE NO. 3 FUEL HOSE
-
Remove the fuel hose from the fuel sub tank.
-
- Click here
REMOVE FUEL TANK TO FILLER PIPE HOSE
-
Remove the hose from the fuel sub tank.
-