REAR DOOR WINDOW FRAME MOULDING REMOVAL

-
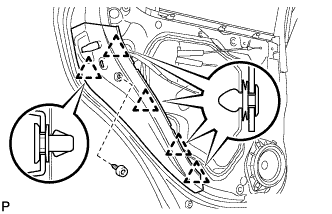
REMOVE REAR DOOR BELT MOULDING ASSEMBLY
-
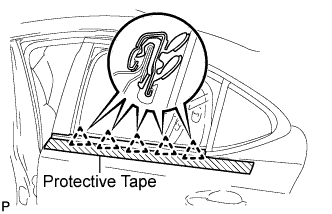
Fully open the rear door glass.
-
Put protective tape on the door below the rear door belt moulding assembly.
-
Using a moulding remover, disengage the 5 clips and remove the rear door belt moulding assembly.
-
-
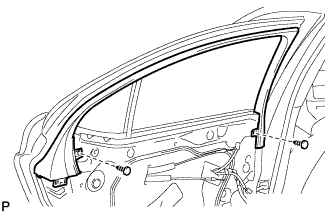
REMOVE REAR DOOR FRONT WINDOW FRAME MOULDING
Tech Tips
When removing the rear door front window frame moulding, heat the vehicle body and rear door front window frame moulding using a heat light.
Heating Temperature: Item Temperature Vehicle Body 40 to 60°C (104 to 140°F) Moulding 20 to 30°C (68 to 86°F) Note
Do not heat the vehicle body and moulding excessively.
-
Fully open the rear door glass.
-
Using a heat light, heat the rear door front window frame moulding.
-
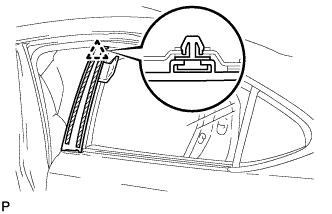
Using a moulding remover, remove the clip and rear door front window frame moulding.
-
-
REMOVE REAR DOOR INSIDE HANDLE BEZEL PLUG
-
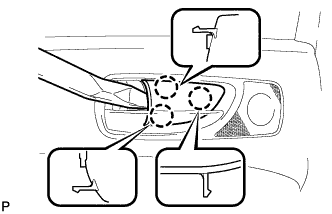
Using a moulding remover, disengage the 3 claws and remove the rear door inside handle bezel plug.
-
-
REMOVE REAR POWER WINDOW REGULATOR SWITCH ASSEMBLY WITH REAR DOOR ARMREST BASE PANEL
-
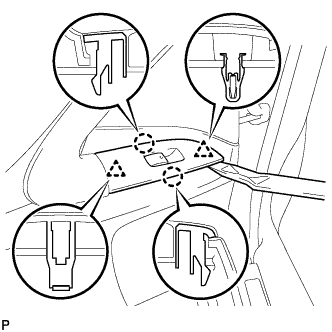
Using a moulding remover, disengage the 2 claws and 2 clips.
-
Disconnect the connector and remove the rear power window regulator switch assembly with rear door armrest base panel.
-
-
REMOVE REAR DOOR TRIM BOARD SUB-ASSEMBLY
-
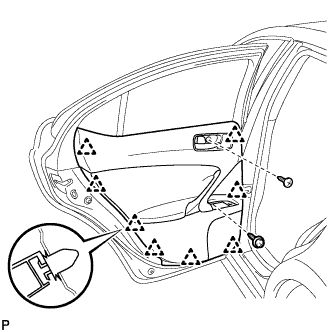
Remove the 2 screws.
-
Using a clip remover, disengage the 8 clips.
-
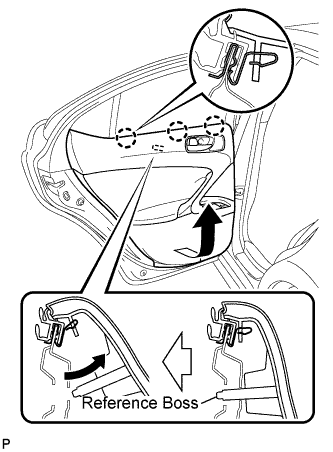
Pull out the rear door trim board in the direction indicated by the arrow.
-
Remove the reference boss from the rear door panel.
-
Raise the rear door trim board to disengage the 3 claws and remove the rear door trim board together with the rear door inner glass weatherstrip.
-
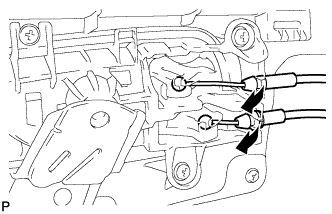
Disconnect the rear door lock remote control cable assembly and rear door inside locking cable assembly.
-
Disconnect each connector and remove the rear door trim board sub-assembly.
-
Remove the 2 rear door trim board retainers (green) from the rear door trim board.
-
-
REMOVE REAR DOOR INNER GLASS WEATHERSTRIP
-
Using a moulding remover, disengage the 3 clips as shown in the illustration and remove the rear door inner glass weatherstrip from the rear door trim board.
-
-
REMOVE REAR DOOR TRIM COVER
-
Remove the screw.
-
Using a clip remover, disengage the 5 clips and remove the rear door trim cover.
-
-
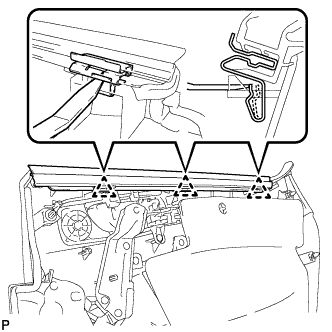
REMOVE REAR DOOR FRAME GARNISH
-
Using a clip remover, remove the 2 clips and rear door frame garnish.
-
-
REMOVE REAR DOOR WEATHERSTRIP
-
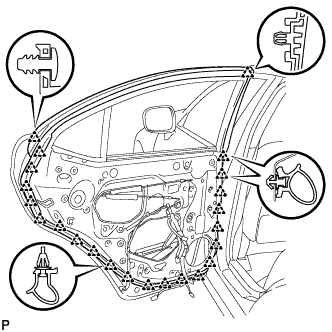
Using a clip remover, disengage the 23 clips.
-
Remove the double-sided tape and the rear door weatherstrip.
-
-
REMOVE REAR DOOR UPPER WINDOW FRAME MOULDING
-
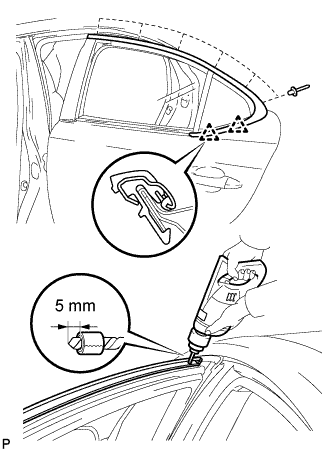
Insect a 4 mm (0.157 in.) drill bit into a drill.
-
Tape the 4 mm (0.157 in.) drill bit 5 mm (0.197 in.) from the tip as shown in the illustration.
Note
Tape the 4 mm (0.157 in.) drill bit to prevent the drill bit from going too deep.
-
Lightly press the drill bit against the rivets to drill off the rivet flanges, and remove the 6 rivets.
Note
-
Pressing the drill too firmly will cause the rivet to turn and result in the rivet not being drilled through.
-
Prying the rivets with the drill may damage the rivet installation holes or drill bit.
-
Be careful of the drilled rivets, as they may be hot.
-
-
Using a vacuum cleaner, remove the rivet fragments and shavings from the drilled areas.
-
Disengage the 2 clips and remove the rear door upper window frame moulding from the door frame.
-