LUGGAGE COMPARTMENT DOOR SUPPORT REMOVAL

Tech Tips
-
Use the same procedure for the RH side and LH side.
-
The procedure listed below is for the LH side.
-
REMOVE NO. 2 LUGGAGE COMPARTMENT TRIM COVER
-
REMOVE DECK SIDE TRIM BOX LH
-
REMOVE DECK SIDE TRIM BOX RH
-
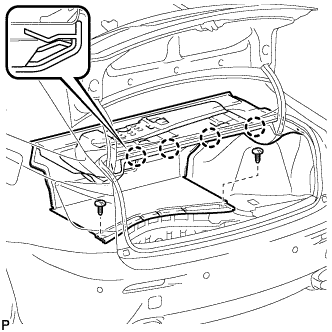
REMOVE ROPE HOOK ASSEMBLY
-
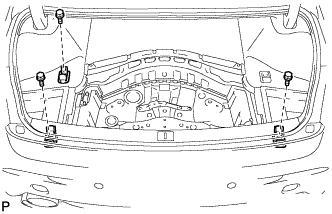
Remove the 3 bolts and 3 rope hook assemblies.
-
-
REMOVE REAR LUGGAGE COMPARTMENT TRIM COVER
-
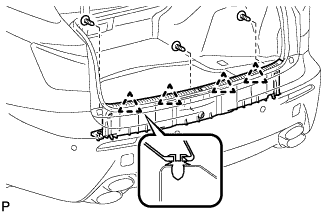
Using a clip remover, remove the 3 clips.
-
Disengage the 4 clips and remove the rear luggage compartment trim cover.
-
-
REMOVE NO. 2 ROOM LIGHT ASSEMBLY
-
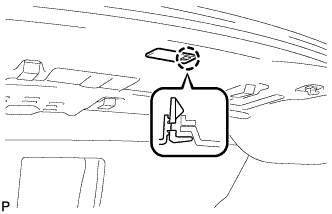
Disengage the claw and disconnect the No. 2 room light assembly.
-
Disconnect the connector and remove the No. 2 room light assembly.
-
-
REMOVE ROPE HOOK
-
Remove the 2 rope hooks.
-
-
REMOVE NO. 2 LUGGAGE COMPARTMENT TRIM HOOK
-
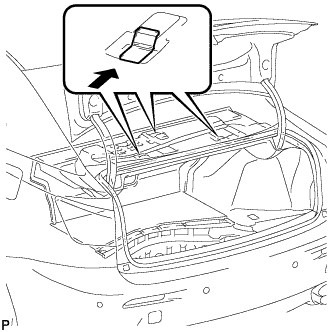
Remove the 3 No. 2 luggage compartment trim hooks as shown in the illustration.
-
-
REMOVE FRONT LUGGAGE COMPARTMENT TRIM COVER
-
Using a clip remover, remove the 2 clips.
-
Disengage the 4 claws and remove the front luggage compartment trim cover.
-
-
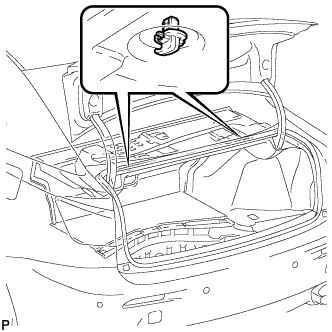
REMOVE LUGGAGE COMPARTMENT DOOR SUPPORT ASSEMBLY
Note
-
Avoid touching the stroke portions of the rod as much as possible to prevent foreign matter from attaching to it. Be sure to hold the cylinders while servicing.
-
Do not wear cotton gloves or other similar materials when handling the rod. Fibers may attach to the rod and result in gas leaks.
-
Do not apply any load to the cylinders in the horizontal direction in order to prevent the rod from being deformed.
-
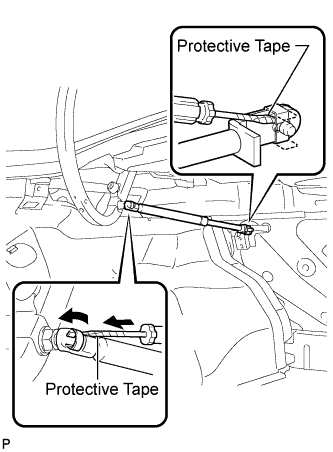
Using a screwdriver, raise the claws on the bracket of the luggage compartment door support.
Tech Tips
Tape the screwdriver tip before use.
-
Using a screwdriver, remove the stop ring on the ball joint along its groove.
Tech Tips
Tape the screwdriver tip before use.
-
Disengage the luggage compartment door support at the ball joint and the pin.
Note
Remove the luggage compartment door support assembly while supporting the luggage compartment door by hand.
-