LUGGAGE COMPARTMENT DOOR ADJUSTMENT


Tech Tips
-
Centering bolts are used to mount the door hinge to the vehicle body and door. The door cannot be adjusted with the centering bolts on. Substitute the centering bolts with standard bolts (with washers) when making adjustments.
-
A bolt without a torque specification is shown in the standard bolt chart Click here.
-
REMOVE LUGGAGE COMPARTMENT DOOR ASSIST GRIP
-

Disengage the 3 claws and disconnect the cover.
-
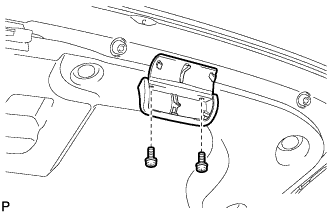
Remove the 2 screws and luggage compartment door assist grip.
-
-
REMOVE LUGGAGE COMPARTMENT DOOR COVER
-
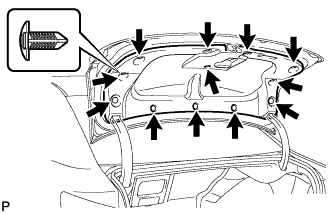
Using a clip remover, remove the 12 clips and luggage compartment door cover.
-
-
REMOVE NO. 2 LUGGAGE COMPARTMENT TRIM COVER
-
REMOVE DECK SIDE TRIM BOX LH
-
REMOVE DECK SIDE TRIM BOX RH
-
REMOVE ROPE HOOK ASSEMBLY
-
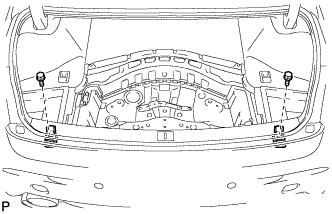
Remove the 2 bolts and 2 rope hook assemblies.
-
-
REMOVE REAR LUGGAGE COMPARTMENT TRIM COVER
-
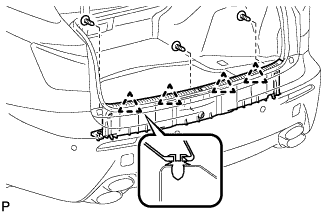
Using a clip remover, remove the 3 clips.
-
Disengage the 4 clips and remove the rear luggage compartment trim cover.
-
-
ADJUST LUGGAGE COMPARTMENT DOOR
-
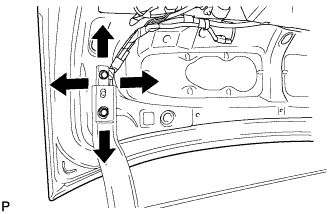
Horizontally and vertically adjust the door by loosening the door side hinge bolts.
- Torque:
- 8.0 N*m { 82 kgf*cm, 71 in.*lbf }
-
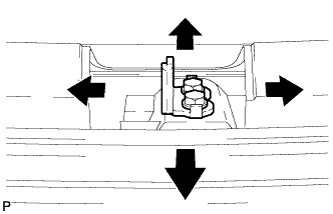
Adjust the striker position by slightly loosening the striker mounting screws and hitting the striker with a plastic hammer.
-
Tighten the striker mounting screws after the adjustment.
- Torque:
- 5.5 N*m { 56 kgf*cm, 49 in.*lbf }
-
-
INSTALL REAR LUGGAGE COMPARTMENT TRIM COVER
-
Engage the 4 clips.
-
Install the rear luggage compartment trim cover with the 3 clips.
-
-
INSTALL ROPE HOOK ASSEMBLY
-
Install the 2 rope hook assemblies with the 2 bolts.
-
-
INSTALL DECK SIDE TRIM BOX LH
-
INSTALL DECK SIDE TRIM BOX RH
-
INSTALL NO. 2 LUGGAGE COMPARTMENT TRIM COVER
-
INSTALL LUGGAGE COMPARTMENT DOOR COVER
-
Install the luggage compartment door cover with the 12 clips.
-
-
INSTALL LUGGAGE COMPARTMENT DOOR ASSIST GRIP
-
Install the luggage compartment door assist grip with the 2 screws.
-
Engage the 3 claws and install the cover.
-