LUGGAGE COMPARTMENT DOOR DISASSEMBLY

-
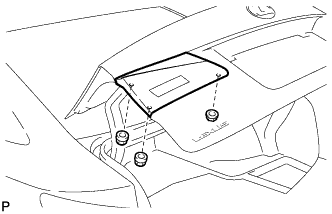
REMOVE LUGGAGE COMPARTMENT DOOR ASSIST GRIP
-

Disengage the 3 claws and disconnect the cover.
-
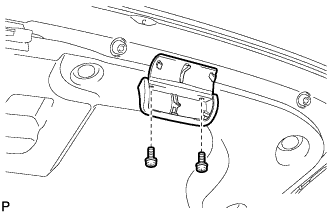
Remove the 2 screws and luggage compartment door assist grip.
-
-
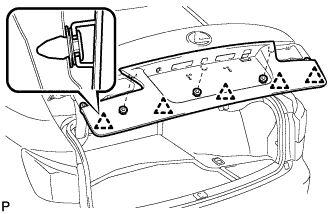
REMOVE LUGGAGE COMPARTMENT DOOR COVER
-
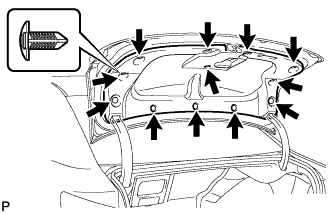
Using a clip remover, remove the 12 clips and luggage compartment door cover.
-
-
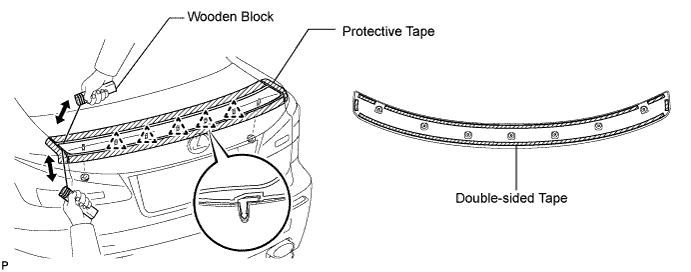
REMOVE REAR SPOILER SUB-ASSEMBLY
-
Put protective tape around the spoiler.
-
Remove the 2 nuts.
-
Insert a piano wire between the vehicle body and spoiler.
-
Tie objects that can serve as handles (for example, wooden blocks) to both wire ends.
-
Pull the piano wire and cut through the double-sided tape while disengaging the 5 clips from the vehicle body.
Note
-
If reusing the spoiler, take care not to damage the spoiler.
-
Be careful not to damage the vehicle body.
-
-
Remove the rear spoiler sub-assembly.
-
-
REMOVE LUGGAGE COMPARTMENT DOOR REINFORCEMENT
-
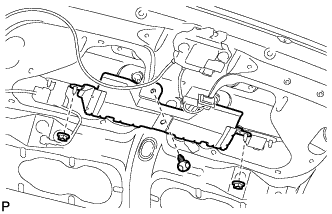
Using a clip remover, remove the clip.
-
Remove the 2 nuts and luggage compartment door reinforcement.
-
-
REMOVE LUGGAGE KEY ELECTRICAL SWITCH
-
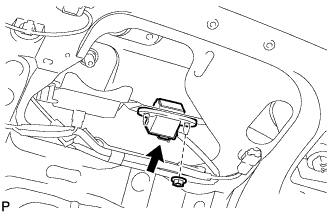
Disconnect the connector.
-
Remove the nut and luggage key electrical switch.
-
-
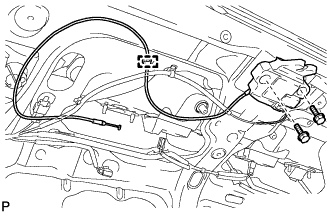
REMOVE LUGGAGE COMPARTMENT DOOR LOCK CYLINDER ASSEMBLY
-

Disconnect the connector and clamp.
-
Remove the nut.
-
Disconnect the luggage compartment door lock control cable and remove the luggage compartment door lock cylinder assembly.
-
-
REMOVE LUGGAGE COMPARTMENT DOOR LOCK ASSEMBLY
-
Disconnect the connector.
-
Disengage the clamp.
-
Remove the 2 bolts and luggage compartment door lock assembly.
-
-
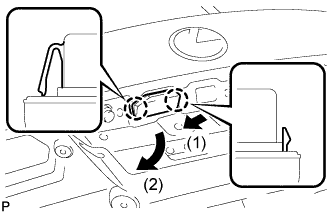
REMOVE TELEVISION CAMERA ASSEMBLY (w/ Parking Assist Monitor System)
-
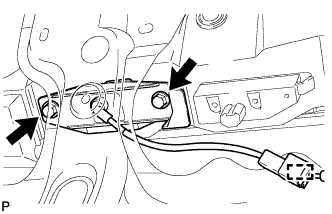
Disengage the camera connector clamp.
-
Disconnect the television camera connector.
-
Remove the 2 screws.
-
Disengage the 2 claws to remove the television camera assembly as shown in the illustration.
-
-
REMOVE REAR LIGHT ASSEMBLY LH
-
Disconnect the connector.
-
Remove the 3 nuts and rear light assembly.
-
-
REMOVE REAR LIGHT ASSEMBLY RH
Tech Tips
Use the same procedure for the RH side and LH side.
-
REMOVE LUGGAGE COMPARTMENT OUTSIDE DOOR GARNISH SUB-ASSEMBLY
-
Remove the 3 nuts.
-
Disengage the 5 clips and remove the luggage compartment outside door garnish sub-assembly.
-
-
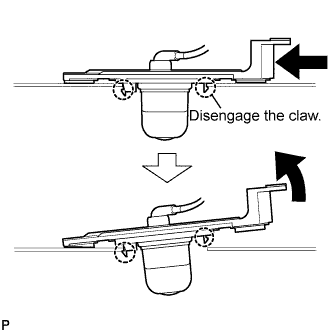
REMOVE LICENSE PLATE LIGHT ASSEMBLY LH
-
Disconnect the connector.
-
Disengage the 2 claws and remove the license plate light assembly as shown in the illustration.
-
-
REMOVE LICENSE PLATE LIGHT ASSEMBLY RH
Tech Tips
Use the same procedure for the RH side and LH side.