HOOD LOCK CONTROL CABLE ASSEMBLY REMOVAL

-
REMOVE COOL AIR INTAKE DUCT SEAL
-
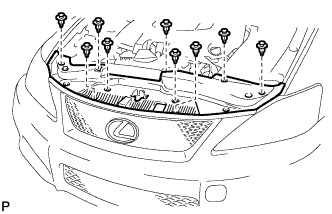
Using a clip remover, remove the 9 clips and cool air intake duct seal.
-
-
REMOVE ENGINE ROOM SIDE COVER LH (for LHD)
-
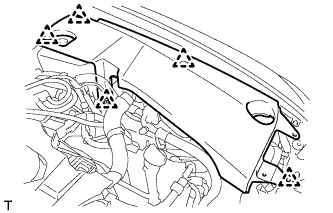
Remove the 5 clips and engine room side cover LH.
-
-
REMOVE ENGINE ROOM SIDE COVER RH (for RHD)
-
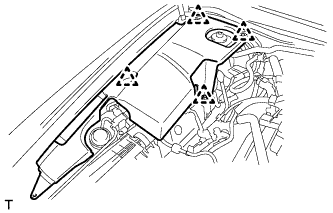
Remove the 4 clips and engine room side cover RH.
-
-
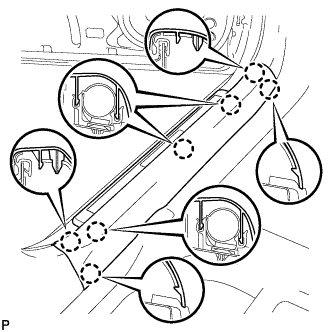
REMOVE FRONT UPPER FENDER PROTECTOR
-
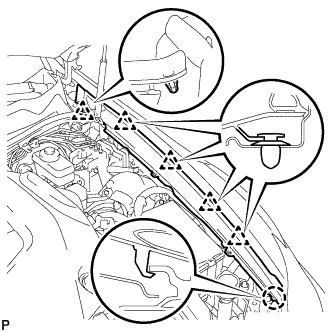
Separate the clip on the rubber portion of the cowl top ventilator louver sub-assembly from the front upper fender protector LH.
-
Disengage the 4 clips and the claw to remove the front upper fender protector LH.
-
-
REMOVE RADIATOR GRILLE PROTECTOR
-
Remove the 2 radiator grille protectors.
-
-
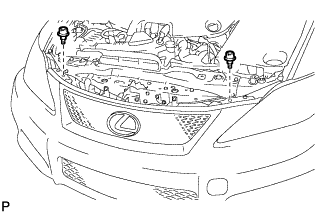
REMOVE FRONT BUMPER ASSEMBLY
-
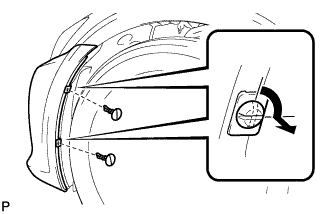
Using a screwdriver, turn the pins 90 degrees and remove the 2 pin hold clips.
Tech Tips
-
Tape the screwdriver tip before use.
-
Use the same procedure for the RH side and LH side.
-
-
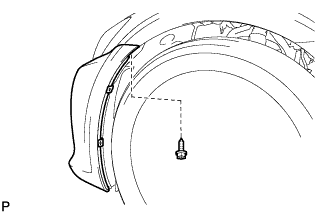
remove the screw.
Tech Tips
Use the same procedure for the RH side and LH side.
-
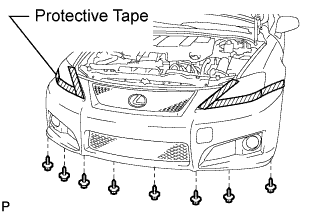
Put protective tape around the front bumper assembly.
-
Remove the 8 screws.
-

Using a clip remover, remove the 2 clips and screw.
-
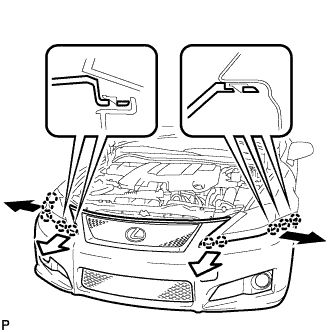
Disengage the 10 claws and disconnect the front bumper assembly as shown in the illustration.
-
w/ LEXUS Parking Assist-Sensor system:
-
Disconnect the ultrasonic sensor connector.
-
-
Disconnect the headlight cleaner hose.
Note
Prepare a drain pan or a piece of cloth in case washer fluid leaks.
-
Disconnect the 2 fog light connectors and remove the front bumper assembly.
-
-
REMOVE MILLIMETER WAVE RADAR SENSOR ASSEMBLY (w/ Dynamic Radar Cruise Control System)
-
Disconnect the connector.
-
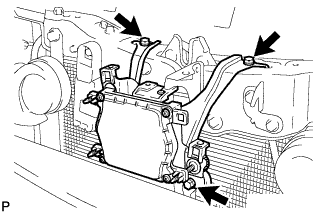
Remove the 3 bolts and the millimeter wave radar sensor assembly.
-
-
REMOVE LOW PITCHED HORN ASSEMBLY
-
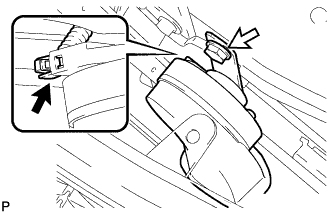
Disconnect the connector.
-
Remove the bolt and the low pitched horn assembly.
-
-
REMOVE HOOD LOCK CONTROL CABLE COVER
-
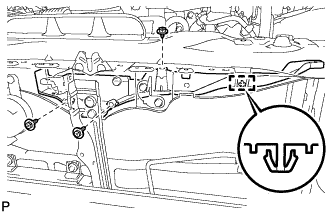
Remove the 3 screws.
-
Disengage the clamp and remove the hood lock control cable cover.
-
-
REMOVE HOOD LOCK NUT CAP
-
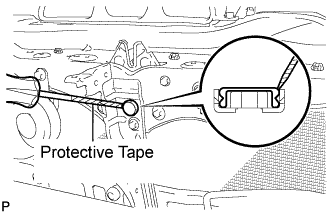
Using a screwdriver, remove the hood lock nut cap as shown in the illustration.
Tech Tips
Tape the screwdriver tip before use.
-
-
REMOVE HOOD LOCK ASSEMBLY
-
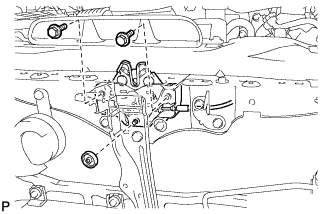
Remove the 2 bolts and hood lock nut.
-
Disconnect the hood lock control cable assembly.
-
Disconnect the connector and remove the hood lock assembly.
-
-
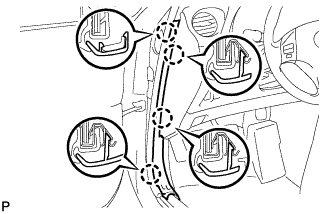
REMOVE FRONT DOOR SCUFF PLATE
-
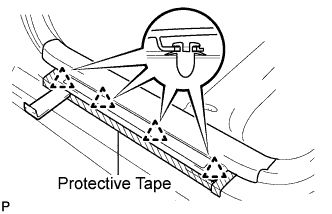
Put protective tape around the front door scuff plate.
-
Using a moulding remover, disengage the 4 clips.
-
Disengage the 7 claws and remove the front door scuff plate LH.
-
-
REMOVE FRONT DOOR OPENING TRIM COVER
-
Disengage the 4 claws and remove the front door opening trim cover LH.
-
-
REMOVE SIDE INSTRUMENT PANEL
-
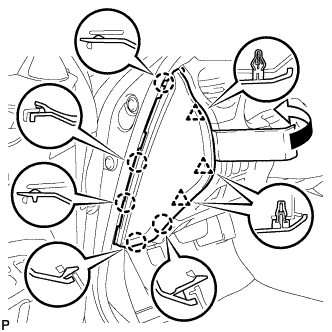
Using a moulding remover, disengage the 5 claws and 3 clips to remove the side instrument panel LH as shown in the illustration.
-
-
REMOVE NO. 1 INSTRUMENT PANEL UNDER COVER SUB-ASSEMBLY
-
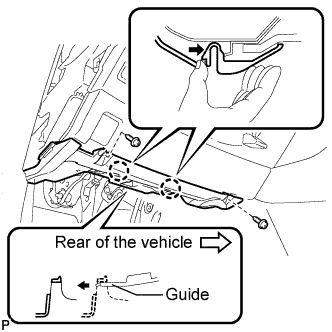
Remove the 2 screws <D>.
-
Push the 2 claws in the direction indicated by the arrow to disengage them.
-
Remove the No. 1 instrument panel under cover sub-assembly from the guide as shown in the illustration and pull the cover toward the rear of the vehicle.
-
Disconnect the connectors and remove the No. 1 instrument panel under cover sub-assembly.
-
-
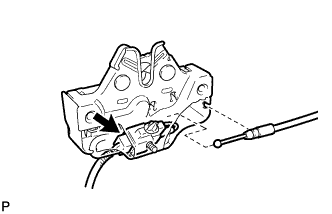
REMOVE HOOD LOCK CONTROL LEVER SUB-ASSEMBLY
-
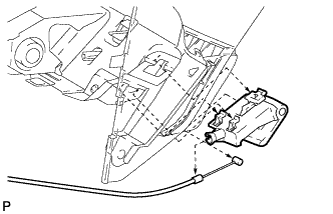
Disengage the 3 claws.
-
Disconnect the hood lock control cable assembly and remove the hood lock control lever sub-assembly.
-
-
REMOVE HOOD LOCK CONTROL CABLE ASSEMBLY (for LHD)
-
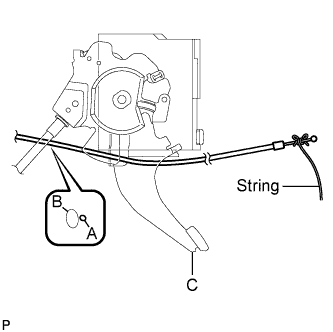
Tie a string to the end of the hood lock control cable assembly as shown in the illustration.
Area Part Name A Hood lock control cable B Parking brake cable C Parking brake pedal Note
Use a length of string long enough to pass through the engine compartment.
-
Disengage the clamp and remove the hood lock control cable assembly as shown in the illustration.
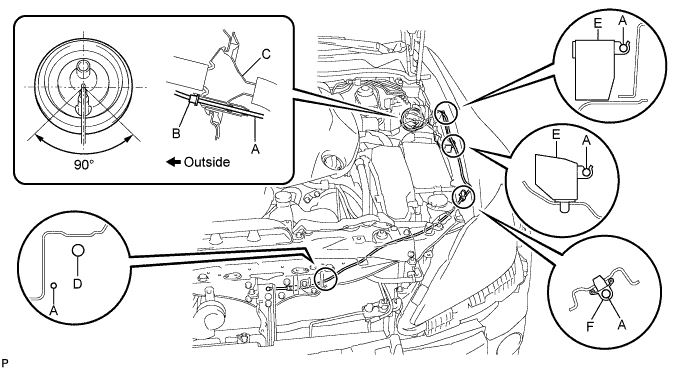
Area Part Name Area Part Name A Hood lock control cable D Wire harness B Stopper E Wire harness protector C Grommet F Clamp
-
-
REMOVE HOOD LOCK CONTROL CABLE ASSEMBLY (for RHD)
-
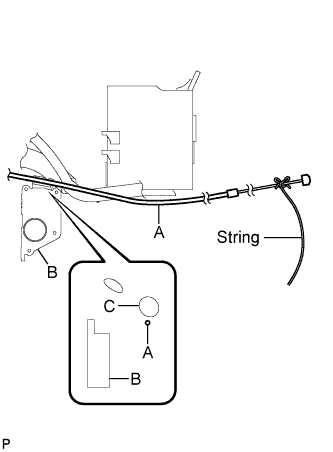
Tie a string to the end of the hood lock control cable assembly as shown in the illustration.
Area Part Name A Hood lock control cable B Accelerator pedal C Wire harness Note
Use a length of string long enough to pass through the engine compartment.
-
Disengage the clamp and remove the hood lock control cable assembly as shown in the illustration.
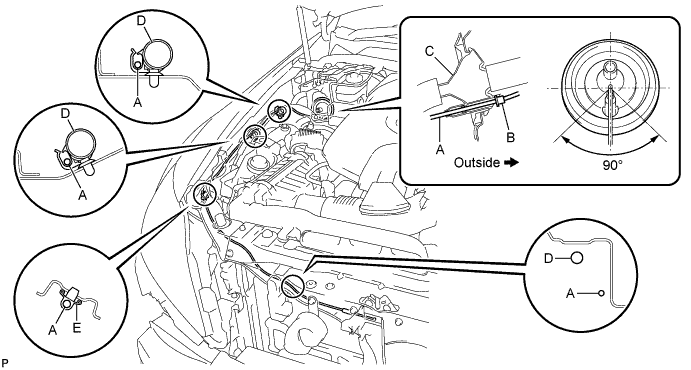
Area Part Name Area Part Name A Hood lock control cable D Wire harness B Stopper E Clamp C Grommet - -
-