FRONT CONSOLE BOX DISASSEMBLY

-
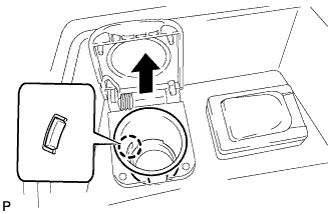
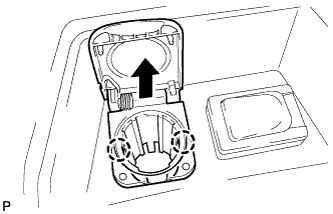
REMOVE CONSOLE BOX CUP HOLDER SUB-ASSEMBLY
-
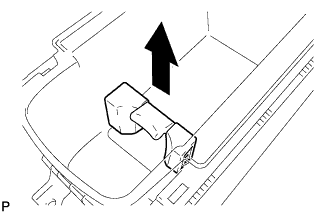
Remove the console box cup holder sub-assembly as shown in the illustration.
Note
When removing the console box cup holder sub-assembly, do not hold the center part of the cup holder in order to prevent the cup holder from breaking.
-
-
REMOVE FRONT UPPER CONSOLE PANEL GARNISH
-
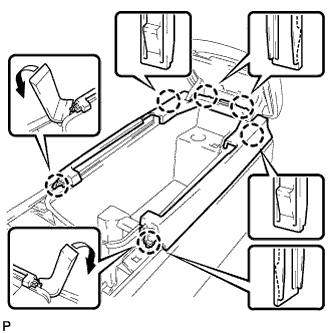
Using a moulding remover, disengage the 2 claws.
-
Disengage the 4 claws and remove the front upper console panel garnish.
-
-
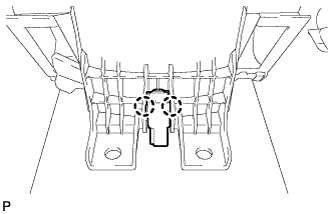
REMOVE CONSOLE COMPARTMENT DOOR LOCK SUB-ASSEMBLY
-
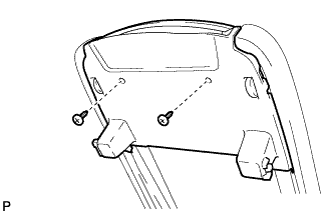
Remove the 2 screws.
-
Open the console compartment door lock sub-assembly in the direction indicated by the arrow in the illustration to remove it.
-
-
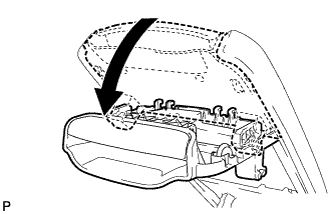
REMOVE CONSOLE COMPARTMENT DOOR SUB-ASSEMBLY
-
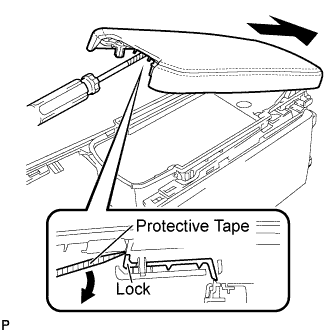
While pushing down on the lock using a screwdriver with its tip taped, slide the console door in the direction shown by the arrow in the illustration to remove it.
-
-
REMOVE CONSOLE COMPARTMENT DOOR CUSHION
-
Remove the 2 console compartment door cushions from the console box.
-
-
REMOVE CONSOLE BOX ILLUMINATION LIGHT ASSEMBLY
-
Disengage the 2 claws and remove the console box illumination light assembly.
-
-
REMOVE POWER OUTLET SOCKET ASSEMBLY
-
Disengage the claw to remove the power outlet socket assembly.
-
-
REMOVE POWER OUTLET SOCKET COVER NO.1
-
Disengage the 2 claws to remove the power point socket cover.
-
-
REMOVE STEREO JACK ADAPTER ASSEMBLY
-
Disconnect the connector.
-
Disengage the 2 claws and remove the stereo jack adapter assembly.
-
-
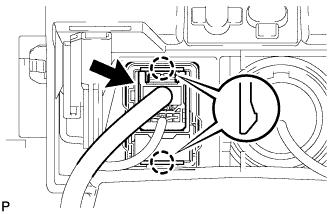
REMOVE RADIO WIRE
-
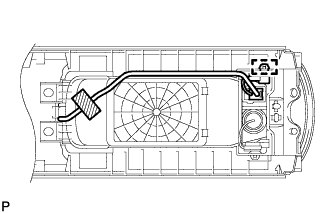
Remove the adhesive tape.
-
Disengage the clamp to remove the radio wire.
-