GENERATOR REMOVAL

-
DISCONNECT CABLE FROM NEGATIVE BATTERY TERMINAL
Note
When disconnecting the cable, some systems need to be initialized after the cable is reconnected Click here.
-
REMOVE COOL AIR INTAKE DUCT SEAL
-
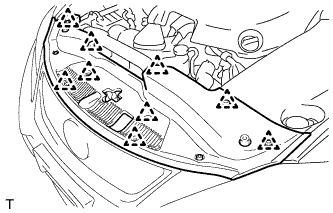
Remove the 9 clips and cool air intake duct seal.
-
-
REMOVE ENGINE ROOM SIDE COVER RH (for LHD)
-
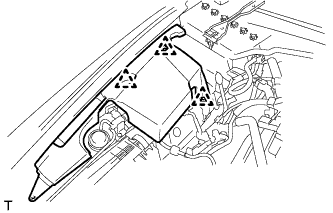
Remove the 3 clips and engine room side cover RH.
-
-
REMOVE ENGINE ROOM SIDE COVER RH (for RHD)
-
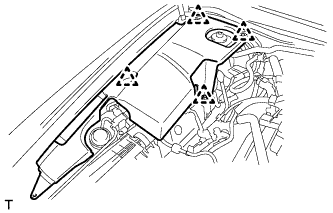
Remove the 4 clips and engine room side cover RH.
-
-
REMOVE FRONT WHEELS
-
REMOVE ENGINE UNDER COVER
-
REMOVE REAR ENGINE UNDER COVER LH
-
REMOVE REAR ENGINE UNDER COVER RH
-
REMOVE NO. 1 AIR CLEANER INLET
-
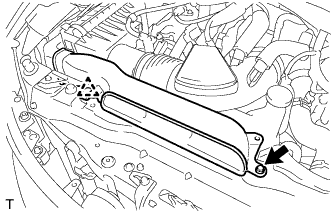
Remove the bolt, clip and No. 1 air cleaner inlet.
-
-
REMOVE AIR CLEANER CAP SUB-ASSEMBLY
-
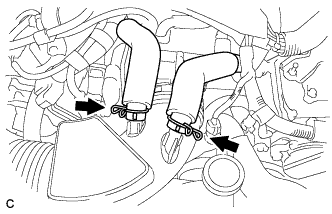
Loosen the 2 hose clamps and separate the 2 ventilation hoses.
-
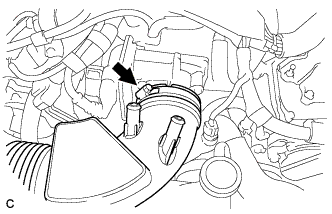
Disconnect the mass air flow meter connector and separate the wire harness clamp.
-
Loosen the hose clamp and separate the air cleaner hose.
-
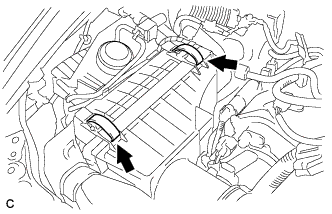
Unlock the 2 clamps and remove the air cleaner cap sub-assembly.
-
-
REMOVE AIR CLEANER CASE SUB-ASSEMBLY
-
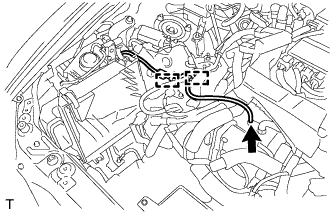
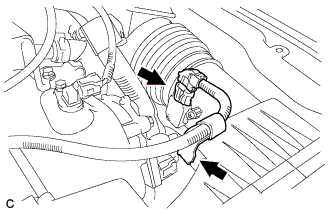
Remove the 2 clamps and disconnect the vacuum hose.
-
Remove the clamp and disconnect the vacuum switching valve connector.
-
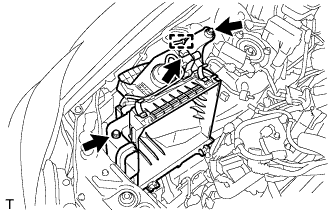
Remove the 2 bolts and air cleaner case sub-assembly.
-
-
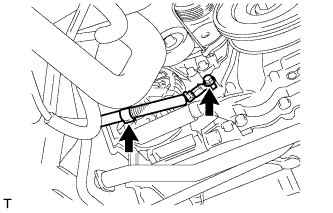
SEPARATE RADIATOR RESERVE TANK ASSEMBLY
-
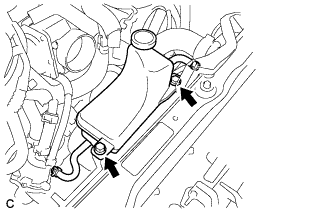
Remove the 2 bolts and separate the radiator reserve tank assembly.
-
-
REMOVE V-RIBBED BELT
-
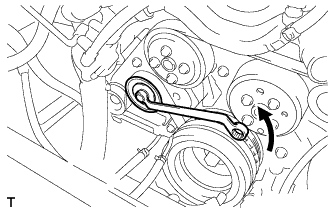
Rotate the V-ribbed belt tensioner pulley counterclockwise to loosen the V-ribbed belt tensioner.
Tech Tips
The pulley bolt for the V-ribbed belt tensioner is reverse threaded.
-
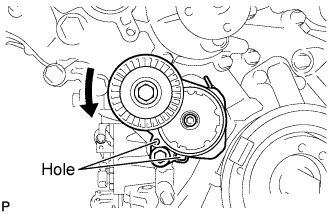
While turning the V-ribbed belt tensioner counterclockwise, align the holes. Insert a bar of φ5 mm (0.197 in.) into the holes to secure the V-ribbed belt tensioner in place.
-
Remove the V-ribbed belt.
-
-
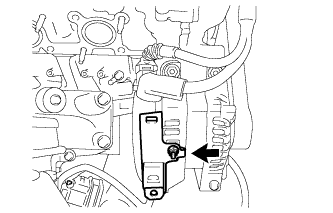
REMOVE WIRE HARNESS
-
Remove the bolt, and disconnect the clamp and ground cable.
-
-
REMOVE FRONT STABILIZER BAR
-
Remove the front stabilizer bar Click here.
-
-
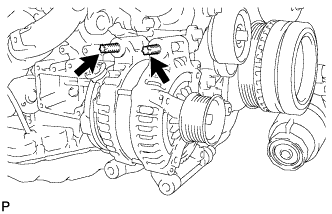
REMOVE GENERATOR
-

Remove nut A, and disconnect the harness from the +B terminal.
-
Remove bolt B, and disconnect the oil cooler tube.
-
Remove clamp C.
-
Disconnect generator connector D.
-
Remove the nut and the wire harness bracket.
-
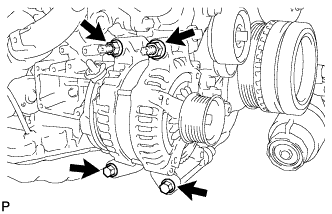
Remove the 2 bolts and 2 nuts.
-
Using an E8 "TORX" socket wrench, remove the 2 stud bolts and generator.
-