REAR STABILIZER BAR INSTALLATION

-
INSTALL REAR STABILIZER BAR
-
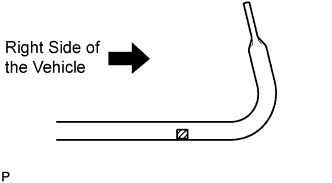
Insert the rear stabilizer bar between the rear suspension member and exhaust tail pipe assembly so that the indication mark on the rear stabilizer bar is on the right of the vehicle.
-
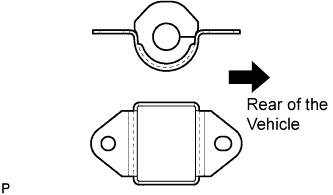
Install the 2 rear stabilizer bushings and the 2 rear stabilizer brackets.
Note
Be sure to install the rear stabilizer bushings so that each cutout faces the rear of the vehicle.
-
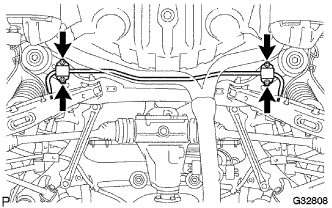
Install the rear stabilizer bar with the 4 bolts.
- Torque:
- 32 N*m { 326 kgf*cm, 24 ft.*lbf }
-
-
INSTALL REAR STABILIZER LINK ASSEMBLY LH
-
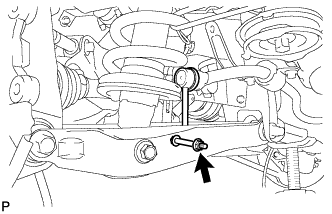
Install the rear stabilizer link assembly LH to the rear No. 2 suspension arm assembly and height control sensor link bracket with the bolt and nut.
- Torque:
- 27 N*m { 275 kgf*cm, 20 ft.*lbf }
-
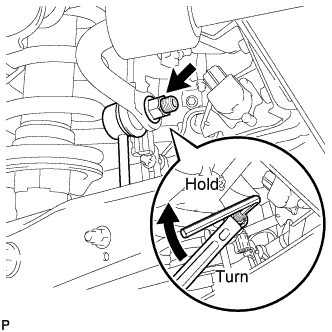
Temporarily install the rear stabilizer link assembly LH to the rear stabilizer bar with the nut.
Tech Tips
If the ball joint turns together with the nut, use a hexagon wrench (6 mm) to hold the stud bolt.
-
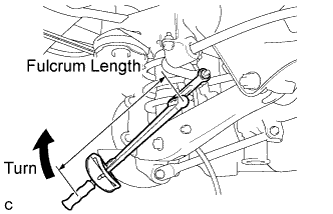
Using the ball joint lock nut wrench (17 mm), fully tighten the nut.
- Torque:
- without the ball joint lock nut wrench (17 mm)
- 89 N*m { 908 kgf*cm, 66 ft.*lbf }
- with the ball joint lock nut wrench (17 mm)
- 66 N*m { 673 kgf*cm, 49 ft.*lbf }
Note
-
Use a torque wrench with a fulcrum length of 425 mm (16.73 in.).
-
Use the recommended ball joint lock nut wrench (17 mm).
-
This torque value is effective when the ball joint lock nut wrench (17 mm) is parallel to the torque wrench.
-
-
INSTALL REAR STABILIZER LINK ASSEMBLY RH
Tech Tips
Perform the same procedure as the LH side.
-
STABILIZE SUSPENSION
-
Install the rear wheels.
-
Lower the vehicle to the ground.
-
Bounce the vehicle up and down at the corners to stabilize the rear suspension.
-
Remove the rear wheels.
-
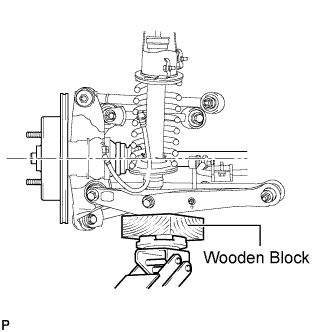
Jack up the axle carrier, with a wooden block placed between the jack and axle carrier, to apply a load to the suspension so that the rear drive shaft assembly becomes level.
-
-
FULLY TIGHTEN BOLT (for LH Side)
-
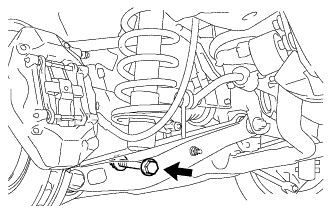
Fully tighten the bolt.
- Torque:
- 110 N*m { 1122 kgf*cm, 81 ft.*lbf }
Note
Turn the bolt while holding the nut.
-
-
FULLY TIGHTEN BOLT (for RH Side)
Tech Tips
Perform the same procedure as the LH side.
-
INSTALL NO. 2 DIFFERENTIAL SUPPORT PROTECTOR
-
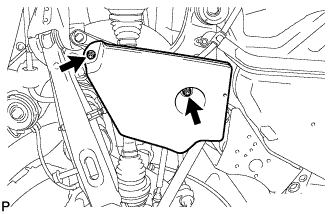
Install the No. 2 differential support protector with the 2 nuts.
-
-
INSTALL NO. 1 DIFFERENTIAL SUPPORT PROTECTOR
Tech Tips
Perform the same procedure as the No. 2 differential support protector.
-
INSTALL REAR WHEELS
- Torque:
- 103 N*m { 1050 kgf*cm, 76 ft.*lbf }
-
INSPECT AND ADJUST REAR WHEEL ALIGNMENT
-
INSPECT AND ADJUST HEADLIGHT AIMING