REAR SHOCK ABSORBER REMOVAL

Tech Tips
-
Use the same procedure for the RH side and LH side.
-
The procedure listed below is for the LH side.
-
REMOVE NO. 2 LUGGAGE COMPARTMENT TRIM COVER
-
REMOVE DECK SIDE TRIM BOX LH
-
REMOVE DECK SIDE TRIM BOX RH
-
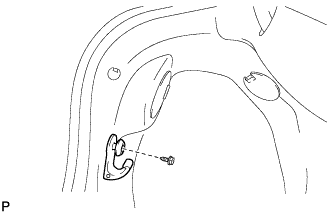
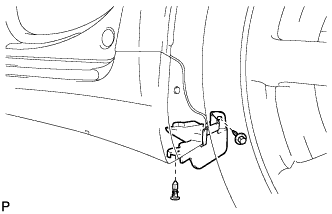
REMOVE ROPE HOOK ASSEMBLY
-
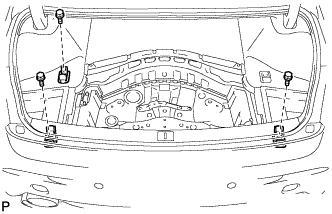
Remove the 3 bolts and 3 rope hook assemblies.
-
-
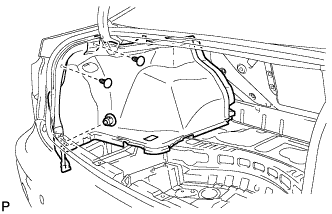
REMOVE REAR LUGGAGE COMPARTMENT TRIM COVER
-
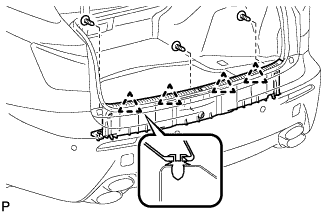
Using a clip remover, remove the 3 clips.
-
Disengage the 4 clips and remove the rear luggage compartment trim cover.
-
-
REMOVE NO. 2 ROOM LIGHT ASSEMBLY
-
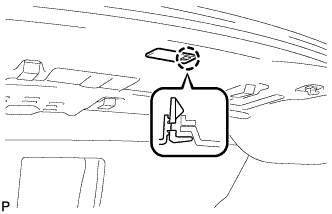
Disengage the claw and disconnect the No. 2 room light assembly.
-
Disconnect the connector and remove the No. 2 room light assembly.
-
-
REMOVE ROPE HOOK
-
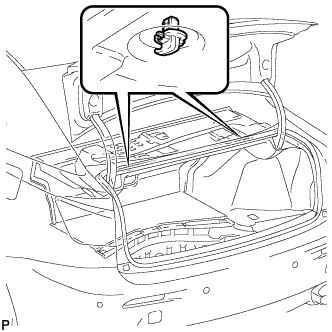
Remove the 2 rope hooks.
-
-
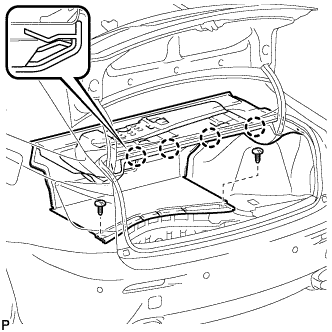
REMOVE NO. 2 LUGGAGE COMPARTMENT TRIM HOOK
-
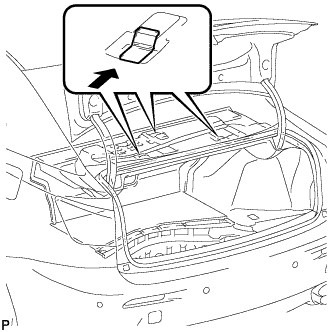
Remove the 3 No. 2 luggage compartment trim hooks as shown in the illustration.
-
-
REMOVE FRONT LUGGAGE COMPARTMENT TRIM COVER
-
Using a clip remover, remove the 2 clips.
-
Disengage the 4 claws and remove the front luggage compartment trim cover.
-
-
REMOVE NO. 1 LUGGAGE COMPARTMENT TRIM HOOK
-
Remove the screw and No. 1 luggage compartment trim hook.
-
-
REMOVE SIDE LUGGAGE COMPARTMENT TRIM COVER
-
Using a clip remover, remove the 3 clips and side luggage compartment trim cover.
-
-
REMOVE REAR WHEEL
-
REMOVE NO. 2 REAR FLOOR HOUSING SHIELD
-
Using a clip remover, remove the clip.
-
Remove the screw and No. 2 rear floor housing shield.
-
-
REMOVE REAR WHEEL HOUSE LINER
-
REMOVE NO. 2 DIFFERENTIAL SUPPORT PROTECTOR
-
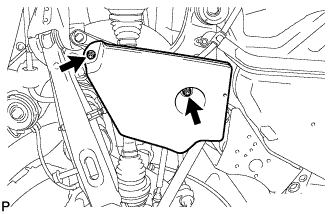
Remove the 2 nuts and No. 2 differential support protector.
-
-
REMOVE REAR SUSPENSION MEMBER BRACE
-
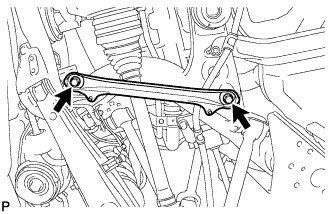
Remove the 2 bolts and rear suspension member brace.
-
-
SEPARATE REAR NO. 2 SUSPENSION ARM ASSEMBLY
-
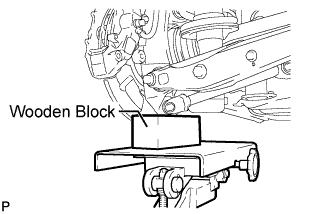
Support the rear axle assembly with a jack using a wooden block.
-
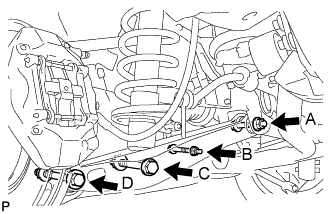
Loosen the nut (A).
Note
Do not remove the nut.
-
Remove the bolt (B) and the nut. Disconnect the stabilizer link assembly and height control sensor link bracket from the rear No. 2 suspension arm assembly.
-
Remove the bolt (C), nut, and rear shock absorber.
Note
Turn the bolt while holding the nut.
-
Remove the bolt (D) and the nut on the axle carrier side and separate the rear No. 2 suspension arm assembly from the axle carrier.
Note
Turn the bolt while holding the nut.
-
-
REMOVE REAR SHOCK ABSORBER WITH COIL SPRING
-
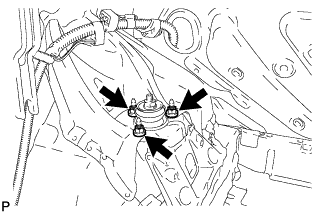
Remove the 3 nuts on the upper side of the rear shock absorber with coil spring.
-
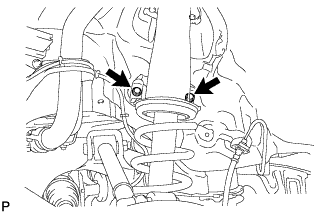
Remove the 2 bolts and rear shock absorber with coil spring from the body.
Note
During this operation, hold the rear shock absorber with coil spring to prevent it from falling.
-
-
REMOVE REAR SHOCK ABSORBER ASSEMBLY
-

Loosen the lock nut while holding the rod of the rear shock absorber assembly with a socket hexagon wrench (6 mm).
Tech Tips
Securely insert the socket hexagon wrench to the shock absorber rod to prevent damage to the rear shock absorber.
Note
-
Do not remove the lock nut.
-
Loosen the lock nut only when disassembling the rear shock absorber with coil spring.
-
-
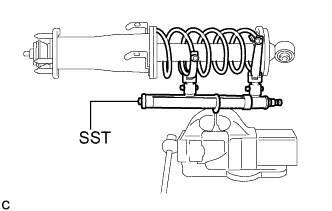
Secure SST in a vise.
- SST
- 09727-30021 ( 09727-00010, 09727-00021, 09727-00031 )
-

Text in Illustration *a Correct *b Incorrect Attach the arm of SST to the diameter of the rear coil spring.
CAUTION:
-
Make sure that the rear coil spring is installed so that the distance between the upper and lower hooks of SST is at the maximum.
-
Make sure that the claws of the hooks are securely attached.
-
-
Using SST, compress the rear coil spring.
CAUTION:
-
If the rear coil spring bends during the compression, immediately stop the compression and reinstall SST.
-
Do not compress the spring until the coil springs contact each other.
-
Do not use an impact wrench. It will damage SST.
-
-
Confirm that the rear coil spring becomes free and remove the lock nut.
CAUTION:
Do not remove the lock nut when the rear coil spring is not free.
-
Remove the rear No. 1 shock absorber cushion washer, rear No. 1 shock absorber cushion, rear suspension support assembly, rear upper coil spring insulator, collar, rear No. 2 shock absorber cushion, and rear No. 1 spring bumper.
-
Remove the rear coil spring and rear lower coil spring insulator from the rear shock absorber.
-
Release SST and remove it from the rear coil spring.
-