RADIATOR REMOVAL

-
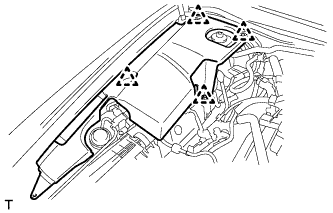
REMOVE COOL AIR INTAKE DUCT SEAL
-
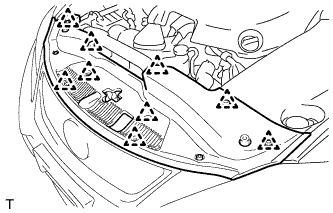
Remove the 9 clips and cool air intake duct seal.
-
-
REMOVE ENGINE ROOM SIDE COVER LH (for LHD)
-
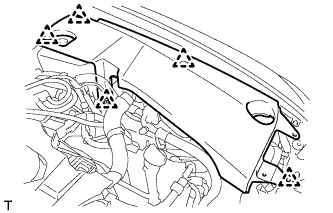
Remove the 5 clips and engine room side cover LH.
-
-
REMOVE ENGINE ROOM SIDE COVER LH (for RHD)
-
Remove the 4 clips and engine room side cover LH.
-
-
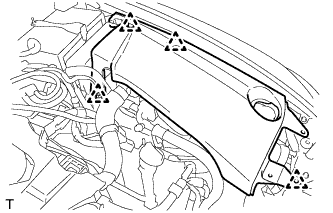
REMOVE ENGINE ROOM SIDE COVER RH (for LHD)
-
Remove the 3 clips and engine room side cover RH.
-
-
REMOVE ENGINE ROOM SIDE COVER RH (for RHD)
-
Remove the 4 clips and engine room side cover RH.
-
-
REMOVE V-BANK COVER SUB-ASSEMBLY
-
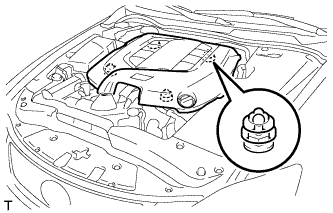
Hold the front of the V-bank cover sub-assembly and raise it to disengage the 2 clips on the front of the cover. Continue to raise the cover to disengage the 2 clips on the rear of the cover and remove the V-bank cover sub-assembly.
Note
Attempting to disengage both front and rear clips at the same time may cause the cover to break.
-
-
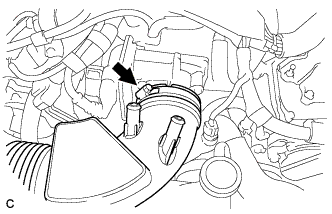
REMOVE NO. 1 AIR CLEANER INLET
-
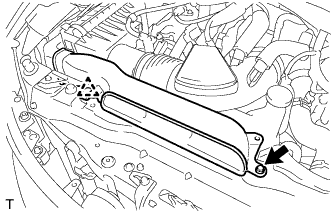
Remove the bolt, clip and No. 1 air cleaner inlet.
-
-
REMOVE AIR CLEANER CAP SUB-ASSEMBLY
-
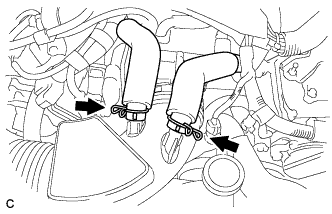
Loosen the 2 hose clamps and separate the 2 ventilation hoses.
-
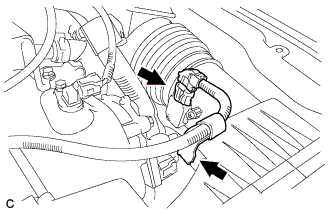
Disconnect the mass air flow meter connector and separate the wire harness clamp.
-
Loosen the hose clamp and separate the air cleaner hose.
-
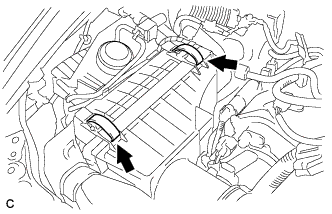
Unlock the 2 clamps and remove the air cleaner cap sub-assembly.
-
-
REMOVE ENGINE UNDER COVER
-
REMOVE NO. 2 ENGINE UNDER COVER
-
DRAIN AUTOMATIC TRANSMISSION FLUID
-
Remove the drain plug and gasket, and drain the ATF.
-
Install a new gasket and the drain plug.
- Torque:
- 20 N*m { 204 kgf*cm, 15 ft.*lbf }
-
-
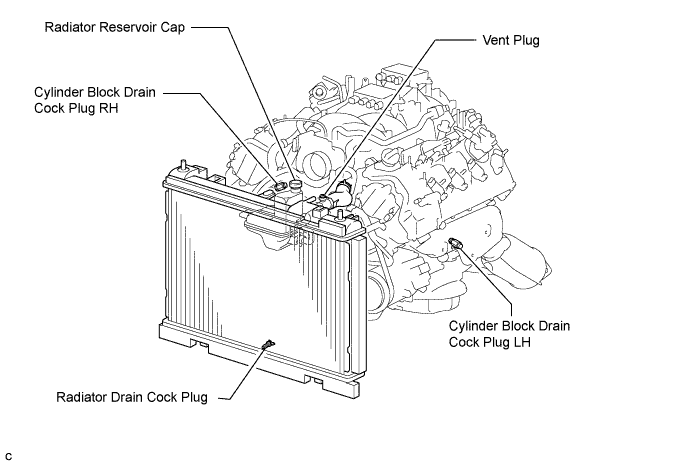
DRAIN ENGINE COOLANT
-
Loosen the radiator drain cock plug.
CAUTION:
Do not loosen the radiator drain cock plug while the engine and radiator are still hot. Pressurized, hot engine coolant and steam may be released and cause serious burns.
Tech Tips
Collect the coolant in a container and dispose of it according to local regulations.
-
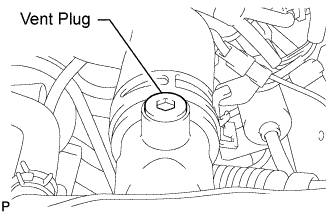
Remove the radiator reservoir cap, and using a 6 mm socket hexagon wrench, remove the vent plug.
-
Drain coolant.
-
Loosen the 2 cylinder block drain cock plugs.
-
-
REMOVE RADIATOR GRILLE PROTECTOR
-
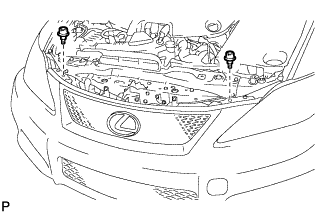
Remove the 2 radiator grille protectors.
-
-
REMOVE FRONT BUMPER ASSEMBLY
-
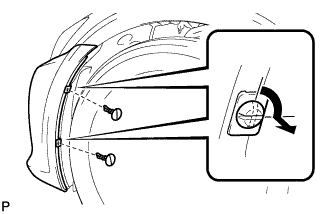
Using a screwdriver, turn the pins 90 degrees and remove the 2 pin hold clips.
Tech Tips
-
Tape the screwdriver tip before use.
-
Use the same procedure for the RH side and LH side.
-
-
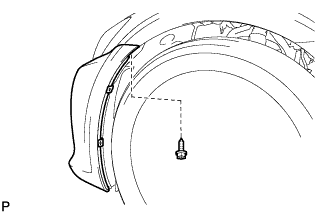
remove the screw.
Tech Tips
Use the same procedure for the RH side and LH side.
-
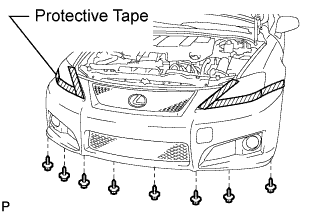
Put protective tape around the front bumper assembly.
-
Remove the 8 screws.
-

Using a clip remover, remove the 2 clips and screw.
-
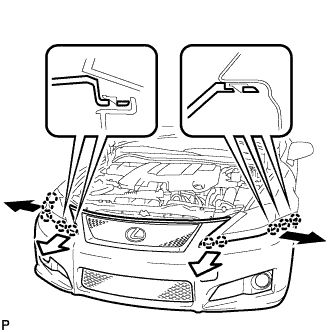
Disengage the 10 claws and disconnect the front bumper assembly as shown in the illustration.
-
w/ LEXUS Parking Assist-Sensor system:
-
Disconnect the ultrasonic sensor connector.
-
-
Disconnect the headlight cleaner hose.
Note
Prepare a drain pan or a piece of cloth in case washer fluid leaks.
-
Disconnect the 2 fog light connectors and remove the front bumper assembly.
-
-
REMOVE FRONT BUMPER ENERGY ABSORBER
-

Remove the front bumper energy absorber.
-
-
REMOVE RADIATOR SUPPORT OPENING COVER
-
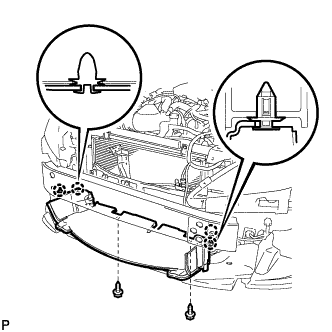
Remove the 2 screws.
-
Disengage the 4 clips and the radiator support opening cover.
-
-
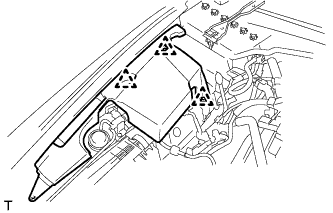
REMOVE MILLIMETER WAVE RADAR SENSOR ASSEMBLY (w/ Dynamic Radar Cruise Control System)
-
Disconnect the connector.
-
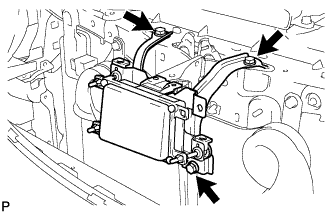
Remove the 3 bolts and the millimeter wave radar sensor assembly.
-
-
REMOVE HOOD LOCK CONTROL CABLE COVER
-
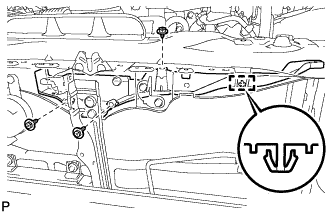
Remove the 3 screws.
-
Disengage the clamp and remove the hood lock control cable cover.
-
-
REMOVE HOOD LOCK NUT CAP
-
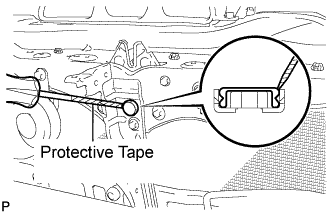
Using a screwdriver, remove the hood lock nut cap as shown in the illustration.
Tech Tips
Tape the screwdriver tip before use.
-
-
REMOVE HOOD LOCK ASSEMBLY
-
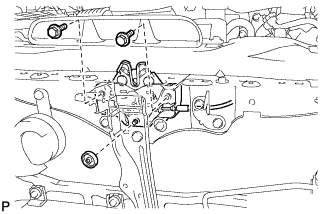
Remove the 2 bolts and hood lock nut.
-
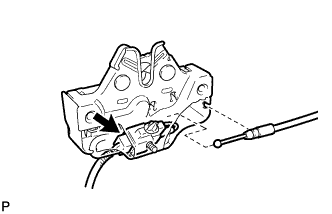
Disconnect the hood lock control cable assembly.
-
Disconnect the connector and remove the hood lock assembly.
-
-
REMOVE RADIATOR RESERVE TANK ASSEMBLY
-
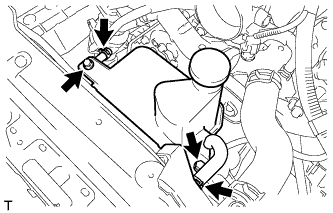
Disconnect 2 reserve tank hoses, then remove the 2 bolts and radiator reserve tank assembly.
-
-
REMOVE ENGINE ROOM ECU OUTLET DUCT
-
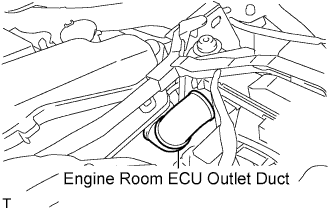
Remove the engine room ECU outlet duct from the engine room ECU box.
-
-
REMOVE UPPER RADIATOR SUPPORT
-
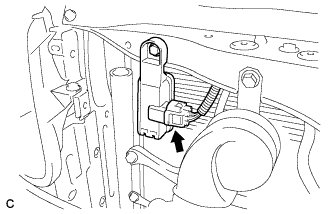
Disconnect the smog ventilation sensor connector.
-
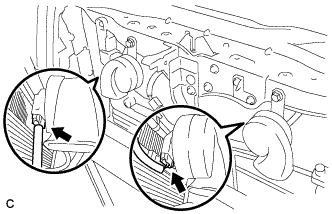
Disconnect the 2 horn connectors.
-
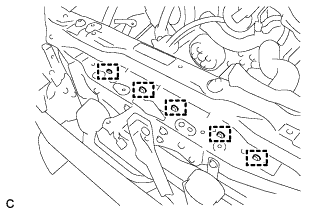
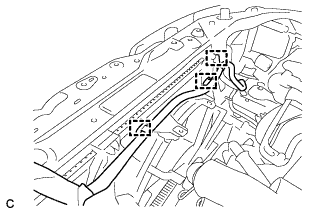
Separate the 5 clamps and the wire harness from the upper radiator support.
-
Separate the 2 clamps and the wire harness from the upper radiator support.
-
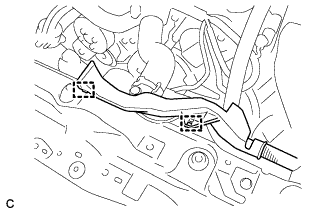
Separate the 3 clamps and the wire harness from the fan shroud.
-
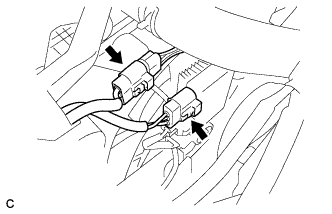
Disconnect the 2 cooling fan ECU connectors.
-
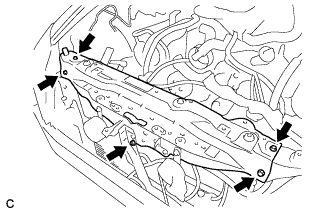
Remove the 5 bolts and the upper radiator support.
-
-
DISCONNECT NO. 1 RADIATOR HOSE
-
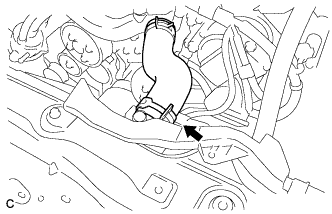
Disconnect the No. 1 radiator hose from the radiator assembly.
-
-
DISCONNECT NO. 2 RADIATOR HOSE
-
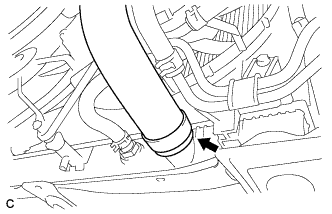
Disconnect the No. 2 radiator hose from the radiator assembly.
-
-
DISCONNECT OIL COOLER HOSE
-
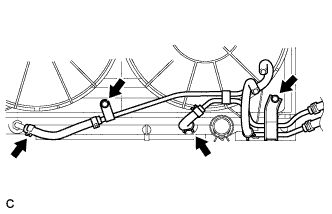
Disconnect the 2 oil cooler hoses from the radiator assembly.
-
Disconnect the 2 bolts and oil cooler pipe from the radiator assembly.
-
-
SEPARATE COOLER CONDENSER ASSEMBLY
-
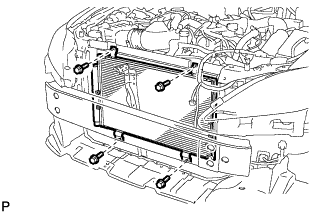
Remove the 4 bolts and separate the cooler condenser assembly from the radiator assembly.
-
-
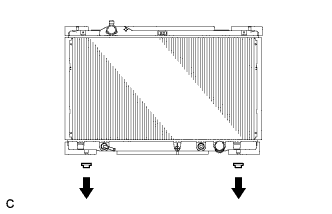
REMOVE RADIATOR ASSEMBLY
-
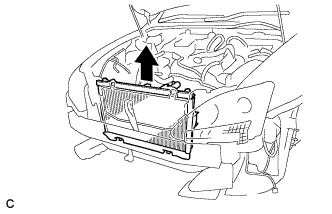
Remove the radiator assembly from the vehicle together with the cooling fan assembly.
Note
Make sure that the cooler condenser assembly and radiator assembly do not come into contact with each other.
-
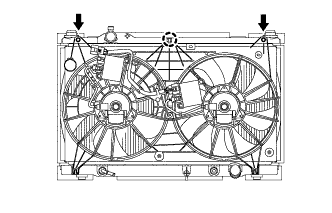
Remove the 2 bolts.
-
Release the claw and lift the fan assembly from the radiator assembly.
-
-
REMOVE RADIATOR SUPPORT CUSHION
-
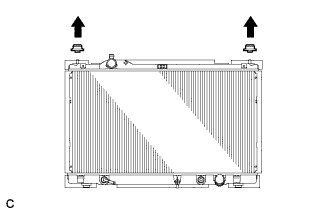
Remove the 2 radiator support cushions.
-
-
REMOVE LOWER RADIATOR SUPPORT
-
Remove the 2 lower radiator supports.
-