PURGE VALVE REMOVAL

-
REMOVE V-BANK COVER SUB-ASSEMBLY
-
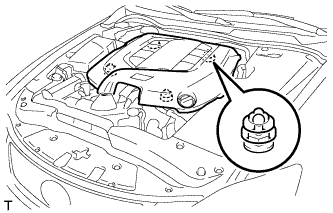
Hold the front of the V-bank cover sub-assembly and raise it to disengage the 2 clips on the front of the cover. Continue to raise the cover to disengage the 2 clips on the rear of the cover and remove the V-bank cover sub-assembly.
Note
Attempting to disengage both front and rear clips at the same time may cause the cover to break.
-
-
REMOVE NO. 1 VACUUM SWITCHING VALVE ASSEMBLY
Tech Tips
The No. 1 vacuum switching valve assembly is the purge valve.
-
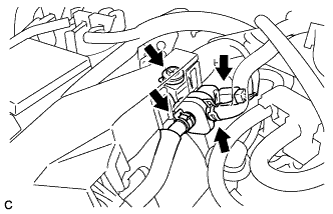
Disconnect the No. 1 vacuum switching valve assembly connector.
-
Disconnect the fuel vapor feed hose and No. 2 fuel vapor feed hose from the No. 1 vacuum switching valve assembly.
-
Remove the bolt and No. 1 vacuum switching valve assembly.
-