FUEL TANK REMOVAL

-
DISCHARGE FUEL SYSTEM PRESSURE
-
Discharge fuel system pressure Click here.
-
-
DISCONNECT CABLE FROM NEGATIVE BATTERY TERMINAL
Note
When disconnecting the cable, some systems need to be initialized after the cable is reconnected Click here.
-
REMOVE REAR SEAT CUSHION ASSEMBLY
-
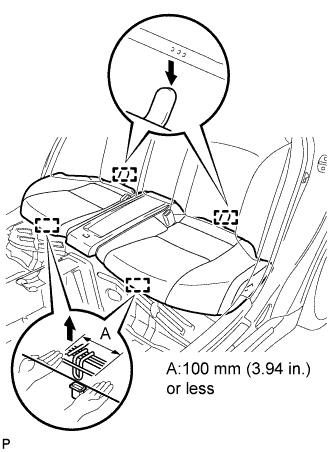
Disengage the 2 front hooks of the rear seat cushion assembly from the vehicle body.
Note
Follow the instructions below carefully as the cushion frame deforms easily.
-
Choose a hook to detach first. Place your hands near the hook as shown in the illustration. Then lift the seat cushion to detach the hook.
-
Repeat for the other hook.
-
-
Disengage the 2 rear hooks of the seat cushion from the child restraint seat anchor bracket.
-
Remove the rear seat cushion assembly.
-
-
REMOVE NO. 3 ROOM PARTITION PAD
-
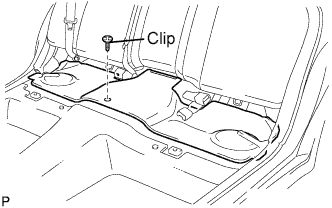
Remove the clip and No.3 room partition pad.
-
-
REMOVE NO. 2 REAR FLOOR SERVICE HOLE COVER
-
Remove the No. 2 rear floor service hole cover and disconnect the fuel suction tube connector.
-
-
REMOVE FUEL SUCTION WITH PUMP AND GAUGE TUBE ASSEMBLY
-
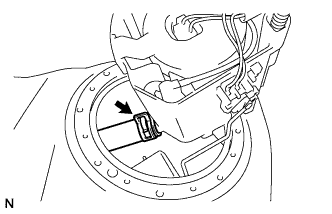
Disconnect the connector from the fuel suction with pump and gauge tube assembly.
-
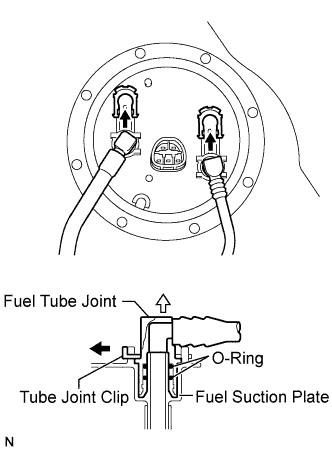
Disconnect fuel pump tubes.
Note
Before beginning this procedure, check for foreign matter on the joint clips. Clean if necessary.
-
Remove the 2 tube joint clips, fuel tank main tube and fuel tank return vent tube.
Note
-
Keep the O-rings free of foreign matter, as it becomes contaminated easily.
-
Do not use any tools in this procedure.
-
Do not forcefully bend or twist the tube.
-
Put the tube in a plastic bag to prevent damage and contamination.
-
If the fuel suction plate and tube are stuck together, pinch the tube and turn it carefully to disconnect it.
-
Be careful not to damage any clips. If a clip is damaged, replace it.
-
-
-

Remove the 8 bolts and the fuel tank vent tube set plate.
Tech Tips
While holding the fuel suction tube by hand, remove the fuel tank vent tube set plate.
-
Disconnect the clip and fuel tube.
-
Remove the fuel suction with pump and gauge tube assembly and fuel suction tube set gasket from the fuel tank.
Note
-
Make sure that the fuel sender gauge assembly arm does not bend.
-
Do not damage the fuel tube.
-
-
-
DRAIN FUEL
-
REMOVE REAR FLOOR SERVICE HOLE COVER
-
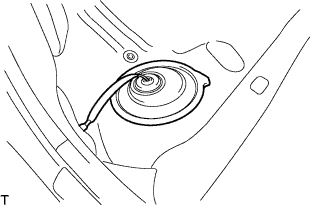
Remove the rear floor service hole cover.
-
-
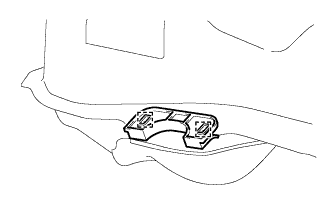
REMOVE FUEL SENDER GAUGE
-
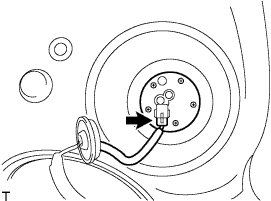
Disconnect the fuel sender gauge connector.
-
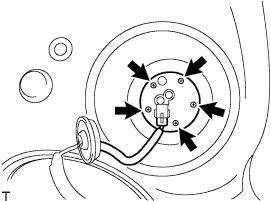
Remove the 5 bolts and fuel sender gauge from the fuel tank.
Note
Be careful not to bend the arm of the fuel sender gauge.
-
-
REMOVE NO. 2 DIFFERENTIAL SUPPORT PROTECTOR
-
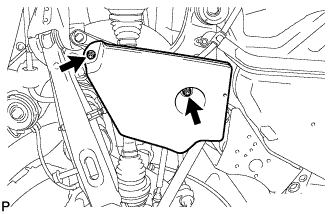
Remove the 2 nuts and No. 2 differential support protector.
-
-
REMOVE NO. 1 DIFFERENTIAL SUPPORT PROTECTOR
Tech Tips
Use the same procedure as for the No. 2 differential support protector.
-
REMOVE NO. 2 FLOOR UNDER COVER
-
REMOVE NO. 1 FLOOR UNDER COVER
-
REMOVE FRONT EXHAUST PIPE ASSEMBLY
Tech Tips
-
REMOVE PROPELLER SHAFT WITH CENTER BEARING ASSEMBLY
Tech Tips
-
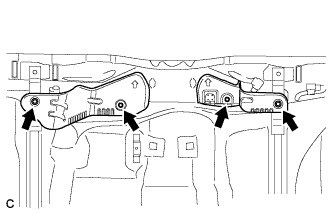
REMOVE REAR SUSPENSION REAR LOWER MEMBER BRACE LH
-
Remove the 4 bolts and rear suspension member brace LH.
-
-
REMOVE REAR SUSPENSION REAR LOWER MEMBER BRACE RH
Tech Tips
Perform the same procedure as the LH side.
-
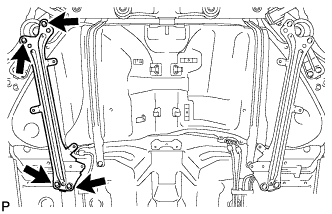
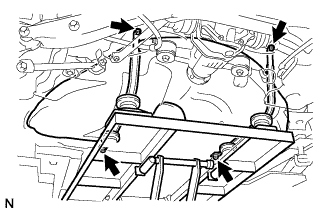
DISCONNECT PARKING BRAKE CABLE ASSEMBLY
-

Remove the 2 parking brake cable assemblies from the 4 clamps.
-
Remove the 4 bolts and disconnect the 2 parking brake cable assemblies.
-
Remove the bolt, loosen the grommet then remove No.3 fuel tank protector.
-
Remove the bolt, loosen the grommet then remove No.4 fuel tank protector.
-
-
DISCONNECT FUEL TUBE SUB-ASSEMBLY
-

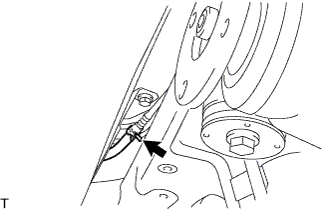
Disconnect the fuel tank main tube (LH side).
Note
-
Remove any dirt and foreign matter on the fuel tube connector before performing this work.
-
Do not allow any scratches or foreign matter on the parts when disconnecting, as the fuel tube connector has O-rings that seal the pipe.
-
Perform this work by hand. Do not use any tools.
-
Do not forcibly bend, twist or turn the nylon tube.
-
Protect the disconnected part by covering it with a plastic bag after disconnecting the fuel pump tube.
-
If the fuel tube connector and pipe are stuck, push and pull on them to release them.
-
-

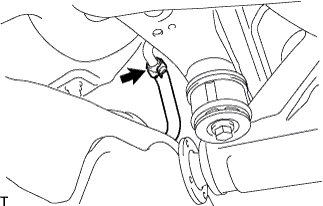
Disconnect the fuel tank return vent tube.
Note
-
Remove any dirt and foreign matter on the fuel tube connector before performing this work.
-
Do not allow any scratches or foreign matter on the parts when disconnecting, as the fuel tube connector has O-rings that seal the pipe.
-
Perform this work by hand. Do not use any tools.
-
Do not forcibly bend, twist or turn the nylon tube.
-
Protect the disconnected part by covering it with a plastic bag after disconnecting the fuel pump tube.
-
If the fuel tube connector and pipe are stuck, push and pull on them to release them.
-
-

Disconnect the fuel tank main tube (RH side).
Note
-
Remove any dirt and foreign matter on the fuel tube connector before performing this work.
-
Do not allow any scratches or foreign matter on the parts when disconnecting, as the fuel tube connector has O-rings that seal the pipe.
-
Perform this work by hand. Do not use any tools.
-
Do not forcibly bend, twist or turn the nylon tube.
-
Protect the disconnected part by covering it with a plastic bag after disconnecting the fuel pump tube.
-
If the fuel tube connector and pipe are stuck, push and pull on them to release them.
-
-
-
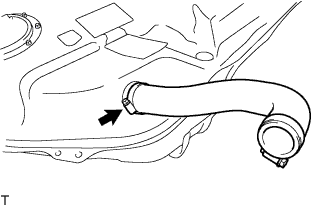
DISCONNECT FUEL TANK TO FILLER PIPE HOSE
-

Loosen the hose clamp bolt and disconnect the fuel tank to filler pipe hose.
-
-
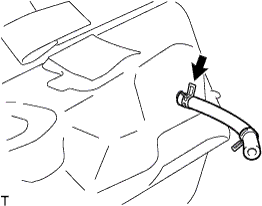
DISCONNECT FUEL TANK VENT HOSE
-
Remove the clamp and disconnect the fuel tank vent hose.
-
-
REMOVE FUEL TANK ASSEMBLY
-
Place a engine lifter under the fuel tank assembly.
-
Remove the 4 bolts and fuel tank bands.
-
Slightly lower the transmission jack.
-
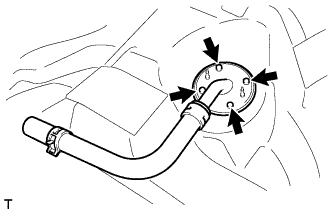
Disconnect the No. 1 fuel tank breather tube sub-assembly and remove the fuel tank assembly.
Note
-
Remove any dirt and foreign matter on the fuel tube connector before performing this work.
-
Do not allow any scratches or foreign matter on the parts when disconnecting, as the fuel tube connector has O-rings that seal the pipe.
-
Perform this work by hand. Do not use any tools.
-
Do not forcibly bend, twist or turn the nylon tube.
-
Protect the disconnected part by covering it with a plastic bag after disconnecting the fuel pump tube.
-
If the fuel tube connector and pipe are stuck, push and pull on them to release them.
-
-
-
REMOVE NO. 1 FUEL TANK BREATHER TUBE SUB-ASSEMBLY
-
Remove the 4 screws, No. 1 fuel tank breather tube sub-assembly and gasket.
-
-
REMOVE FUEL TUBE SUB-ASSEMBLY
-
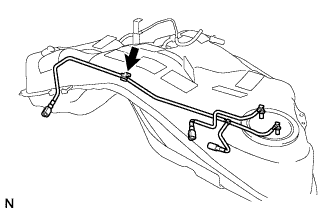
Disconnect the clamp and remove the fuel tank main tube and fuel tank return vent tube.
-
Disconnect the 2 clamps and remove the edge protector.
-

Remove the 2 tank bracket retainer sub-assemblies.
-
-
REMOVE FUEL TANK TO FILLER PIPE HOSE
-
Loosen the hose clamp bolt and remove the fuel tank to filler pipe hose from the fuel tank assembly.
-
-
REMOVE FUEL TANK VENT HOSE
-
Remove the clip and fuel tank vent hose.
-
-
REMOVE FUEL TANK CUSHION
-
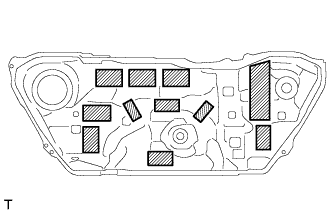
Remove the 11 fuel tank cushions shown in the illustration.
-
-
REMOVE NO. 1 FUEL TANK PROTECTOR
-
Remove the No. 1 fuel tank protector from the fuel tank assembly.
-