FUEL PRESSURE PULSATION DAMPER (for Direct Injection) REMOVAL

-
PRECAUTION
CAUTION:
-
Do not smoke or work near an open flame when handling the fuel system.
-
Keep gasoline away from rubber or leather parts.
-
Do not allow fuel to spray when removing the pipe between the high pressure side fuel pump assembly and the fuel injector assembly. The fuel in the pipe is highly pressurized.
-
-
DISCHARGE FUEL SYSTEM PRESSURE
-
Discharge fuel system pressure Click here.
-
-
DISCONNECT CABLE FROM NEGATIVE BATTERY TERMINAL
Note
When disconnecting the cable, some systems need to be initialized after the cable is reconnected Click here.
-
REMOVE INTAKE AIR SURGE TANK ASSEMBLY
-
Remove the intake air surge tank assembly Click here.
-
-
DISCONNECT NO. 1 FUEL HOSE
-
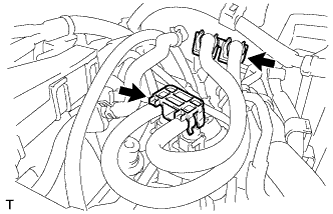
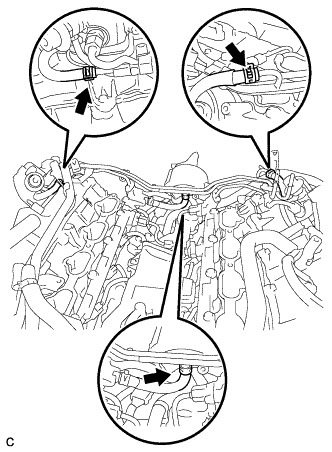
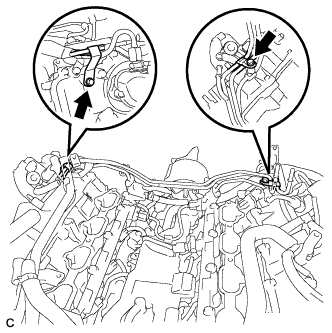
Remove the 2 fuel pipe clamps.
-

Pinch the 2 fuel tube connector and then pull out the No. 1 fuel hose.
Note
-
Check for any dirt and foreign matter contamination in the pipe and around the connector. Clean if necessary. Foreign matter may damage the O-rings or cause leaks in the seal between the pipe and connector.
-
Do not use any tools to separate the pipe and connector.
-
Do not forcefully bend or twist the nylon tube.
-
Check for any dirt and foreign matter on the pipe seal surface. Clean if necessary.
-
Put the pipe and connector ends in plastic bags to prevent damage and dirt contamination.
-
If the pipe and connector are stuck together, pinch the tube between your fingers and turn it carefully to free it. Then disconnect the hose.
-
-
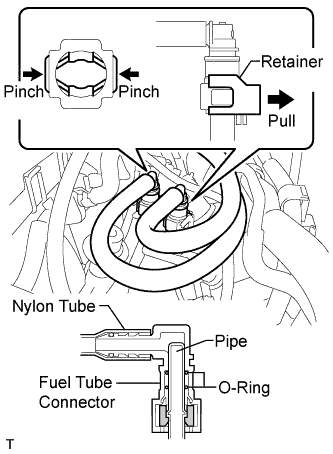
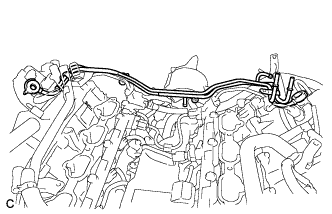
Lift up the retainer to release its lock.
-
Pinch the 2 fuel tube connectors and then pull out the No. 1 fuel hose.
Note
-
Check for any dirt and foreign matter contamination in the pipe and around the connector. Clean if necessary. Foreign matter may damage the O-rings or cause leaks in the seal between the pipe and connector.
-
Do not use any tools to separate the pipe and connector.
-
Do not forcefully bend or twist the nylon tube.
-
Check for any dirt and foreign matter on the pipe seal surface. Clean if necessary.
-
Put the pipe and connector ends in plastic bags to prevent damage and dirt contamination.
-
If the pipe and connector are stuck together, pinch the tube between your fingers and turn it carefully to free it. Then disconnect the hose.
-
-
-
SEPARATE ENGINE WIRE
-
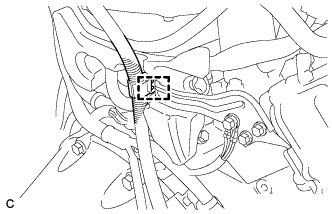
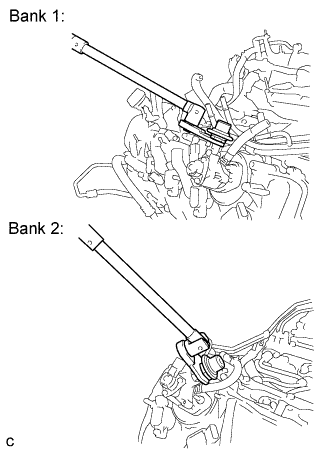
Disconnect the harness clamp and then separate the engine wire.
-
-
REMOVE NO. 3 COVER SUB-ASSEMBLY
-
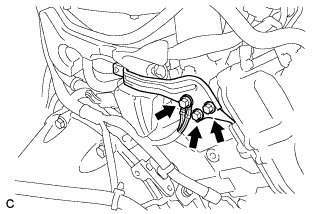
Remove the bolt and separate the engine wire.
-
Remove the 2 bolts and bracket.
-
Remove the 2 clips and No. 3 cover sub-assembly.
-
-
REMOVE FUEL PRESSURE PULSATION DAMPER ASSEMBLY (for Direct Injection)
-
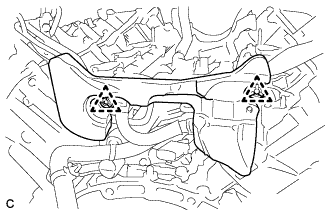
Disconnect the harness clamp and remove the 2 bolts and brackets.
-
Disconnect the 3 fuel hoses.
-
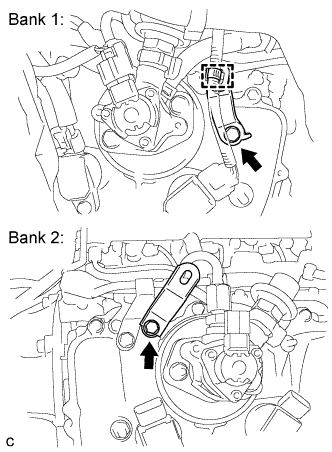
Using SST, loosen the 2 fuel pressure pulsation damper assemblies.
- SST
- 09612-24014 ( 09617-24011 )
-
Remove the 2 clamp bolts shown in the illustration.
-
Remove the 4 gaskets and No. 1 fuel pipe sub-assembly.
-