FENDER LINER (for Front Side) INSTALLATION
-
INSTALL FRONT FENDER LINER LH
-
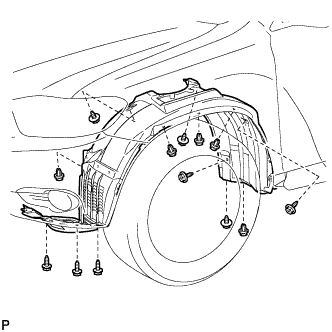
Install the front fender liner LH with the 5 clips and 8 screws.
-
Install 2 new grommets.
-
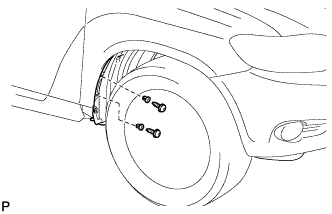
Using a 4 mm hexagon wrench, install the 2 screws.
-
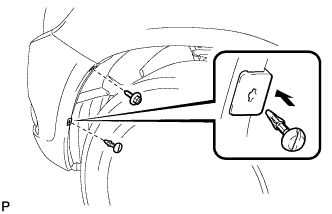
Install the screw and pin hold clip.
- Torque:
- 3.0 N*m { 31 kgf*cm, 27 in.*lbf }
-
-
INSTALL FRONT FENDER LINER RH
-
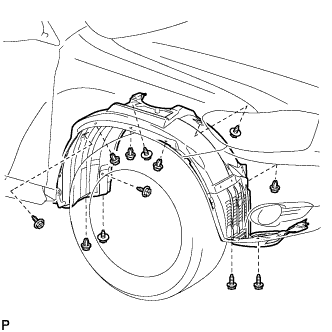
Install the front fender liner RH with the 5 clips and 7 screws.
-
Install 2 new grommets.
-
Using a 4 mm hexagon wrench, install the 2 screws.
-
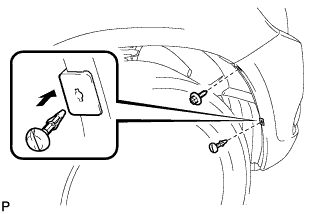
Install the screw and pin hold clip.
- Torque:
- 3.0 N*m { 31 kgf*cm, 27 in.*lbf }
-
-
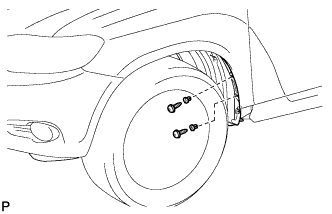
INSTALL FRONT WHEEL OPENING EXTENSION PAD (for LH Side)
-

Install the front wheel opening extension pad with the 2 screws.
-
-
INSTALL FRONT WHEEL OPENING EXTENSION PAD (for RH Side)
Tech Tips
Use the same procedure for the RH side and LH side.
-
INSTALL FRONT FENDER MOULDING SUB-ASSEMBLY LH
-
Clean the vehicle body surface.
-
Using a heat light, heat the vehicle body surface.
-
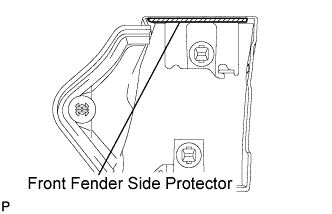
Remove the front fender side protector from the vehicle body.
-
Wipe off any tape adhesive residue with cleaner.
-
-
Clean the front fender moulding sub-assembly. (If reusing the front fender moulding sub-assembly)
-
Using a heat light, heat the front fender moulding sub-assembly.
-
Remove the front fender side protector from the front fender moulding sub-assembly.
-
Wipe off any tape adhesive residue with cleaner.
-
Install a new front fender side protector to the the front fender moulding sub-assembly.
-
-
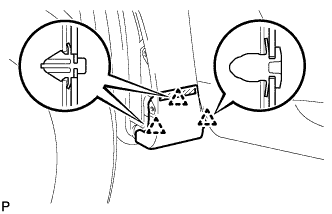
Install 2 new No. 4 clips on the front fender moulding sub-assembly.
-
Install a new pad on the front fender moulding sub-assembly.
-
Install the front fender moulding sub-assembly.
-
Using a heat light, heat the vehicle body and the front fender moulding sub-assembly.
-
Remove the release paper from the front fender moulding sub-assembly.
Tech Tips
After removing the release paper, keep the exposed adhesive free from foreign matter.
-
Engage the 3 clips and install the front fender moulding sub-assembly.
-
-
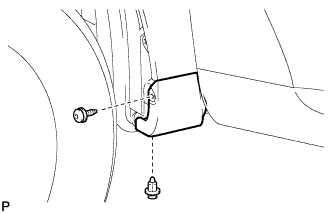
Using a 4 mm hexagon wrench, install the screw.
-
Install the clip.
-
-
INSTALL FRONT FENDER MOULDING SUB-ASSEMBLY RH
Tech Tips
Use the same procedures for the RH side and LH side.
-
INSTALL NO. 1 ENGINE UNDER COVER
-
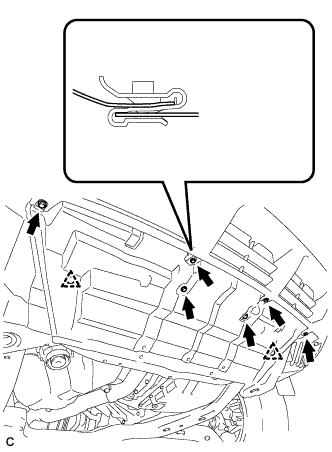
Install the No. 1 engine under cover with the 6 bolts and 2 clips.
-
-
INSTALL ENGINE UNDER COVER ASSEMBLY
-

Install the engine under cover assembly with the 2 bolts, 2 screws and 5 clips.
-

Install the engine under cover assembly RR with the 2 bolts.
-