SIDE MUDGUARD REMOVAL
Tech Tips
When removing the side mudguards, heat the vehicle body and side mudguards using a heat light.
| Heating temperature | ||||||
|---|---|---|---|---|---|---|
|
Note
Do not heat the vehicle body or side mudguards excessively.
-
REMOVE FRONT FENDER MOULDING SUB-ASSEMBLY
-
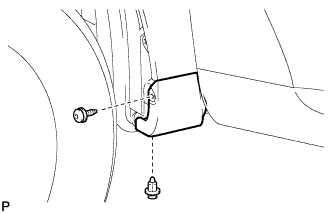
Remove the clip.
-
Using a 4 mm hexagon wrench, remove the screw.
-
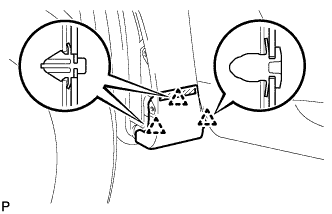
Peel off the double-sided tape and disengage the 3 clips, and then remove the front fender moulding sub-assembly.
-
Remove the pad from the front fender moulding sub-assembly.
-
Remove the 2 No. 4 clips from the front fender moulding sub-assembly.
-
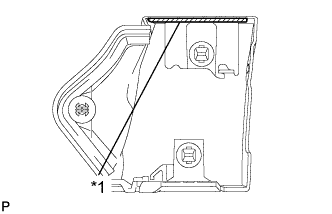
Text in Illustration *1 Double-sided Tape Remove the double-sided tape from the front fender moulding sub-assembly.
-
-
REMOVE FRONT FENDER OUTSIDE MOULDING PAD
-
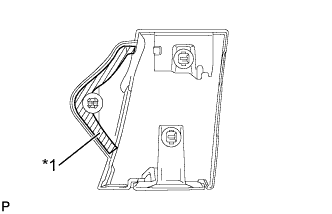
Text in Illustration *1 Front Fender Outside Moulding Pad Remove the front fender outside moulding pad from the front fender moulding sub-assembly.
-
-
REMOVE FRONT DOOR OUTSIDE MOULDING SUB-ASSEMBLY
-
Turn back the front door weatherstrip.
-
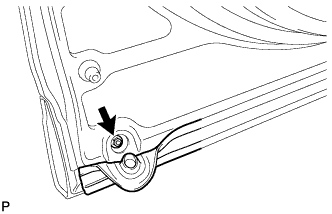
Remove the nut.
-
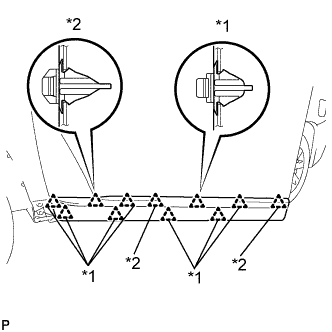
Text in Illustration *1 No. 4 Clip *2 No. 3 Clip Peel off the double-sided tape and disengage the 11 clips, and then remove the front door outside moulding sub-assembly.
-
Remove the gasket from the front door outside moulding sub-assembly.
-
Remove the 3 No. 3 clips from the front door outside moulding sub-assembly.
-
Remove the 8 No. 4 clips from the front door outside moulding sub-assembly.
-
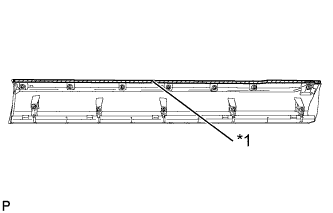
Text in Illustration *1 Double-sided Tape Remove the double-sided tape from the front door outside moulding sub-assembly.
-
-
REMOVE REAR DOOR OUTSIDE MOULDING SUB-ASSEMBLY
-
Turn back the rear door No. 2 weatherstrip.
-
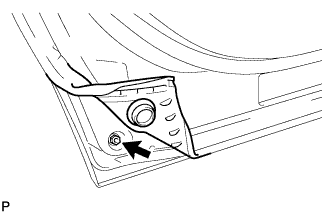
Remove the nut.
-
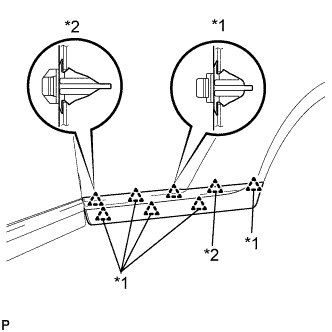
Text in Illustration *1 No. 4 Clip *2 No. 3 Clip Peel off the double-sided tape and disengage the 8 clips, and then remove the rear door outside moulding sub-assembly.
-
Remove the gasket from the rear door outside moulding sub-assembly.
-
Remove the 2 No. 3 clips from the rear door outside moulding sub-assembly.
-
Remove the 6 No. 4 clips from the rear door outside moulding sub-assembly.
-
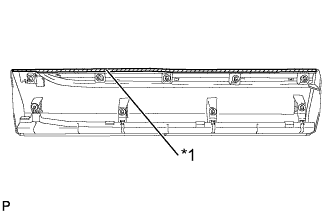
Text in Illustration *1 Double-sided Tape Remove the double-sided tape from the rear door outside moulding sub-assembly.
-