HOOD REASSEMBLY
-
CONNECT WASHER HOSE ASSEMBLY
-
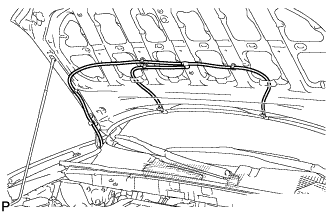
Connect the washer hose assembly.
-
-
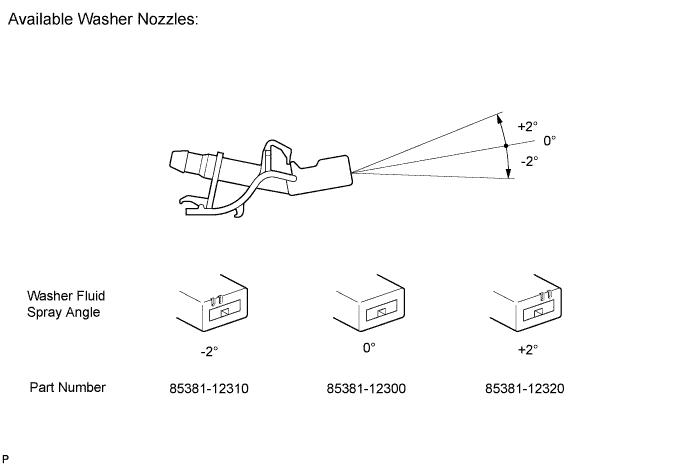
ADJUST WASHER NOZZLE SUB-ASSEMBLY
-
Select a washer nozzle sub-assembly so that the washer fluid spray area is as specitied.
-
-
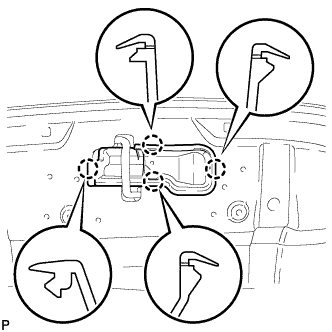
INSTALL WASHER NOZZLE SUB-ASSEMBLY
-
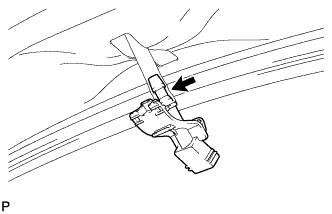
Connect a new washer nozzle sub-assembly to the washer hose.
-
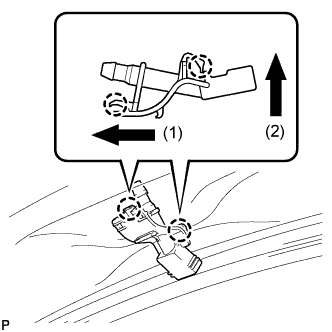
Engage the 2 claws and install the washer nozzle sub-assembly as shown in the illustration.
-
-
INSTALL HOOD INSULATOR
-
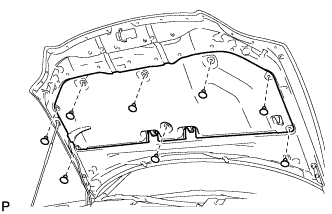
Install the hood insulator with the 8 clips.
-
-
INSTALL HOOD TO RADIATOR SUPPORT SEAL
-
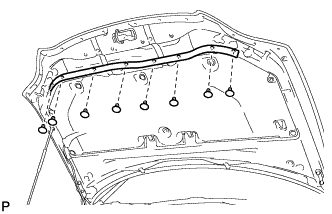
Install the hood to radiator support seal with the 8 clips.
-
-
INSTALL RADIATOR SEAL SUB-ASSEMBLY
-
Clean the vehicle body surface.
-
Wipe off any tape adhesive residue with cleaner.
-
-
Remove the release paper from the radiator seal sub-assembly.
Tech Tips
After removing the release paper, keep the exposed adhesive free from foreign matter.
-
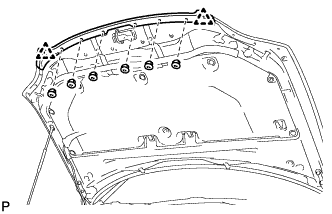
Install a new radiator seal sub-assembly with the 2 clips.
-
Install the 6 clips.
-
-
INSTALL FRONT HOOD PROTECTOR
-
Engage the 4 claws and install the front hood protector.
-
-
INSPECT FRONT WASHER NOZZLE SUB-ASSEMBLY
-
With the engine running, check the positions that the washer fluid hits the windshield.
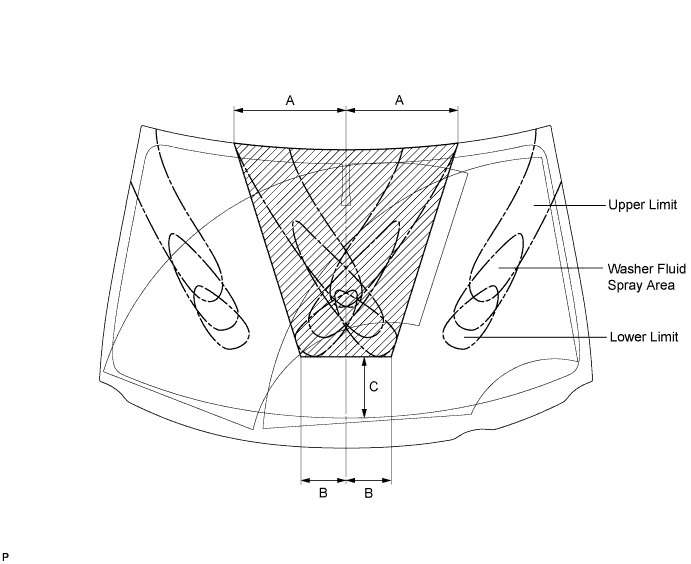
Area Dimension A 353 mm (13.88 in.) B 143 mm (5.70 in.) C 193 mm (7.61 in.) OK Washer fluid hits the windshield in the areas shown in the illustration. Tech Tips
If the result is not as specified, replace the washer nozzle.
-