BACK WINDOW LOCK REMOVAL
-
PRECAUTION
Note
-
Be sure to use the centering jig when removing and installing the rear wiper motor assembly (for Glass Hatch Type). Failure to do so will result in a change of the location of the axis of the rear wiper motor assembly (for Glass Hatch Type), causing the wiping angle to change.
-
After installing the rear wiper motor assembly (for Glass Hatch Type), do not open the glass hatch before installing the rear wiper link pivot.
-
If the rear wiper motor assembly is removed without using the centering jig, the rear wiper motor assembly must be replaced with a new one.
-
-
REMOVE BACK WINDOW UPPER TRIM PANEL ASSEMBLY
-
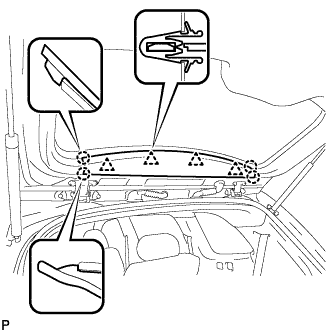
Disengage the 4 clips and 4 claws, and remove the back window upper trim panel assembly.
-
-
REMOVE BACK DOOR TRIM COVER LH (w/o Power Back Door)
-

Disengage the 2 clips and 2 claws, and remove the back door trim cover LH.
-
-
REMOVE BACK DOOR SERVICE HOLE COVER LH (w/ Power Back Door)
-
Disengage the 6 claws, and remove the back door service hole cover LH.
-
-
DISCONNECT POWER BACK DOOR ROD (w/ Power Back Door)
-

Disconnect the power back door rod and remove the back door stay plate.
-
-
REMOVE BACK DOOR TRIM COVER LH (w/ Power Back Door)
-
Disengage the 2 clips and 2 claws, and remove the back door trim cover LH.
-
-
REMOVE BACK DOOR TRIM COVER RH
-
Disengage the 2 clips and 2 claws, and remove the back door trim cover RH.
-
-
REMOVE BACK DOOR LOCK COVER (for Glass Hatch Type)
-

Disengage the 2 claws and 4 guides, and remove the back door lock cover.
-
-
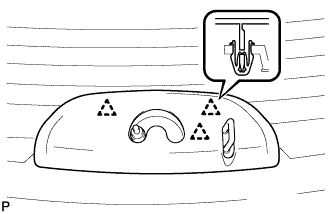
REMOVE ASSIST STRAP HOLE COVER
-

Disengage the 2 claws and 2 guides, and remove the assist strap hole cover.
-
-
REMOVE ASSIST STRAP ASSEMBLY
-
Remove the bolt and assist strap assembly.
-
-
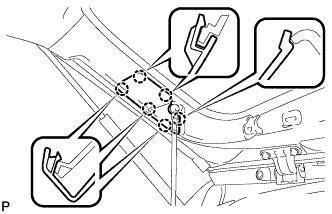
REMOVE BACK DOOR TRIM PANEL ASSEMBLY
-
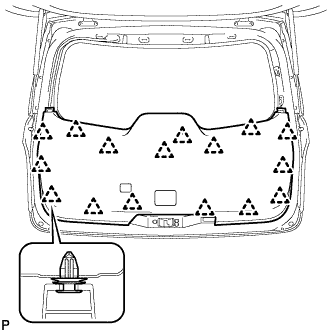
Disengage the 16 clips and remove the back door trim panel assembly.
-
-
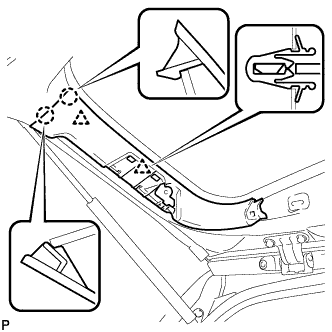
REMOVE REAR WIPER SHAFT COVER
-
Disengage the 3 clips and remove the rear wiper shaft cover.
-
-
REMOVE REAR WIPER ARM HEAD CAP
-
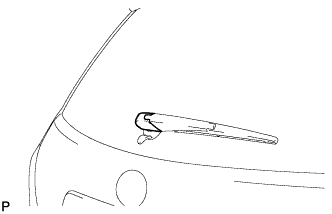
Remove the rear wiper arm head cap.
-
-
REMOVE REAR WIPER ARM AND BLADE ASSEMBLY
-
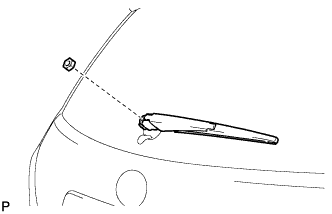
Remove the nut and the rear wiper arm and blade assembly.
-
-
REMOVE REAR WIPER LINK CAP
-
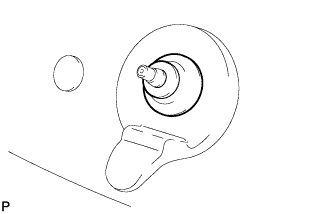
Remove the rear wiper link cap.
-
-
REMOVE REAR WIPER LINK PIVOT
-
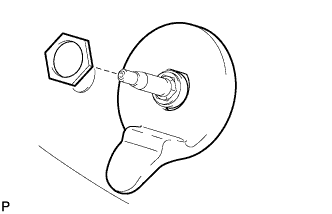
Remove the nut and the rear wiper link pivot.
-
-
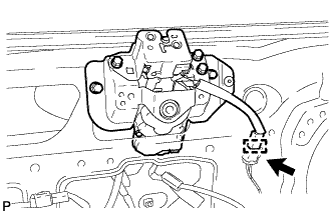
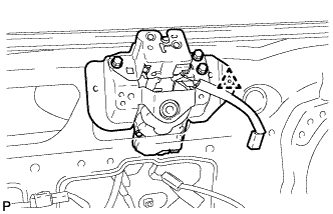
REMOVE REAR WIPER MOTOR ASSEMBLY
-
When reinstalling the rear wiper motor assembly:
-
Open the glass hatch.
-
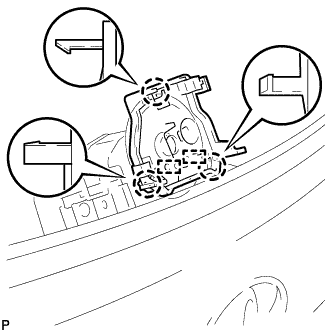
Engage the 3 claws and 2 guides, and then install the centering jig.
Note
-
The centering jig cannot be reused.
-
Do not remove the centering jig before installing the rear wiper link pivot.
-
-
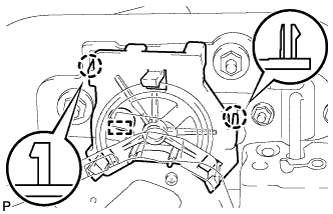
Close the glass hatch, and engage the 2 claws and guide.
Note
Be sure to engage the 2 claws and guide securely.
-
Disconnect the connector.
-
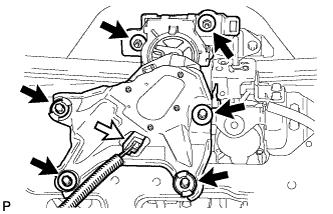
Remove the 2 nuts.
-
Remove the 4 bolts and the rear wiper motor assembly.
Note
-
Do not hold the rear wiper motor assembly by the rear wiper link pivot.
-
Be careful not to scratch the back door glass.
-
-
-
When using a new rear wiper motor assembly:
-
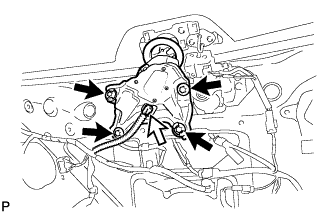
Disconnect the connector.
-
Remove the 4 bolts.
-
Remove the 2 nuts and the rear wiper motor assembly.
Note
Be careful not to scratch the back door glass.
-
-
-
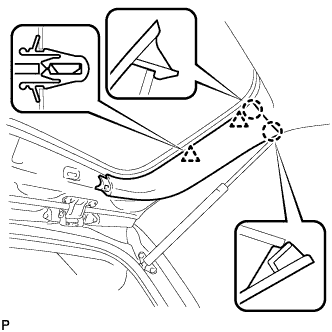
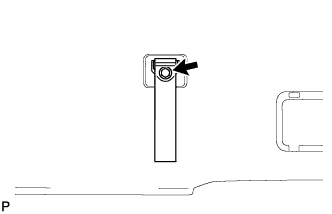
REMOVE BACK WINDOW LOCK ASSEMBLY
-
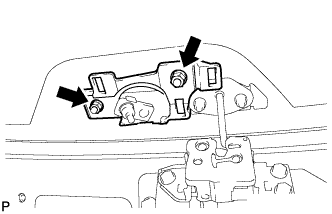
Disconnect the connector.
-
Disengage the clamp.
-
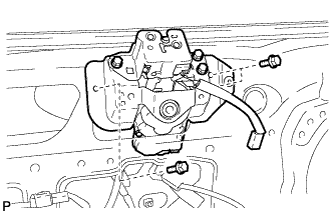
Remove the 3 bolts.
-
Disengage the clip and remove the back window lock assembly.
-