- Click here
PRECAUTION
Note:
-
Be sure to use the centering jig when removing and installing the rear wiper motor assembly (for Glass Hatch Type). Failure to do so will result in a change of the location of the axis of the rear wiper motor assembly (for Glass Hatch Type), causing the wiping angle to change.
-
After installing the rear wiper motor assembly (for Glass Hatch Type), do not open the glass hatch before installing the rear wiper link pivot.
-
If the rear wiper motor assembly is removed without using the centering jig, the rear wiper motor assembly must be replaced with a new one.
-
- Click here
INSTALL BACK DOOR WINDOW PROTECTOR (for Glass Hatch Type)
-
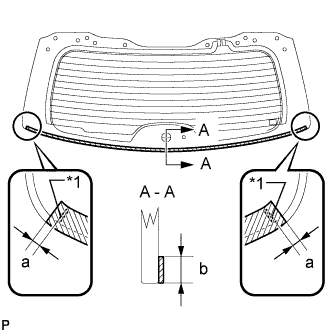
Apply Primer G to the installation part of the back door window protector.
Table 1. Text in Illustration *1 Ceramic Notch Standard Dimension Area Dimension a 2.5 to 8.5 mm (0.098 to 0.334 in.) b 9 to 13 mm (0.354 to 0.511 in.) Tip:If primer is applied to an area that is not specified, wipe off the primer with a non-residue solvent before it dries.
-
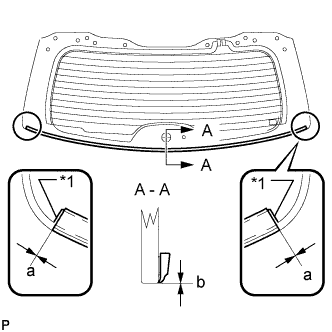
Install a new back door window protector onto the back door glass, as shown in the illustration.
Table 2. Text in Illustration *1 Ceramic Notch Standard Dimension Area Dimension a -3 to 3 mm (-0.118 to 0.118 in.) b -1 to 1.5mm (-0.039 to 0.059 in.) Note:
-
Allow the primer to dry for 3 minutes or more.
-
Throw away any leftover primer.
-
Do not apply too much primer.
-
-
- Click here
INSTALL BACK DOOR GLASS
-
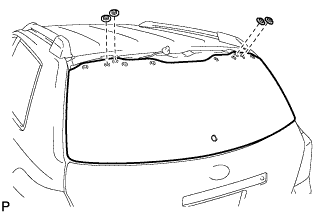
Install the back door glass with the 4 nuts.
8.0 N*m 82 kgf*cm 71 in.*lbf
-
- Click here
INSTALL BACK WINDOW STAY ASSEMBLY LH (for Glass Hatch Type)
Note:
-
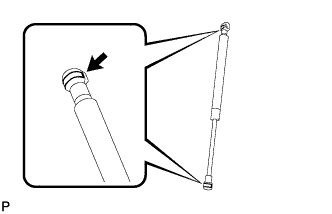
Avoid touching the piston rod as much as possible to prevent foreign matter from attaching to it. Be sure to hold the cylinders while servicing.
-
Do not wear cotton gloves or other similar materials when handling the piston rod. Fibers may attach to the piston rod and result in gas leaks.
-
Do not apply any horizontal load to the cylinders in the in order to prevent the piston rod from deforming.
-
When replacing the back window stay assembly with a new one:
-
Install the 2 stop rings to the back window stay assembly.
-
-
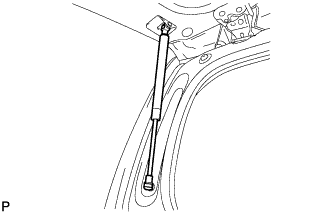
Install the back window stay assembly.
Note:Install the back door stay assembly while supporting the back door by hand.
-
Check that the hood support assembly is engaged in the ball joint and that the hood support assembly cannot be pulled out.
-
- Click here
INSTALL BACK WINDOW STAY ASSEMBLY RH (for Glass Hatch Type)
Tip:Use the same procedure for the RH side and the LH side.
- Click here
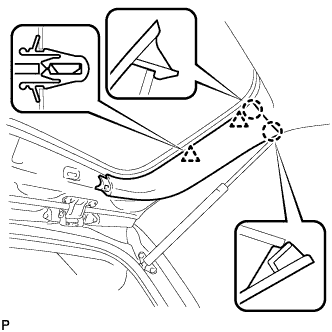
INSTALL REAR SPOILER SUB-ASSEMBLY
-
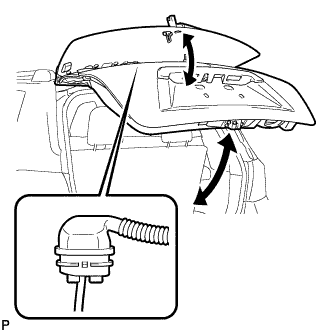
Raise and lower the glass hatch and the back door respectively. Pass the wire harness into the vehicle and temporarily install the rear spoiler sub-assembly.
-
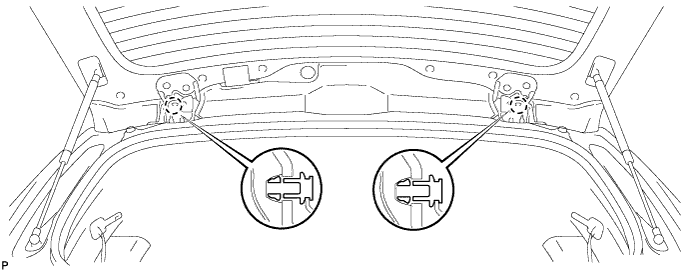
Engage the 2 claws.
-

Temporarily install the 8 screws.
-
Using a "TORX" socket wrench (T30), fully tighten the 6 screws (B).
5.0 N*m 51 kgf*cm 44 in.*lbf -
Using a "TORX" socket wrench (T30), fully tighten the 2 screws (A).
6.5 N*m 66 kgf*cm 58 in.*lbf -
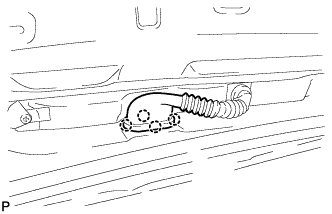
Connect the wire harness.
-

Connect the connector.
-
Engage the grommet.
-
Connect the rear washer hose.
-
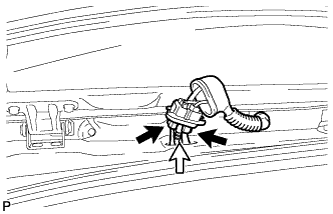
Connect the 2 connectors.
-
Install the wire harness grommet to the wire harness.
-
Engage the 4 claws and install the wire harness.
-
-
- Click here
INSTALL BACK DOOR GLASS GUIDE BRACKET SUB-ASSEMBLY (for Fixed Glass Type)
-
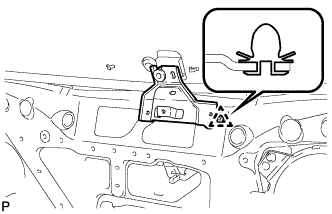
Engage the clip and install the back door glass guide bracket sub-assembly.
-
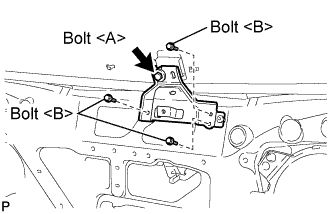
Install the 3 bolts <B>.
8.0 N*m 82 kgf*cm 71 in.*lbf -
Tighten the bolt <A>.
5.5 N*m 56 kgf*cm 49 in.*lbf
-
- Click here
INSTALL REAR WIPER MOTOR ASSEMBLY (for Fixed Glass Type)
-
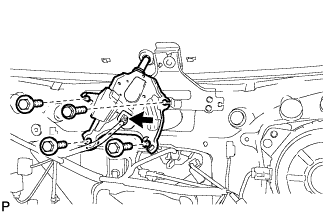
Install the rear wiper motor assembly with the 4 bolts.
5.5 N*m 56 kgf*cm 49 in.*lbf Note:Be careful not to scratch the back door glass.
-
Connect the connector.
-
- Click here
INSTALL REAR WIPER MOTOR ASSEMBLY (for Glass Hatch Type)
-
Temporarily install the rear wiper motor assembly with the 4 bolts and 2 nuts.
Note:
-
Do not hold the rear wiper motor assembly by the rear wiper link pivot.
-
Be careful not to scratch the back door glass.
-
Do not remove the centering jig before installing the rear wiper link pivot.
-
-
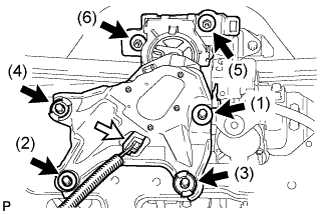
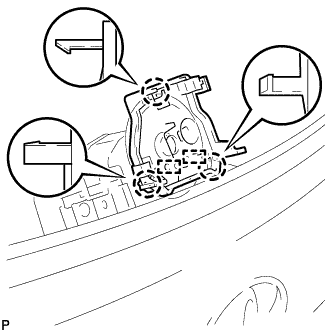
Tighten the 4 bolts and 2 nuts in the order shown in the illustration to install the rear wiper motor assembly.
Bolt 5.5 N*m 56 kgf*cm 49 in.*lbf Nut 8.0 N*m 82 kgf*cm 71 in.*lbf -
Connect the connector.
-
- Click here
INSTALL REAR WIPER MOTOR GROMMET (for Fixed Glass Type)
-
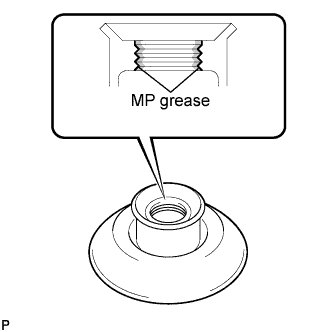
Apply MP grease to the entire surface of the wiper motor grommet lip.
Tip:Make sure that the hole does not clog with grease and the grooves on the lip are filled with grease.
-
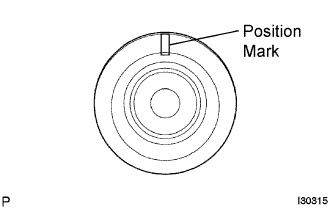
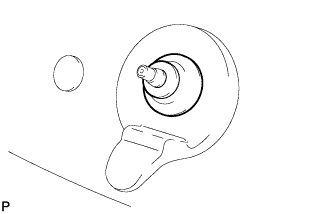
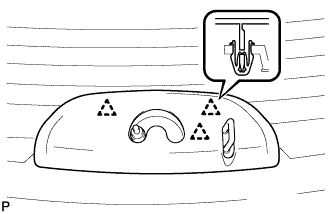
Install the rear wiper motor grommet.
Tip:As shown in the illustration, install the rear wiper motor grommet with its position mark at the top.
-
- Click here
INSTALL REAR WIPER LINK PIVOT (for Glass Hatch Type)
-
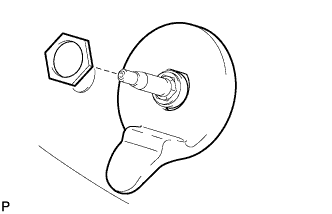
Install the rear wiper link pivot with the nut.
7.0 N*m 71 kgf*cm 62 in.*lbf -
Open the glass hatch.
-
Disengage the 2 guides.
-
Disengage the 3 claws and remove the centering jig.
-
Close the glass hatch.
-
- Click here
INSTALL REAR WIPER LINK CAP (for Glass Hatch Type)
-
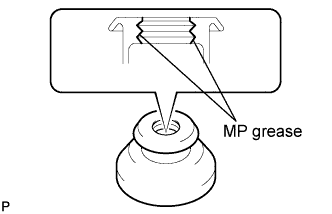
Apply MP grease to the entire surface of the rear wiper link cap.
Tip:Make sure that the hole does not get clogged with grease and the grooves on the lip are filled with grease.
-
Install the rear wiper link cap.
-
- Click here
INSTALL REAR WIPER ARM AND BLADE ASSEMBLY (for Fixed Glass Type)
-
Stop the wiper motor at the automatic stop position.
-
When reinstalling:
-
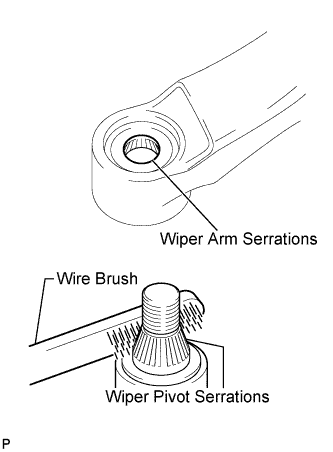
Clean the wiper arm serrations.
-
Clean the wiper pivot serrations with a wire brush.
-
-
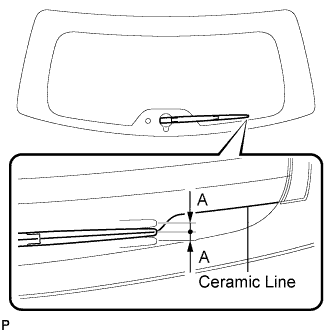
Place the rear wiper arm and blade assembly so that the rear wiper blade is aligned with the ceramic line.
Area Dimension A 10 mm (0.39 in.) -
Install the rear wiper arm and blade assembly with the nut.
5.5 N*m 56 kgf*cm 49 in.*lbf Tip:Hold down the wiper arm by hand when tightening the nut.
-
- Click here
INSTALL REAR WIPER ARM AND BLADE ASSEMBLY (for Glass Hatch Type)
-
Stop the wiper motor at the automatic stop position.
-
When reinstalling:
-
Clean the wiper arm serrations.
-
Clean the wiper pivot serrations with a wire brush.
-
-
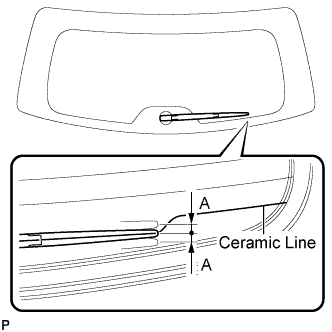
Place the rear wiper arm and blade assembly so that the rear wiper blade is aligned with the ceramic line.
Area Dimension A 10 mm (0.39 in.) -
Install the rear wiper arm and blade assembly with the nut.
5.5 N*m 56 kgf*cm 49 in.*lbf Tip:Hold down the wiper arm by hand when tightening the nut.
-
- Click here
INSTALL REAR WIPER ARM HEAD CAP
-
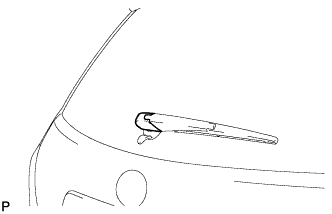
Install the rear wiper arm head cap.
Tip:Push down on the cap until a click sound can be heard.
-
- Click here
INSTALL REAR WIPER SHAFT COVER (for Glass Hatch Type)
-
Open the glass hatch.
-
Engage the 3 clips and install the rear wiper shaft cover.
-
Operate the rear wiper while spraying washer fluid on the glass. Make sure that the rear wiper functions properly and there is no interference with the vehicle body.
-
- Click here
INSTALL BACK DOOR TRIM PANEL ASSEMBLY
-
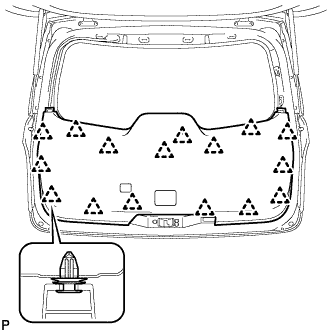
Engage the 16 clips and install the back door trim panel assembly.
-
- Click here
INSTALL ASSIST STRAP ASSEMBLY
-
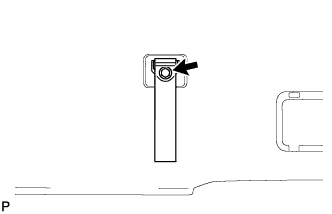
Install the assist strap assembly with the bolt.
-
- Click here
INSTALL ASSIST STRAP HOLE COVER
-

Engage the 2 guides and 2 claws, and install the assist strap hole cover.
-
- Click here
INSTALL BACK DOOR LOCK COVER (for Glass Hatch Type)
-

Engage the 4 guides and 2 claws, and install the back door lock cover.
-
- Click here
INSTALL BACK DOOR TRIM COVER LH (w/o Power Back Door)
-

Engage the 2 clips and 2 claws, and install the back door trim cover LH.
-
- Click here
INSTALL BACK DOOR TRIM COVER LH (w/ Power Back Door)
-
Engage the 2 clips and 2 claws, and install the back door trim cover LH.
-
- Click here
CONNECT POWER BACK DOOR ROD (w/ Power Back Door)
-

Install the back door stay plate and connect the power back door rod.
18 N*m 184 kgf*cm 13 ft.*lbf
-
- Click here
INSTALL BACK DOOR SERVICE HOLE COVER LH (w/ Power Back Door)
-
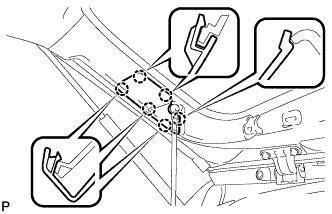
Engage the 6 claws and install the back door service hole cover LH.
-
- Click here
INSTALL BACK DOOR TRIM COVER RH
-
Engage the 2 clips and 2 claws, and install the back door trim cover RH.
-
- Click here
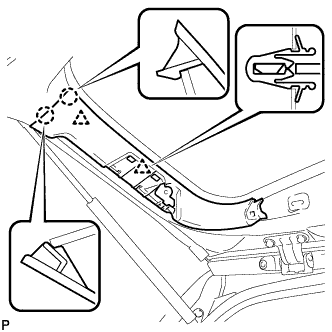
INSTALL BACK WINDOW UPPER TRIM PANEL ASSEMBLY
-
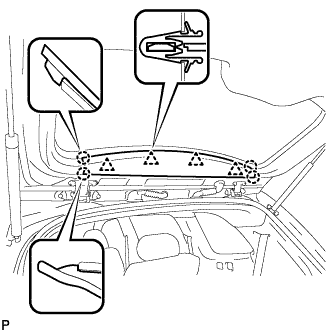
Engage the 4 clips and 4 claws, and install the back window upper trim panel assembly.
-