CLOCK (w/ Multi-information Display) INSTALLATION
-
INSTALL MULTI INFORMATION DISPLAY CLOCK ASSEMBLY
-
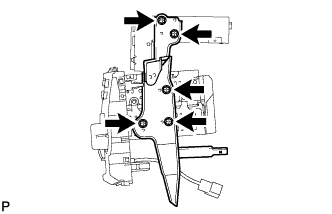
INSTALL NO. 2 RADIO BRACKET (w/o Navigation System)
-
Install the No. 2 radio bracket with the 5 screws.
-
-
INSTALL NO. 2 RADIO RECEIVER BRACKET (w/ Navigation System)
-
Install the No. 2 radio bracket with the 6 screws.
-
-
INSTALL NO. 2 RADIO BRACKET (w/o Radio Receiver)
-
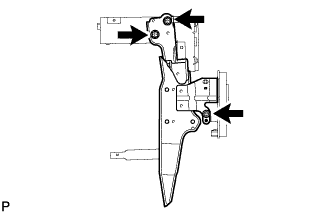
Install the No. 2 radio bracket with the 3 screws.
-
-
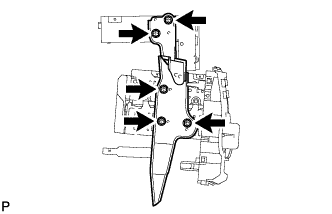
INSTALL NO. 1 RADIO BRACKET (w/o Navigation System)
-
Install the No. 1 radio bracket with the 5 screws.
-
Engage the claw and install the connector.
-
-
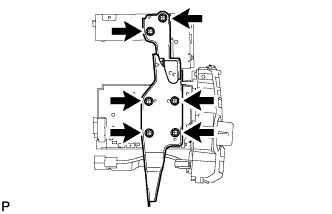
INSTALL NO. 1 RADIO RECEIVER BRACKET (w/ Navigation System)
-
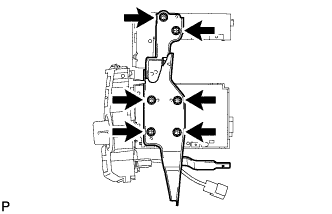
Install the No. 1 radio bracket with the 6 screws.
-
Engage the claw and connect the connector.
-
-
INSTALL NO. 1 RADIO BRACKET (w/o Radio Receiver)
-

Install the No. 1 radio bracket with the 6 screws.
-
-
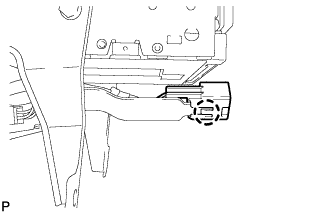
INSTALL RADIO RECEIVER ASSEMBLY WITH BRACKET (w/o Navigation System)
-
Connect each connector.
-
Engage the 4 clips.
-
Install the radio receiver assembly with bracket with the 4 bolts.
-
-
INSTALL NAVIGATION RECEIVER ASSEMBLY WITH BRACKET (w/ Navigation System)
-
Connect each connector.
-
Engage the 4 clips.
-
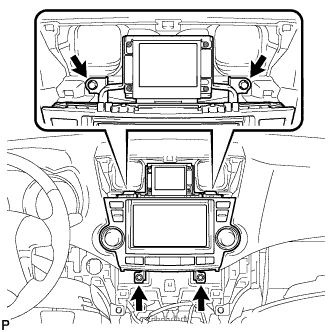
Install the navigation receiver assembly with bracket with the 4 bolts.
-
-
INSTALL INTEGRATION CONTROL AND PANEL ASSEMBLY WITH BRACKET (w/o Radio Receiver)
-
Connect each connector.
-
Engage the 4 clips.
-
Install the integration control and panel assembly with bracket with the 4 bolts <D>.
-
-
INSTALL HEATER CONTROL AND ACCESSORY ASSEMBLY (for Manual Air Conditioning System)
-
Connect the connector.
-

Engage the 4 clips and install the heater control and accessory assembly.
-
-
INSTALL AIR CONDITIONING CONTROL ASSEMBLY (for Automatic Air Conditioning System)
-
Connect the connector.
-
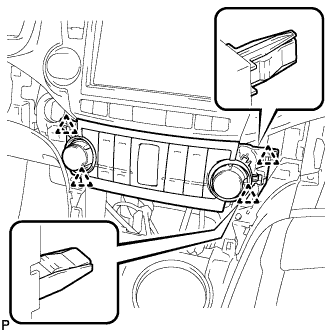
Engage the 4 clips and install the air conditioning control assembly.
-
-
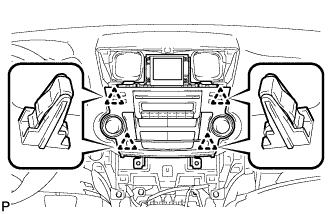
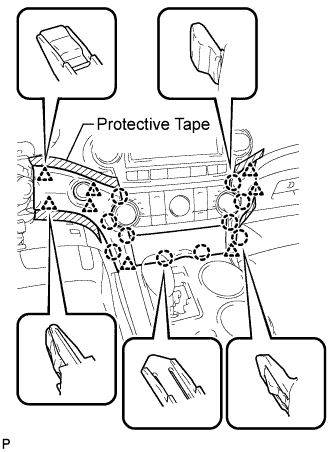
INSTALL CENTER INSTRUMENT CLUSTER FINISH PANEL ASSEMBLY (w/o Smart Entry and Start System)
-

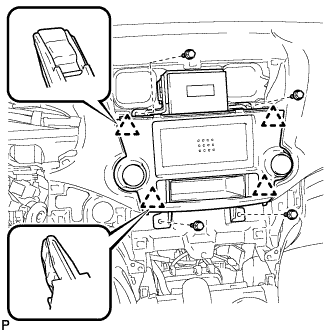
Apply protective tape to the areas shown in the illustration.
-
Connect each connector.
-
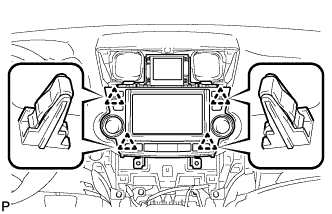
Engage the 10 claws and 8 clips, and install the center instrument cluster finish panel assembly.
Note
Do not the damage the instrument panel safety pad assembly and lower instrument panel finish panel sub-assembly.
-
-
INSTALL CENTER INSTRUMENT CLUSTER FINISH PANEL ASSEMBLY (w/ Smart Entry and Start System)
-
Apply protective tape to the areas shown in the illustration.
-
Connect each connector.
-
Engage the 10 claws and 8 clips, and install the center instrument cluster finish panel assembly.
Note
Do not the damage the instrument panel safety pad assembly and lower instrument panel finish panel sub-assembly.
-
-
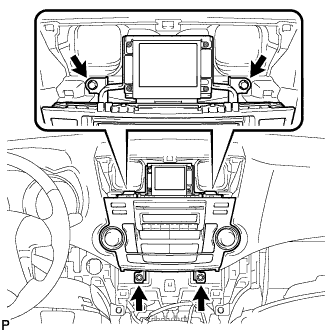
INSTALL CENTER INSTRUMENT PANEL REGISTER ASSEMBLY
-
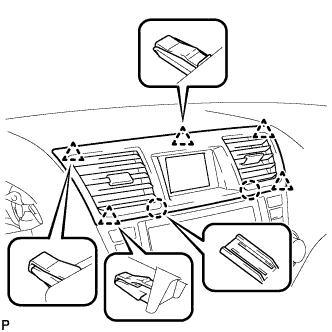
Engage the 2 claws and 5 clips, and install the center instrument panel register assembly.
-