| DTC Code | DTC Name |
|---|---|
| Audio cannot be Recorded to HDD |
DESCRIPTION
The HDD is compliant with the Serial Copy Management System (SCMS). Therefore, recording from a CD-R that is a copy of a commercially published music CD is not possible.
INSPECTION PROCEDURE
PROCEDURE
- Click here
CHECK SOUND LIBRARY SETTING OF HDD ON SOUND LIBRARY INFORMATION SCREEN
-
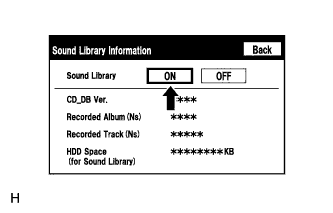
Enter the "Sound Library Information" screen. Refer to Check Sound Library Setting in Operation Check (Click here).
-
Select "ON" for the "Sound Library" setting.
-
Check if recording is possible.
OK Malfunction disappears.
- OKClick here
- NGClick here
-
- Click here
END
- Click here
CHECK FREE SPACE IN HDD
-
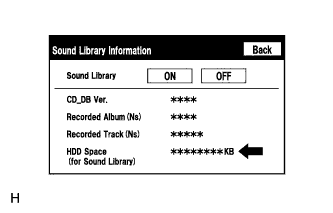
Enter the "Sound Library Information" screen. Refer to Check Sound Library Setting in Operation Check (Click here).
-
Check free space in HDD from the sound library setting screen.
Result Result Proceed to Insufficient space in HDD A Sufficient space in HDD B
-
- Click here
DELETE UNNECESSARY DATA FROM HDD
- Click here
CHECK IF AUDIO POWER IS ON
-
Check if the audio power is on.
Tip:When the audio is off, audio recording is not possible.
OK Audio power is on.
- OKClick here
- NGClick here
-
- Click here
TURN AUDIO ON
- Click here
CHECK IF RECORDING SETTING IS SET TO AUTO
-
Check if the recording setting is set to AUTO.
Tip:When the recording setting is set to manual, recording does not start automatically after a CD is inserted.
OK Recording setting is set to AUTO.
- OKClick here
- NGClick here
-
- Click here
CHANGE RECORDING SETTING TO AUTO
- Click here
CHECK CD
-
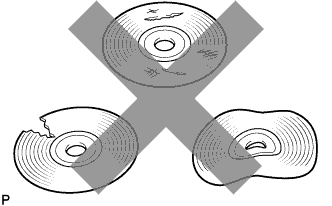
Check that the disc is not deformed or cracked.
OK No deformation or cracks on the CD
- OKClick here
- NGClick here
-
- Click here
CLEAN CD AND RECHECK CD
-
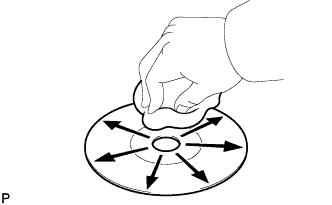
Check the disc by wiping it clean with a soft cloth from the inside to the outside in a radial direction.
OK Malfunction disappears. Note:Do not use a conventional record cleaner or anti-static preservative.
- OKClick here
- NGClick here
-
- Click here
END
- Click here
CHECK USING ANOTHER VEHICLE WITH HDD NAVIGATION SYSTEM
-
Check if the CD plays normally using another vehicle with the HDD navigation system.
OK Malfunction disappears.
- OKClick here
- NGClick here
-
- Click here
CD WAS FAULTY
- Click here
CHANGE CD
- Click here
PROCEED TO NEXT SUSPECTED AREA SHOWN IN PROBLEM SYMPTOMS TABLEClick here