- Click here
REMOVE INSTRUMENT PANEL SAFETY PAD ASSEMBLY
- Click here
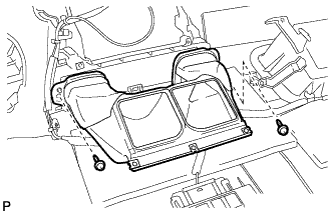
REMOVE NO. 1 HEATER TO REGISTER DUCT
-
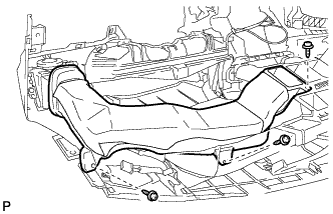
Remove the 3 screws <E> and the No. 1 heater to register duct.
-
- Click here
REMOVE NO. 4 HEATER TO REGISTER DUCT
-
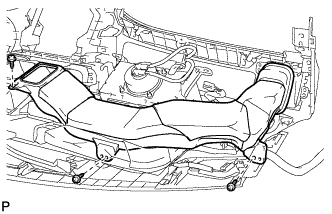
Remove the 3 screws <E> and the No. 4 heater to register duct.
-
- Click here
REMOVE SIDE NO. 1 DEFROSTER NOZZLE DUCT
-
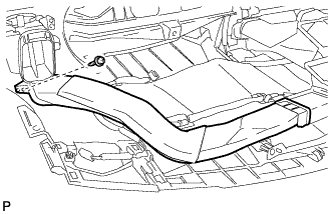
Remove the screw <E> and the side No. 1 defroster nozzle duct.
-
- Click here
REMOVE SIDE NO. 2 DEFROSTER NOZZLE DUCT
-
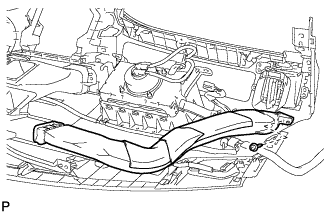
Remove the screw <E> and the side No. 2 defroster nozzle duct.
-
- Click here
REMOVE DEFROSTER NOZZLE ASSEMBLY
-
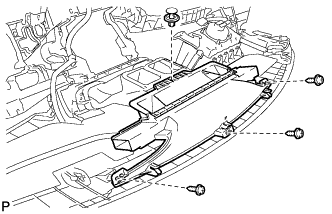
Remove the clip.
-
Remove the 3 screws <E> and the defroster nozzle assembly.
-
- Click here
REMOVE CENTER HEATER TO REGISTER SUB DUCT
-
Remove the 2 screws <E> and the center heater to register sub duct.
-
- Click here
REMOVE NAVIGATION ANTENNA ASSEMBLY (w/ Navigation System)
-
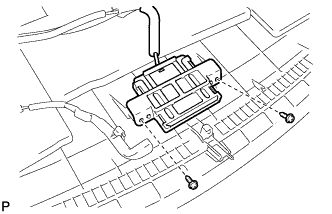
Remove the 2 screws and separate the navigation antenna assembly.
-
Disengage the 3 clamps and remove the navigation antenna assembly.
-
- Click here
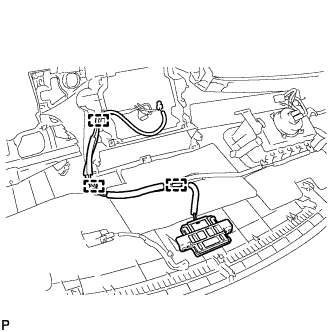
REMOVE ANTENNA CORD SUB-ASSEMBLY
-
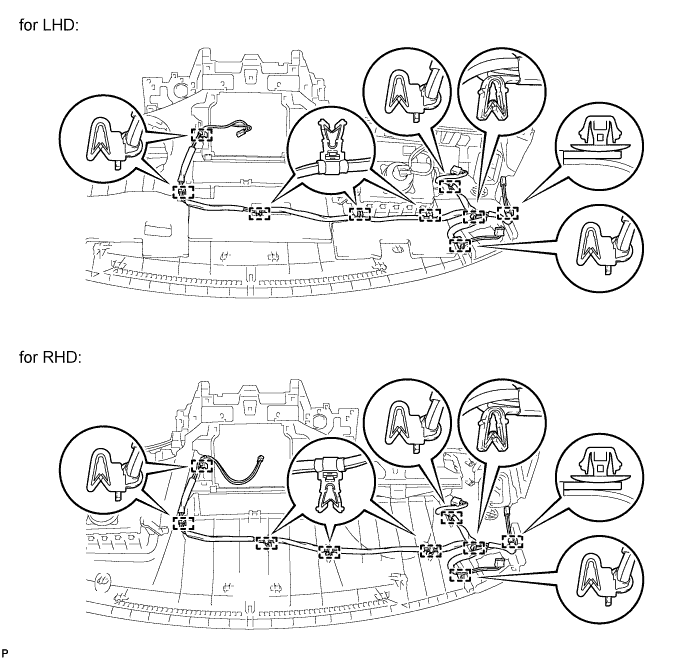
Disengage the 9 clamps and remove the antenna cord sub-assembly.
-
- Click here
REMOVE ROOF HEADLINING ASSEMBLY
- Click here
REMOVE NO. 2 ANTENNA CORD SUB-ASSEMBLY
-
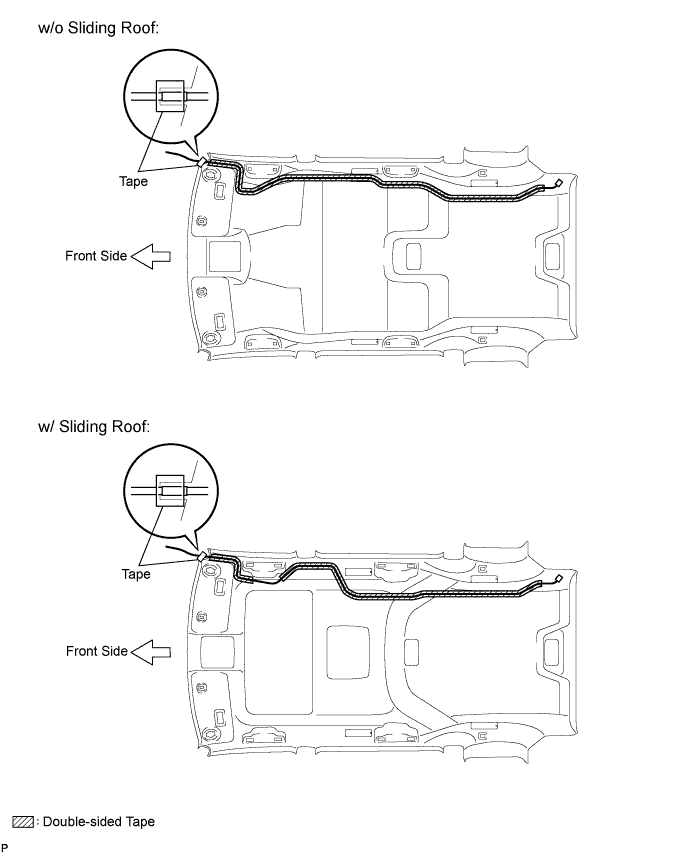
Peel the strips of the tape used to secure the antenna cord only to the extent that allows removal of the antenna cord.
Tip:Tape is not available as a supply part. Try to leave as much tape as possible on the roof headlining so that the tape can be reused.
-
Remove the No. 2 antenna cord sub-assembly from the roof headlining.
-