FRONT DOOR SPEAKER INSTALLATION
-
INSTALL FRONT NO. 1 SPEAKER ASSEMBLY
-
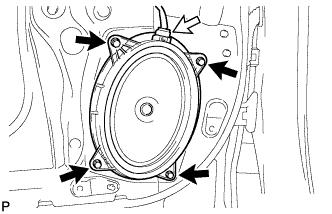
Install the front No. 1 speaker assembly with the 4 bolts.
Note
Do not touch the cone part of the speaker.
-
Connect the connector.
-
-
INSTALL FRONT DOOR TRIM BOARD SUB-ASSEMBLY
-
Connect the connector.
-
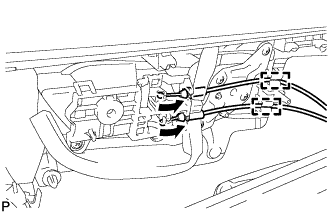
Connect the front door lock remote control cable and front door inside locking cable to the front door inside handle sub-assembly.
-
Engage the 2 clamps.
-
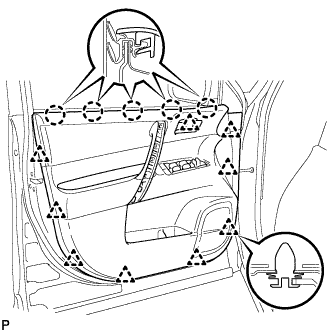
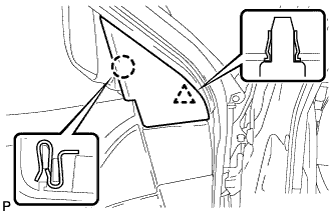
Engage the front door trim board with the 5 claws on the front door inner glass weatherstrip.
-
Engage the 9 clips.
-
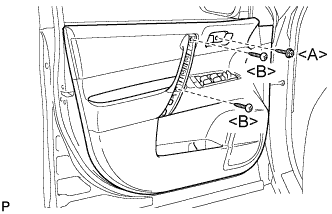
Install the 2 screws <B>.
-
Install the screw <A> and front door trim board to the front door panel.
- Torque:
- 3.5 N*m { 36 kgf*cm, 31 in.*lbf }
-
-
INSTALL COURTESY LIGHT ASSEMBLY
-
Connect the connector.
-
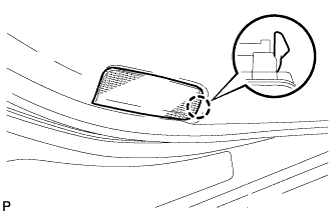
Engage the claw and install the courtesy light assembly.
-
-
INSTALL ASSIST GRIP COVER
-
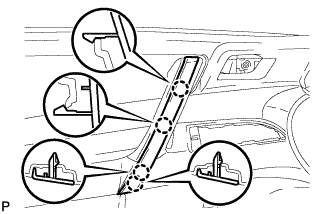
Engage the 4 claws and install the assist grip cover.
-
-
INSTALL FRONT ARMREST UPPER BASE PANEL
-
Connect the connector.
-
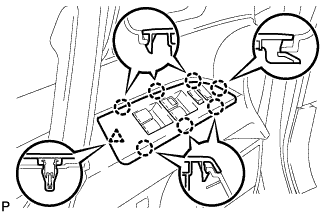
Engage the 7 claws and clip and install the front armrest upper base panel.
-
-
INSTALL FRONT DOOR INSIDE HANDLE BEZEL PLUG
-
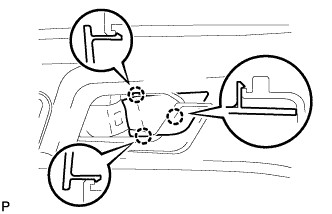
Engage the 3 claws and install the front door inside handle bezel plug.
-
-
INSTALL FRONT DOOR LOWER FRAME BRACKET GARNISH
-
Engage the clip and claw, and install the front door lower frame bracket garnish.
-