- Click here
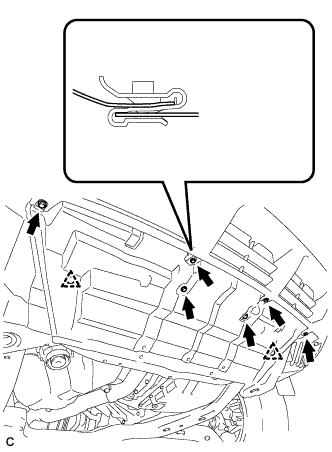
REMOVE ENGINE UNDER COVER ASSEMBLY
-

Remove the 2 bolts and engine under cover assembly RR.
-

Remove the 2 bolts, 2 screws, 5 clips and engine under cover assembly.
-
- Click here
REMOVE NO. 1 ENGINE UNDER COVER
-
Remove the 6 bolts, 2 clips and No. 1 engine under cover.
-
- Click here
REMOVE COOL AIR INTAKE DUCT SEAL
-
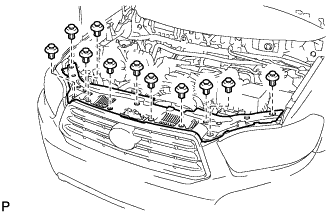
Remove the 11 clips and cool air intake duct seal.
-
- Click here
REMOVE RADIATOR GRILLE
-
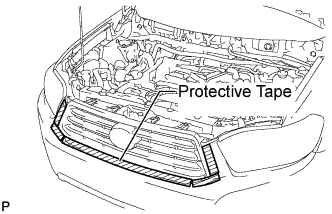
Put protective tape around the radiator grille.
-

Remove the 2 bolts and 4 clips.
-
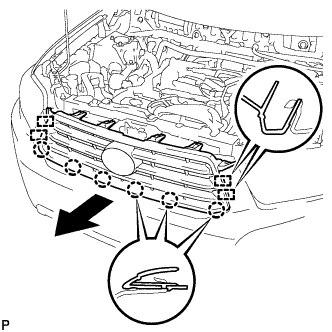
Disengage the 6 claws and 4 guides, and remove the radiator grille.
-
- Click here
REMOVE FRONT BUMPER ASSEMBLY (w/o Fog Light)
-
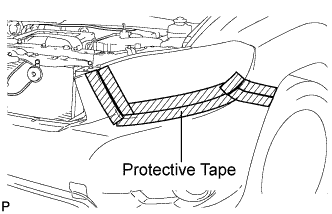
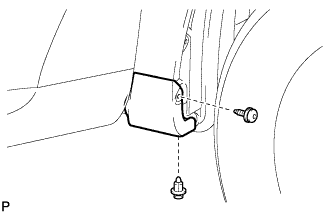
Put protective tape around the front bumper assembly.
Tip:Use the same procedure for the RH side and LH side.
-
Remove the screw.
Tip:Use the same procedure for the RH side and LH side.
-
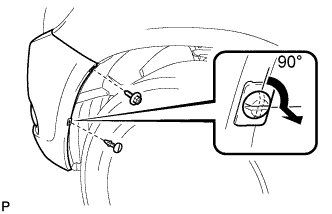
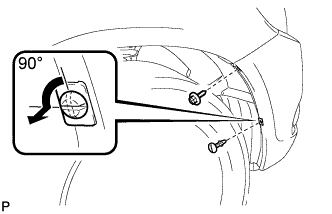
Using a screwdriver, turn the pin 90 degrees and remove the pin hold clip.
Tip:Use the same procedure for the RH side and LH side.
-
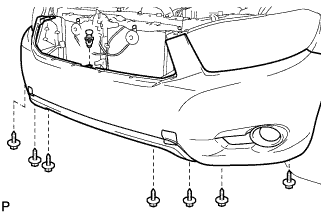
Remove the 7 screws and clip.
-
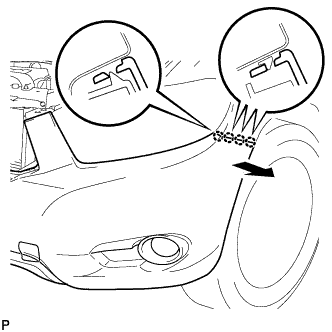
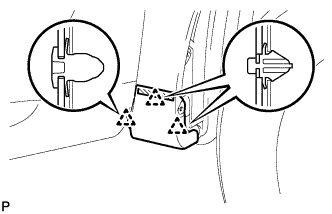
Disengage the 4 claws and disconnect the front bumper assembly.
Tip:Use the same procedure for the RH side and LH side.
-
Remove the front bumper assembly.
-
- Click here
REMOVE FRONT BUMPER ASSEMBLY (w/ Fog Light)
-
Put protective tape around the front bumper assembly.
Tip:Use the same procedure for the RH side and LH side.
-
Remove the screw.
Tip:Use the same procedure for the RH side and LH side.
-
Using a screwdriver, turn the pin 90 degrees and remove the pin hold clip.
Tip:Use the same procedure for the RH side and LH side.
-
Remove the 7 screws and clip.
-
Disengage the 4 claws and disconnect the front bumper assembly.
Tip:Use the same procedure for the RH side and LH side.
-
Disconnect each fog light connector, and then remove the front bumper assembly.
-
- Click here
REMOVE FRONT FENDER MOULDING SUB-ASSEMBLY RH
-
Remove the clip.
-
Using a 4 mm hexagon wrench, remove the screw.
-
Peel off the front fender side protector and disengage the 3 clips, and then remove the front fender moulding sub-assembly RH.
-
Remove the pad from the front fender moulding sub-assembly RH.
-
Remove the 2 clips No. 4 from the front fender moulding sub-assembly RH.
-

Remove the front fender side protector from the front fender moulding sub-assembly RH.
-
- Click here
REMOVE FRONT FENDER LINER RH
-
Remove the screw.
-
Using a screwdriver, turn the pin 90 degrees and remove the pin hold clip.
-
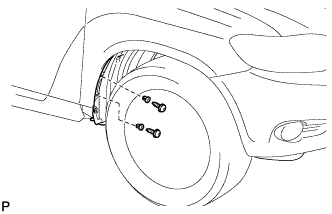
Using a 4 mm hexagon wrench, remove the 2 screws.
-
Remove the 2 grommets.
Tip:The grommets need to be replaced with new ones because they will break when they are removed.
-
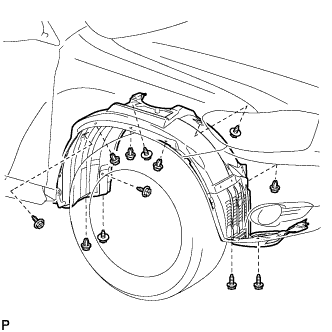
Remove the 5 clips, 7 screws and front fender liner RH.
-
- Click here
DRAIN WASHER FLUID
-
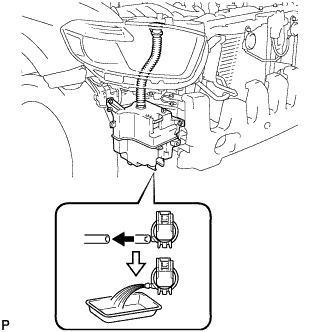
Disconnect the washer hose from the front washer motor and pump assembly, and drain the washer fluid.
-
- Click here
REMOVE LEVEL WARNING SWITCH ASSEMBLY
-

Disconnect the connector.
-
Remove the level warning switch assembly.
-