-
Use the same procedure for the RH side and LH side.
-
The procedures listed below are for the LH side.
- Click here
PRECAUTION
CAUTION:Be sure to read "PRECAUTION" thoroughly before servicing (Click here).
- Click here
DISCONNECT CABLE FROM NEGATIVE BATTERY TERMINAL
CAUTION:Wait for at least 90 seconds after disconnecting the cable to prevent airbag deployment.
Note:When disconnecting the cable, some systems need to be initialized after the cable is reconnected (See PageClick here).
- Click here
REMOVE COOL AIR INTAKE DUCT SEAL
-
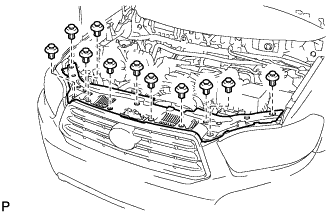
Remove the 11 clips and cool air intake duct seal.
-
- Click here
REMOVE RADIATOR GRILLE
-
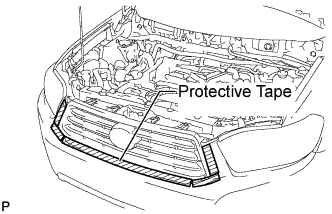
Put protective tape around the radiator grille.
-

Remove the 2 bolts and 4 clips.
-
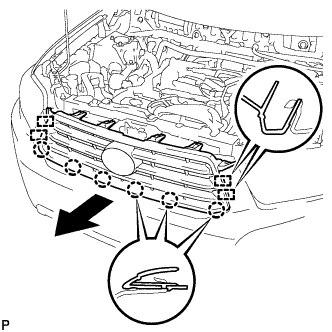
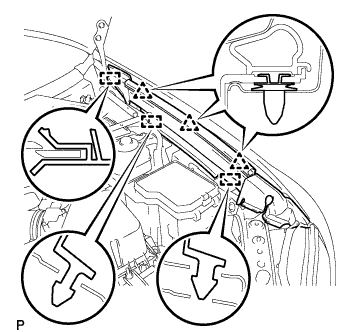
Disengage the 6 claws and 4 guides, and remove the radiator grille.
-
- Click here
REMOVE FRONT BUMPER ASSEMBLY (w/o Fog Light)
-
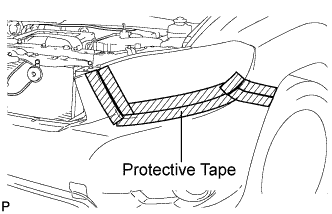
Put protective tape around the front bumper assembly.
Tip:Use the same procedure for the RH side and LH side.
-
Remove the screw.
Tip:Use the same procedure for the RH side and LH side.
-
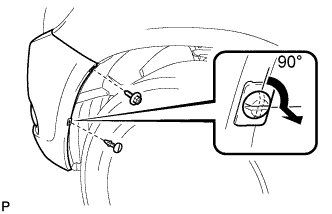
Using a screwdriver, turn the pin 90 degrees and remove the pin hold clip.
Tip:Use the same procedure for the RH side and LH side.
-
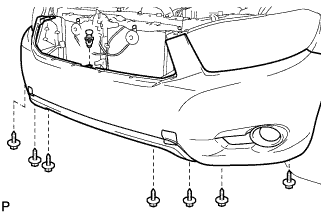
Remove the 7 screws and clip.
-
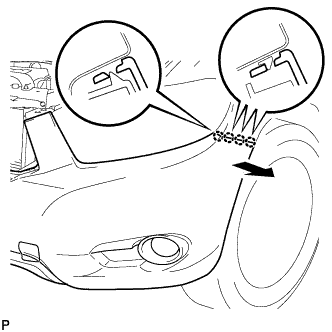
Disengage the 4 claws and disconnect the front bumper assembly.
Tip:Use the same procedure for the RH side and LH side.
-
Remove the front bumper assembly.
-
- Click here
REMOVE FRONT BUMPER ASSEMBLY (w/ Fog Light)
-
Put protective tape around the front bumper assembly.
Tip:Use the same procedure for the RH side and LH side.
-
Remove the screw.
Tip:Use the same procedure for the RH side and LH side.
-
Using a screwdriver, turn the pin 90 degrees and remove the pin hold clip.
Tip:Use the same procedure for the RH side and LH side.
-
Remove the 7 screws and clip.
-
Disengage the 4 claws and disconnect the front bumper assembly.
Tip:Use the same procedure for the RH side and LH side.
-
Disconnect each fog light connector, and then remove the front bumper assembly.
-
- Click here
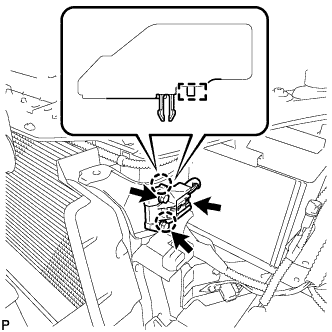
REMOVE REAR FENDER SPLASH SHIELD SUB-ASSEMBLY
-
Disengage the 3 clips and 3 guides, and remove the rear fender splash shield sub-assembly.
-
- Click here
REMOVE HEADLIGHT ASSEMBLY
-
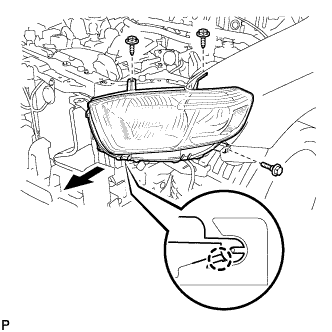
Remove the bolt and 2 screws.
-
Disengage the claw and disconnect the headlight assembly.
-
Disengage the clamp.
-
Disconnect the connectors and remove the headlight assembly.
-
- Click here
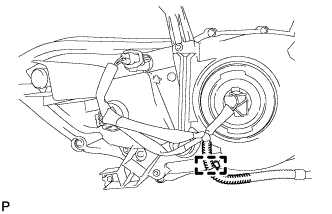
REMOVE FRONT AIRBAG SENSOR
-
Disconnect the connector from the front airbag sensor.
Note:When handling the airbag connector, take care not to damage the airbag wire harness.
-
Remove the 2 bolts.
Note:Loosen the bolt while holding the front airbag sensor because the front airbag sensor claws and pin (stopper) are easily damaged.
-
Disengage the 2 claws and pin, and remove the front airbag sensor from the body.
-