FRONT AIRBAG SENSOR REMOVAL
Tech Tips
-
Use the same procedure for the RH side and LH side.
-
The procedures listed below are for the LH side.
-
PRECAUTION
CAUTION:
Be sure to read "PRECAUTION" thoroughly before servicing Click here.
-
DISCONNECT CABLE FROM NEGATIVE BATTERY TERMINAL
CAUTION:
Wait for at least 90 seconds after disconnecting the cable to prevent airbag deployment.
Note
When disconnecting the cable, some systems need to be initialized after the cable is reconnected Click here.
-
REMOVE COOL AIR INTAKE DUCT SEAL
-
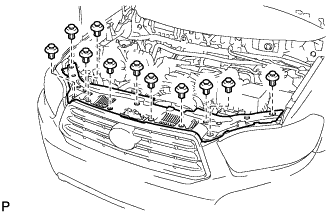
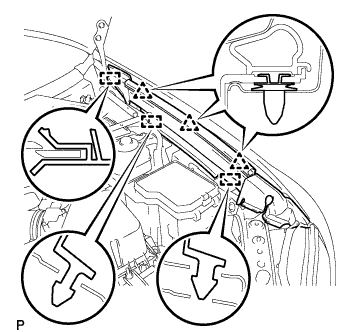
Remove the 11 clips and cool air intake duct seal.
-
-
REMOVE RADIATOR GRILLE
-
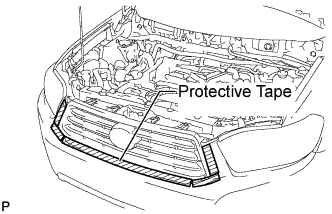
Put protective tape around the radiator grille.
-

Remove the 2 bolts and 4 clips.
-
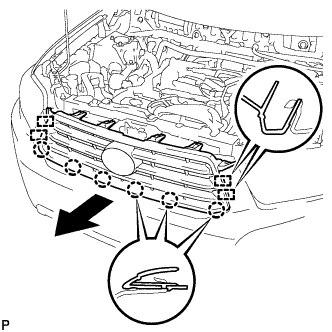
Disengage the 6 claws and 4 guides, and remove the radiator grille.
-
-
REMOVE FRONT BUMPER ASSEMBLY (w/o Fog Light)
-
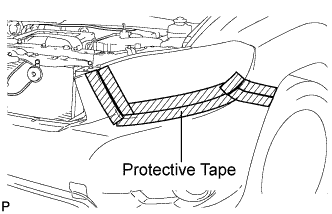
Put protective tape around the front bumper assembly.
Tech Tips
Use the same procedure for the RH side and LH side.
-
Remove the screw.
Tech Tips
Use the same procedure for the RH side and LH side.
-
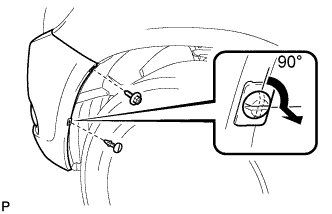
Using a screwdriver, turn the pin 90 degrees and remove the pin hold clip.
Tech Tips
Use the same procedure for the RH side and LH side.
-
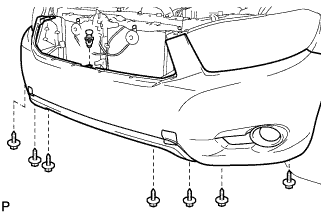
Remove the 7 screws and clip.
-
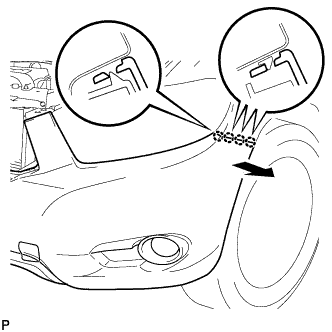
Disengage the 4 claws and disconnect the front bumper assembly.
Tech Tips
Use the same procedure for the RH side and LH side.
-
Remove the front bumper assembly.
-
-
REMOVE FRONT BUMPER ASSEMBLY (w/ Fog Light)
-
Put protective tape around the front bumper assembly.
Tech Tips
Use the same procedure for the RH side and LH side.
-
Remove the screw.
Tech Tips
Use the same procedure for the RH side and LH side.
-
Using a screwdriver, turn the pin 90 degrees and remove the pin hold clip.
Tech Tips
Use the same procedure for the RH side and LH side.
-
Remove the 7 screws and clip.
-
Disengage the 4 claws and disconnect the front bumper assembly.
Tech Tips
Use the same procedure for the RH side and LH side.
-
Disconnect each fog light connector, and then remove the front bumper assembly.
-
-
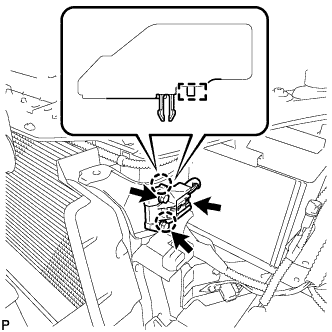
REMOVE REAR FENDER SPLASH SHIELD SUB-ASSEMBLY
-
Disengage the 3 clips and 3 guides, and remove the rear fender splash shield sub-assembly.
-
-
REMOVE HEADLIGHT ASSEMBLY
-
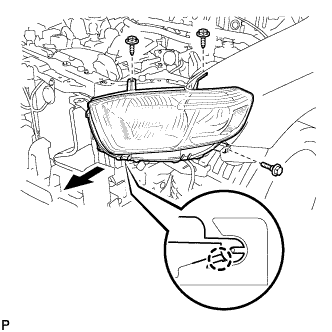
Remove the bolt and 2 screws.
-
Disengage the claw and disconnect the headlight assembly.
-
Disengage the clamp.
-
Disconnect the connectors and remove the headlight assembly.
-
-
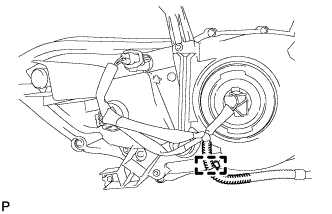
REMOVE FRONT AIRBAG SENSOR
-
Disconnect the connector from the front airbag sensor.
Note
When handling the airbag connector, take care not to damage the airbag wire harness.
-
Remove the 2 bolts.
Note
Loosen the bolt while holding the front airbag sensor because the front airbag sensor claws and pin (stopper) are easily damaged.
-
Disengage the 2 claws and pin, and remove the front airbag sensor from the body.
-