- Click here
REMOVE FRONT DOOR SCUFF PLATE RH
Tip:Use the same procedure for the RH side and the LH side.
- Click here
REMOVE COWL SIDE TRIM SUB-ASSEMBLY RH
Tip:Use the same procedure for the RH side and the LH side.
- Click here
REMOVE NO. 2 INSTRUMENT PANEL UNDER COVER SUB-ASSEMBLY
-
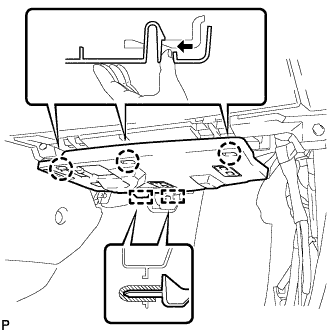
Disengage the 3 claws.
-
Disengage the 2 guides and remove the No. 2 instrument panel under cover sub-assembly.
-
- Click here
REMOVE LOWER INSTRUMENT PANEL SUB-ASSEMBLY
-
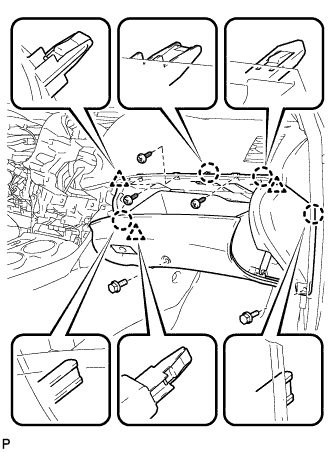
Remove the 2 bolts <B> and 3 screws <F>.
-
Disengage the 4 claws and 3 clips.
-
Disconnect each connector and clamp, and remove the lower instrument panel sub-assembly.
-
- Click here
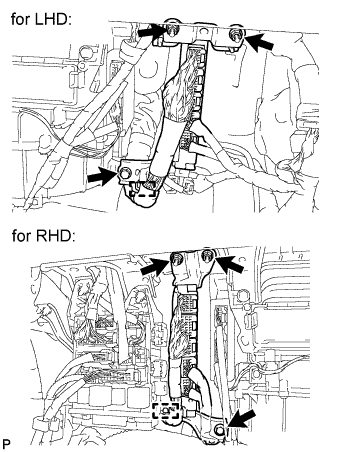
REMOVE ECM (for RHD)
-
Separate the harness connector (LHD).
-
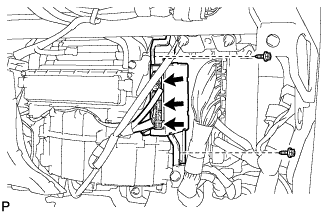
Disconnect the 5 ECM connectors.
-
Remove the wire harness clamp.
-
Remove the 2 nuts, bolt and ECM.
-
- Click here
REMOVE AIR CONDITIONING AMPLIFIER ASSEMBLY
-
Disconnect each connector.
-
Remove the 2 screws and the air conditioning amplifier assembly.
-