REAR SUNSHADE ASSEMBLY INSPECTION

-
INSPECT REAR SUNSHADE ASSEMBLY
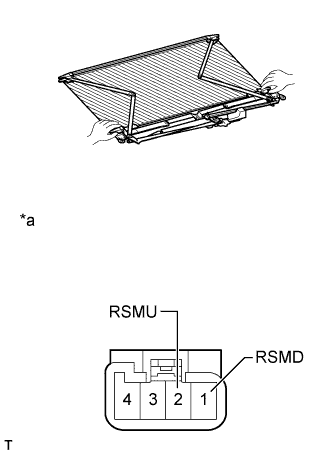
Text in Illustration *a Component without Harness connected
(Rear Sunshade Assembly)
-
Hold the edges of the rear sunshade assembly with your hands as shown in the illustration.
-
Apply battery voltage to the rear sunshade motor and check the operation of the rear sunshade assembly.
OK Measurement Condition Specified Condition Battery positive (+) - 2 (RSMU)
Battery negative (-) - 1 (RSMD)
Rear sunshade raises Battery positive (+) - 1 (RSMU)
Battery negative (-) - 2 (RSMD)
Rear sunshade lowers Tech Tips
To prevent the motor from burning out, stop operation as soon as the rear sunshade is fully raised or lowered.
CAUTION:
Be careful when the rear sunshade raises and lowers. Something could get caught in the rear sunshade and cause an injury.
-
-
INSPECT INTEGRATION CONTROL AND PANEL ASSEMBLY
-
Remove the integration control and panel assembly Click here.
-
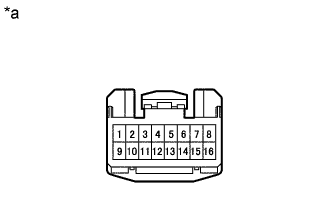
Text in Illustration *a Component without Harness connected
(Integration Control and Panel)
Measure the resistance according to the value(s) in the table below.
Standard resistance Tester Connection Switch Condition Specified Condition 3 - 9 Rear sunshade switch is pushed Below 200 Ω Rear sunshade switch is not pushed 10 kΩ or higher If the result is not as specified, replace the integration control and panel assembly.
-