ROCKER PANEL MOULDING REMOVAL

Tech Tips
-
Use the same procedure for the RH side and LH side.
-
The procedure listed below is for the LH side.
-
REMOVE FRONT FENDER MOULDING SUB-ASSEMBLY LH
-
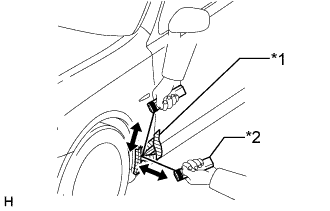
Text in Illustration *1 Protective Tape *2 Wooden Block Put protective tape around the front fender moulding.
-
Insert a piano wire between the vehicle body and front fender moulding sub-assembly LH.
-
Tie objects that can serve as handles (for example, wooden blocks) to both wire ends.
-
Pull the piano wire and scrape off the double-sided tape that holds the front fender moulding sub-assembly LH to the vehicle body.
-
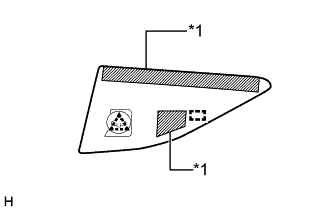
Text in Illustration *1 Double-sided Tape Detach the clip and guide and remove the front fender moulding sub-assembly LH.
Note
Be careful not to damage the vehicle body.
-
-
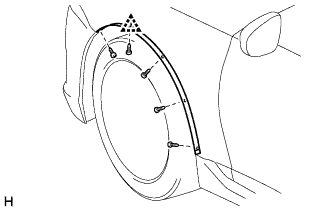
REMOVE FRONT FENDER WHEEL OPENING MOULDING LH
-
Remove the 5 screws.
-
Detach the clip and remove the moulding.
-
-
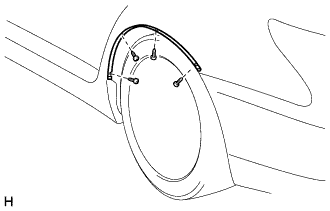
REMOVE QUARTER PANEL WHEEL OPENING MOULDING LH
-
Remove the 4 screws and moulding.
-
-
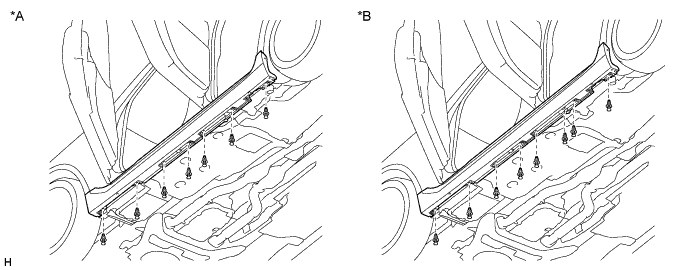
REMOVE NO. 6 ROCKER PANEL MOULDING PROTECTOR
-
Using a clip remover, remove the clip.
-
Remove the 2 screws and No. 6 rocker panel moulding protector.
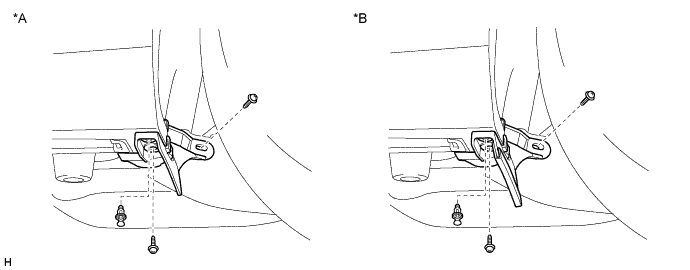
Text in Illustration *A for 2WD *B for AWD
-
-
REMOVE FRONT DOOR NO. 3 WEATHERSTRIP LH
-
Fully open the front door and rear door.
-
for Standard Body:
Detach the 12 clips and remove the front door No. 3 weatherstrip LH.
-
for Long Body:
Detach the 13 clips and remove the front door No. 3 weatherstrip LH.
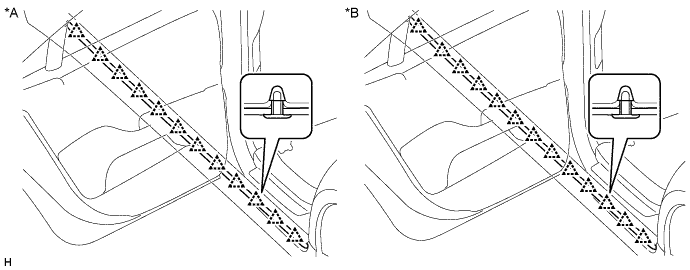
Text in Illustration *A for Standard Body *B for Long Body
-
-
REMOVE ROCKER PANEL MOULDING LH
-
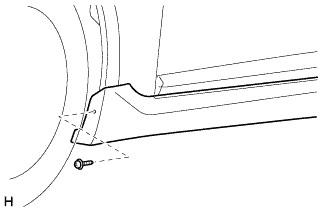
Remove the screw on the front side.
-
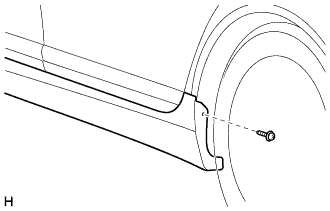
Remove the screw on the rear side.
-
for Standard Body:
Using a clip remover, remove the 7 clips.
-
for Long Body:
Using a clip remover, remove the 8 clips.
Text in Illustration *A for Standard Body *B for Long Body -
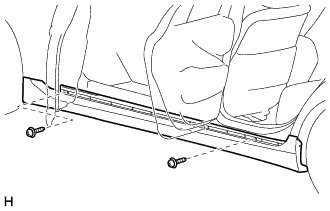
Remove the 2 screws.
-
Put protective tape around the rocker panel moulding LH.
-
for Standard Body:
Detach the 10 clips and remove the rocker panel moulding LH.
-
for Long Body:
Detach the 11 clips and remove the rocker panel moulding LH.
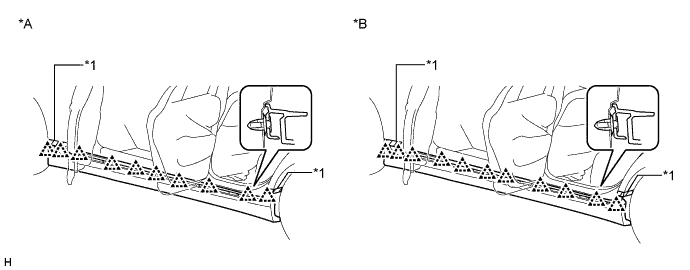
Text in Illustration *A for Standard Body *B for Long Body *1 Protective Tape - -
-