AIR HOSE (for Ottoman) INSTALLATION

Tech Tips
-
Use the same procedure for LHD and RHD vehicles.
-
The procedure listed below is for LHD vehicles.
-
A bolt without a torque specification is shown in the standard bolt chart Click here.
-
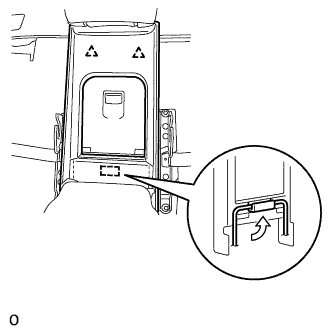
INSTALL AIR HOSE
-
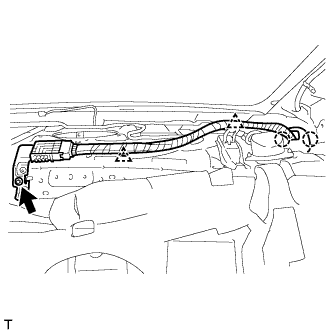
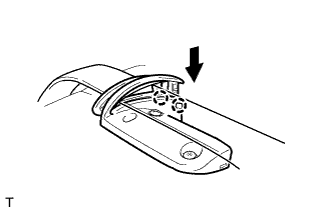
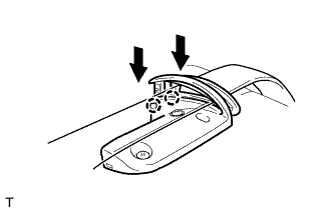
Attach the 2 claws to install the air hose.
-
Install the 2 hose clamps and bolt.
- Torque:
- 9.8 N*m { 100 kgf*cm, 87 in.*lbf }
-
for RHD:
Install the hose clamp and bolt.
- Torque:
- 9.8 N*m { 100 kgf*cm, 87 in.*lbf }
-
Install the 2 hose clamps.
-
Connect the air hose connector.
-
-
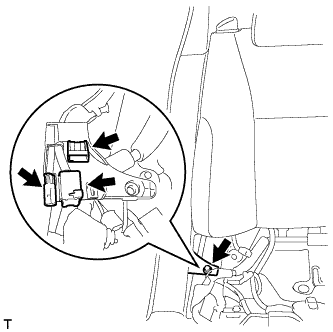
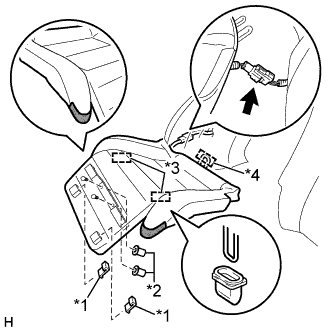
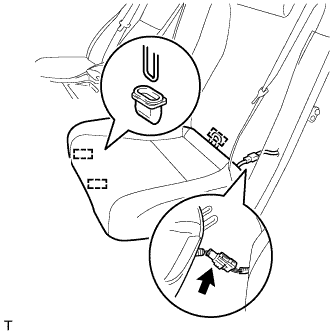
INSTALL REAR SEAT 3 POINT TYPE BELT ASSEMBLY LH
-
Insert the claw of the retractor (a) into the hole.
-
Align the seat belt positioning hole with the claw and install the retractor of the rear seat 3 point type belt assembly LH with the bolt.
- Torque:
- 42 N*m { 428 kgf*cm, 31 ft.*lbf }
-
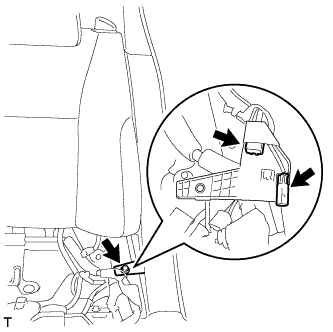
Connect the pretensioner connector and lock the locking button as shown in the illustration.
-
w/ Tension Reducer System:
Connect the tension reducer connector.
-
-
INSTALL ROOF SIDE NO. 2 AIR DUCT LH
-
Attach the 2 claws to install the roof side No. 2 air duct LH.
-
Install the clip.
-
-
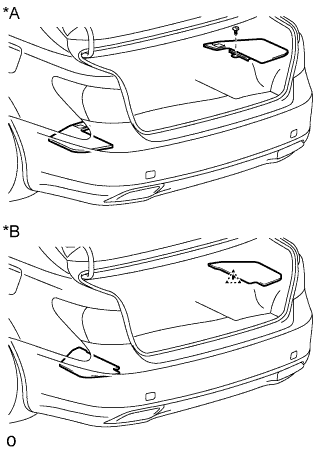
INSTALL LUGGAGE COMPARTMENT TRIM COVER ASSEMBLY RH
-
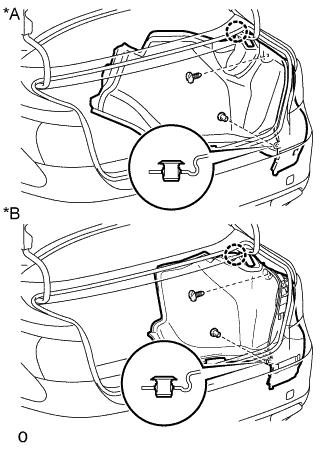
Text in Illustration *A w/o Rear Cooler *B w/ Rear Cooler Install the luggage compartment trim cover assembly RH with the claw and 2 clips.
-
-
INSTALL LUGGAGE COMPARTMENT TRIM COVER ASSEMBLY LH
-
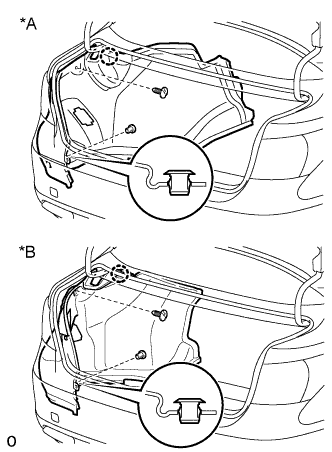
Text in Illustration *A w/o Rear Cooler *B w/ Rear Cooler Install the luggage compartment trim cover assembly LH with the claw and 2 clips.
-
-
INSTALL REAR FLOOR FINISH PLATE
-
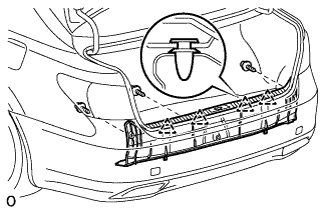
Attach the 4 clips to install the rear floor finish plate.
-
Install the 3 clips.
-
-
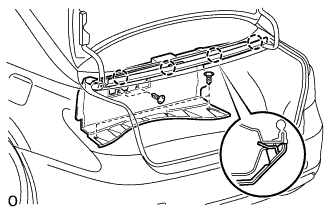
INSTALL TOOL BOX (w/o Spare Tire)
-
Install the tool box with the 2 clips.
-
-
INSTALL DECK BOARD ASSEMBLY (w/o Spare Tire)
-
INSTALL FRONT LUGGAGE COMPARTMENT TRIM COVER
-
w/o Rear Cooler:
-

Install the front luggage compartment trim cover with the 4 claws and 3 clips.
-
Attach the 3 clips.
-
Install the 2 rope hooks.
-
-
w/ Rear Cooler:
-
Install the front luggage compartment trim cover with the 4 claws and 5 clips.
-
Install the 2 rope hooks.
-
-
-
INSTALL NO. 1 COOLER COVER (w/ Rear Cooler)
-
Attach the 2 clips to install the No. 1 cooler cover.
-
-
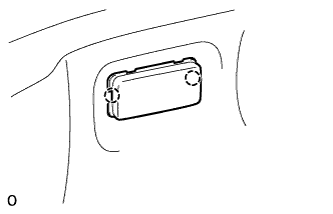
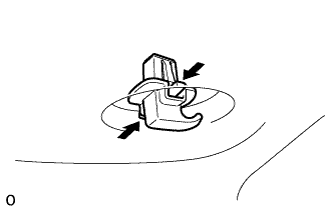
INSTALL NO. 2 LUGGAGE COMPARTMENT TRIM HOOK (w/o Rear Cooler)
-
Attach the No. 2 luggage compartment trim hook.
-
-
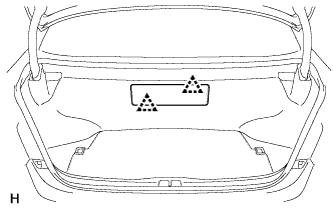
INSTALL NO. 1 LUGGAGE COMPARTMENT LIGHT ASSEMBLY
-
Connect the connector.
-
Attach the 2 claws to install the No. 1 luggage compartment light assembly.
-
-
INSTALL DECK TRIM SIDE BOARD RH
Text in Illustration *A w/ Spare Tire *B w/o Spare Tire
-
w/ Spear Tire:
-
Install the deck trim side board RH with the clip.
-
-
w/o Spear Tire:
-
Attach the clip to install the deck trim side board RH.
-
-
-
INSTALL DECK TRIM SIDE BOARD LH
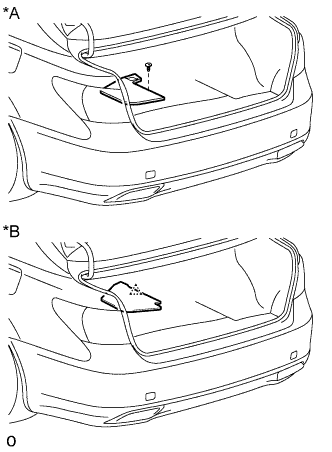
Text in Illustration *A w/ Spare Tire *B w/o Spare Tire
-
w/ Spear Tire:
-
Install the deck trim side board LH with the clip.
-
-
w/o Spear Tire:
-
Attach the clip to install the deck trim side board LH.
-
-
-
INSTALL ROPE HOOK
-
Install the 2 rope hooks.
-
-
INSTALL ROPE HOOK ASSEMBLY
-

Install the 4 rope hook assemblies with the 4 bolts.
-
-
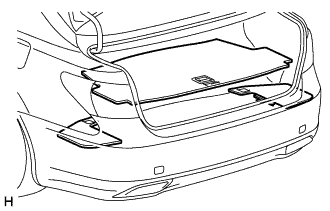
INSTALL LUGGAGE COMPARTMENT MAT SUB-ASSEMBLY
-
INSTALL PACKAGE TRAY TRIM PANEL ASSEMBLY
-
w/ Rear Cooler:
Connect the solar sensor connector.
-
except 4-Passenger with Ottoman:
Pass the 3 rear seat belt floor anchors through the package tray trim panel assembly.
-
for 4-Passenger with Ottoman:
Pass the 2 rear seat belt floor anchors through the package tray trim panel assembly.
-
Insert the rear part of the package tray trim panel assembly into the rear sunshade assembly.
-
Attach the 2 clips to install the package tray trim panel assembly.
-
except 4-Passenger with Ottoman:
Attach the 4 claws to install the 3 belt guides.
-
for 4-Passenger with Ottoman:
Attach the 4 claws to install the 2 belt guides.
-
-
INSTALL INNER ROOF SIDE GARNISH RH
Tech Tips
Use the same procedure described for the LH side.
-
INSTALL INNER ROOF SIDE GARNISH LH
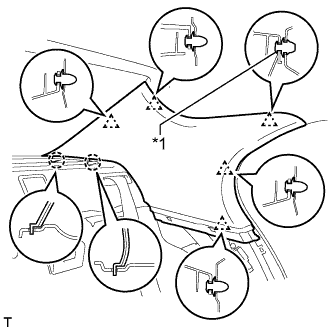
Text in Illustration *1 Clip A
-
Install a new clip A to the inner roof side garnish LH.
-
Attach the 2 claws and 5 clips to install the inner roof side garnish LH.
-
-
INSTALL REAR SEAT SIDE GARNISH RH
Tech Tips
Use the same procedure described for the LH side.
-
INSTALL REAR SEAT SIDE GARNISH LH
-
Attach the 6 claws to install the rear seat side garnish LH.
-
-
INSTALL REAR DOOR SCUFF PLATE RH
Tech Tips
Use the same procedure described for the LH side.
-
INSTALL REAR DOOR SCUFF PLATE LH

-
Attach the 4 clips.
-
Attach the 7 claws to install the rear door scuff plate LH.
-
-
INSTALL REAR SEAT CENTER ARMREST ASSEMBLY (w/ Center Seat)
-
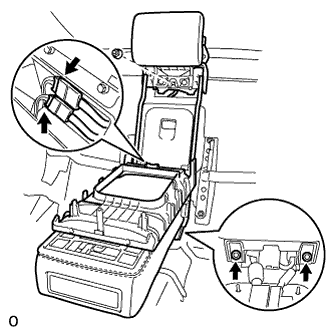
Connect the 2 connectors.
-
Install the rear seat center armrest assembly with the 2 bolts and nut.
- Torque:
- 20 N*m { 204 kgf*cm, 15 ft.*lbf }
Note
Be careful not to damage the vehicle body.
-
Attach the hook to the center seatback frame wire.
-
Attach the 2 clips to install the rear seat armrest hole board.
-
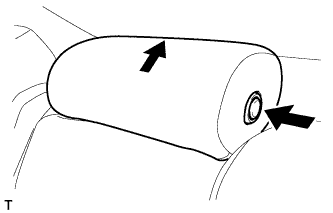
While pressing the button, lower the rear center seat headrest assembly.
-
Raise the rear seat center armrest assembly.
-
-
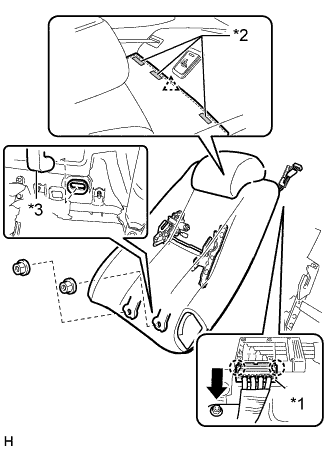
INSTALL REAR SEATBACK ASSEMBLY RH
-
Connect the rear seatback assembly RH to the rear No. 2 seat adjuster assembly, and press down on the rear seatback assembly RH to install it to the rear No. 2 seat adjuster assembly. Then connect the air duct to the vehicle body.
Note
Be careful not to damage the vehicle body.
-
Install the rear seatback assembly RH to the rear No. 2 seat adjuster assembly with the 2 nuts.
- Torque:
- 20 N*m { 204 kgf*cm, 15 ft.*lbf }
-
Attach the clip and 3 pieces of fastening tape.
-
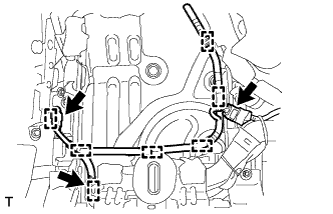
Attach the 2 claws to connect the air hose.
Text in Illustration *1 Air Hose *2 Fastening Tape *3 Air Duct -
Install the nut.
-
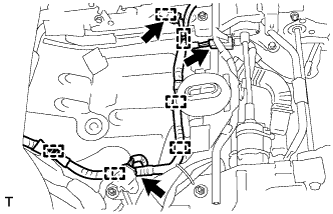
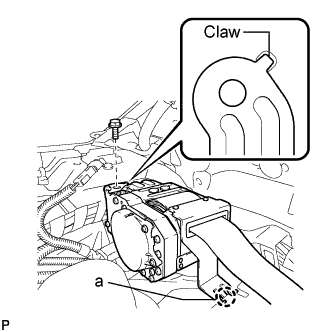
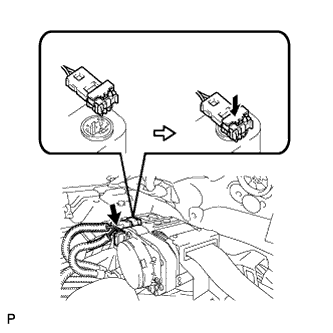
Connect the 3 connectors and attach the 6 wire harness clamps.
-
Connect the 3 connectors.
-
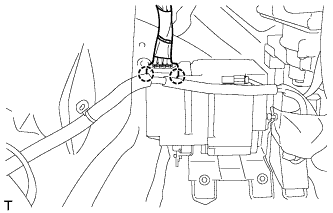
Install the junction block with the bolt.
- Torque:
- 30 N*m { 306 kgf*cm, 22 ft.*lbf }
-
Install the rear seat 3 point type belt assembly RH to the rear seat shoulder belt guide RH.
-
Attach the 2 claws to close the 2 caps.
-
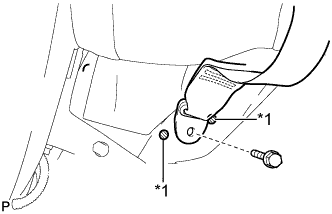
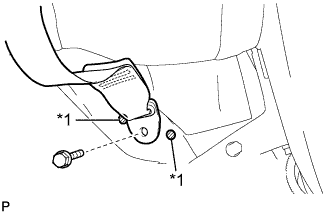
Text in Illustration *1 Protruding Part Connect the anchor part of the rear seat 3 point type belt assembly RH with the bolt.
- Torque:
- 42 N*m { 428 kgf*cm, 31 ft.*lbf }
Note
Do not allow the anchor part of the rear seat 3 point type belt assembly RH to overlap protruding parts of the floor panel.
-
-
INSTALL REAR SEATBACK ASSEMBLY LH

-
Connect the rear seatback assembly LH to the rear No. 2 seatback adjuster assembly, and press down on the rear seatback assembly LH to install it to the rear No. 2 seatback adjuster assembly. Then connect the air duct to the vehicle body.
Note
Be careful not to damage the vehicle body.
-
Install the rear seatback assembly LH to the rear No. 2 seatback adjuster assembly with the 2 nuts.
- Torque:
- 20 N*m { 204 kgf*cm, 15 ft.*lbf }
-
Install the clip and attach the 3 pieces of fastening tape.
Text in Illustration *1 Fastening Tape -
Connect the 3 connectors and attach the 7 wire harness clamps.
-
Connect the 2 connectors.
-
Install the junction block with the bolt.
- Torque:
- 30 N*m { 306 kgf*cm, 22 ft.*lbf }
-
Connect the rear seat 3 point type belt assembly LH to the rear seat shoulder belt guide LH.
-
Attach the 2 claws to close the 2 caps.
-
Text in Illustration *1 Protruding Part Connect the anchor part of the rear seat 3 point type belt assembly LH with the bolt.
- Torque:
- 42 N*m { 428 kgf*cm, 31 ft.*lbf }
Note
Do not allow the anchor part of the rear seat 3 point type belt assembly to overlap protruding parts of the floor panel.
-
-
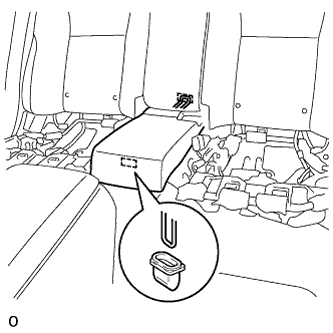
INSTALL REAR SEAT CONSOLE BOX (w/ Console Box)
-
INSTALL REAR CENTER SEAT CUSHION ASSEMBLY (w/ Center Seat)
-
Attach the rear hook of the center seat cushion assembly to the center seatback frame sub-assembly.
Note
Be careful not to damage the vehicle body.
-
Attach the front hook of the rear center seat cushion assembly to the vehicle body.
-
-
INSTALL REAR SEAT CUSHION ASSEMBLY RH
-
Connect the cable to the negative (-) battery terminal.
-
Operate the ottoman switch to move the ottoman to the return position.
-
Disconnect the cable from the negative (-) battery terminal.
CAUTION:
Wait at least 90 seconds after disconnecting the cable from the negative (-) battery terminal to disable the SRS system.
Note
When disconnecting the cable, some systems need to be initialized after the cable is reconnected Click here.
-
Text in Illustration *1 Seat Cover Hook *2 Nut *3 Rear Seat Cushion Lock Hook *4 Rear Hook Connect the connector.
-
Attach the rear hook of the rear seat cushion assembly RH to the rear seatback spring assembly RH.
Note
Be careful not to damage the vehicle body.
-
Attach the 2 front hooks of the rear seat cushion assembly RH to the the rear No. 1 seat adjuster assembly.
-
Connect the 2 rear seat cushion lock hooks.
-
Connect the seat cushion ottoman part with the 2 nuts.
-
Install the 2 seat cushion cover hooks.
-
-
INSTALL REAR SEAT CUSHION ASSEMBLY LH
-
Connect the connector.
-
Attach the rear hook of the rear seat cushion assembly LH to the rear seatback frame assembly LH.
Note
Be careful not to damage the vehicle body.
-
Attach the 2 front hooks of the rear seat cushion assembly LH to the rear No. 2 seat adjuster assembly.
-
-
CONNECT CABLE TO NEGATIVE BATTERY TERMINAL
Note
When disconnecting the cable, some systems need to be initialized after the cable is reconnected Click here.
-
INSTALL COWL TOP VENTILATOR LOUVER
-

for LHD:
Install the 6 clips and cowl top ventilator louver RH.
Note
If the cowl top ventilator louver RH is not properly installed, water may leak into the engine room and cause malfunctions. Therefore, make sure the cowl top ventilator louver RH is installed properly.
-

for RHD:
Install the 6 clips and cowl top ventilator louver LH.
Note
If the cowl top ventilator louver LH is not properly installed, water may leak into the engine room and cause malfunctions. Therefore, make sure the cowl top ventilator louver LH is installed properly.
-
-
CHECK SRS WARNING LIGHT
-
Check the SRS warning light Click here.
-
-
CHECK REAR SEAT ASSEMBLY
-
Check the power seat system Click here.
-
Check the climate control seat system Click here.
-
Check the seat vibration system Click here.
-