SEAT VIBRATOR MODULE ASSEMBLY (for Ottoman) INSTALLATION

Tech Tips
-
Use the same procedure for LHD and RHD vehicles.
-
The procedure listed below is for LHD vehicles.
-
A bolt without a torque specification is shown in the standard bolt chart Click here.
-
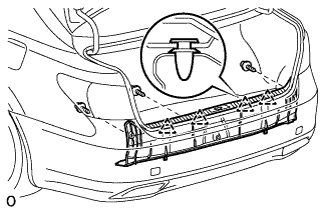
INSTALL SEAT VIBRATOR MODULE ASSEMBLY
-
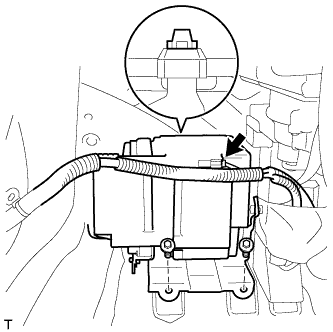
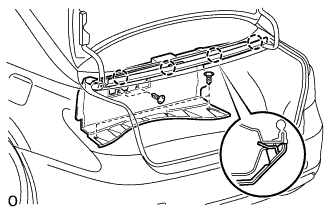
Attach the claw and install the module with the 2 bolts.
- Torque:
- 9.8 N*m { 100 kgf*cm, 87 in.*lbf }
-
Connect the connector.
-
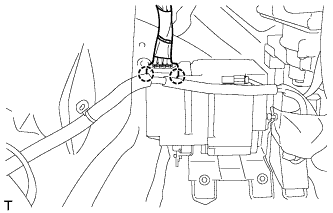
Connect the air hose connector.
-
-
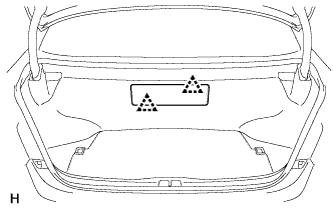
INSTALL LUGGAGE COMPARTMENT TRIM COVER ASSEMBLY RH
-
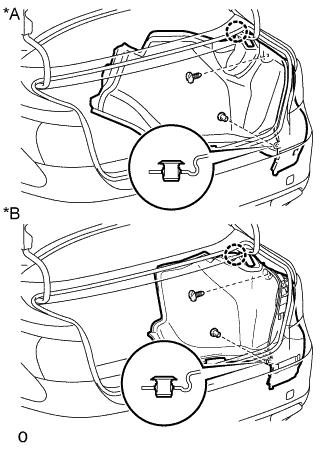
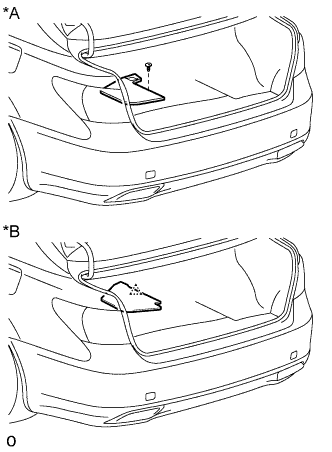
Text in Illustration *A w/o Rear Cooler *B w/ Rear Cooler Install the luggage compartment trim cover assembly RH with the claw and 2 clips.
-
-
INSTALL LUGGAGE COMPARTMENT TRIM COVER ASSEMBLY LH
-
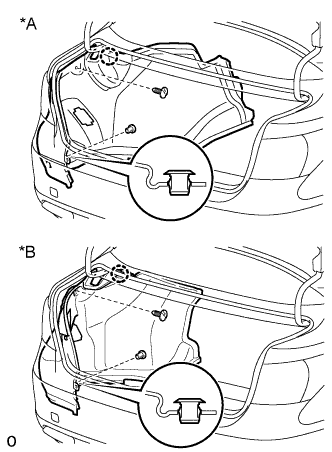
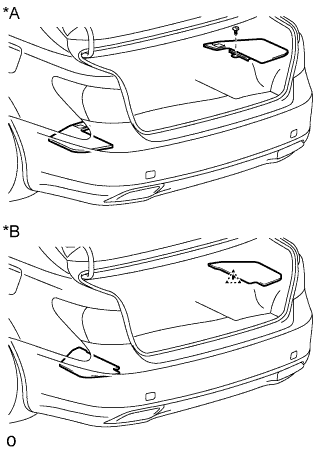
Text in Illustration *A w/o Rear Cooler *B w/ Rear Cooler Install the luggage compartment trim cover assembly LH with the claw and 2 clips.
-
-
INSTALL REAR FLOOR FINISH PLATE
-
Attach the 4 clips to install the rear floor finish plate.
-
Install the 3 clips.
-
-
INSTALL TOOL BOX (w/o Spare Tire)
-
Install the tool box with the 2 clips.
-
-
INSTALL DECK BOARD ASSEMBLY (w/o Spare Tire)
-
INSTALL FRONT LUGGAGE COMPARTMENT TRIM COVER
-
w/o Rear Cooler:
-

Install the front luggage compartment trim cover with the 4 claws and 3 clips.
-
Attach the 3 clips.
-
Install the 2 rope hooks.
-
-
w/ Rear Cooler:
-
Install the front luggage compartment trim cover with the 4 claws and 5 clips.
-
Install the 2 rope hooks.
-
-
-
INSTALL NO. 1 COOLER COVER (w/ Rear Cooler)
-
Attach the 2 clips to install the No. 1 cooler cover.
-
-
INSTALL NO. 2 LUGGAGE COMPARTMENT TRIM HOOK (w/o Rear Cooler)
-
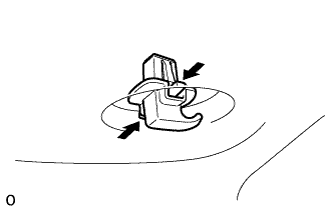
Attach the No. 2 luggage compartment trim hook.
-
-
INSTALL NO. 1 LUGGAGE COMPARTMENT LIGHT ASSEMBLY
-
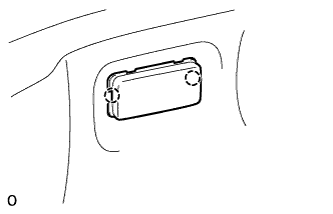
Connect the connector.
-
Attach the 2 claws to install the No. 1 luggage compartment light assembly.
-
-
INSTALL DECK TRIM SIDE BOARD LH
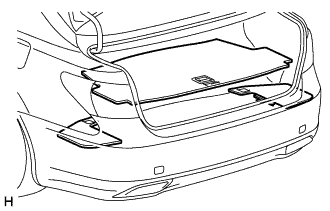
Text in Illustration *A w/ Spare Tire *B w/o Spare Tire
-
w/ Spear Tire:
-
Install the deck trim side board LH with the clip.
-
-
w/o Spear Tire:
-
Attach the clip to install the deck trim side board LH.
-
-
-
INSTALL DECK TRIM SIDE BOARD RH
Text in Illustration *A w/ Spare Tire *B w/o Spare Tire
-
w/ Spear Tire:
-
Install the deck trim side board RH with the clip.
-
-
w/o Spear Tire:
-
Attach the clip to install the deck trim side board RH.
-
-
-
INSTALL ROPE HOOK ASSEMBLY
-

Install the 4 rope hook assemblies with the 4 bolts.
-
-
INSTALL ROPE HOOK
-
Install the 2 rope hooks.
-
-
INSTALL LUGGAGE COMPARTMENT MAT SUB-ASSEMBLY
-
CONNECT CABLE TO NEGATIVE BATTERY TERMINAL
Note
When disconnecting the cable, some systems need to be initialized after the cable is reconnected Click here.
-
INSTALL COWL TOP VENTILATOR LOUVER
-

for LHD:
Install the 6 clips and cowl top ventilator louver RH.
Note
If the cowl top ventilator louver RH is not properly installed, water may leak into the engine room and cause malfunctions. Therefore, make sure the cowl top ventilator louver RH is installed properly.
-

for RHD:
Install the 6 clips and cowl top ventilator louver LH.
Note
If the cowl top ventilator louver LH is not properly installed, water may leak into the engine room and cause malfunctions. Therefore, make sure the cowl top ventilator louver LH is installed properly.
-
-
CHECK SRS WARNING LIGHT
-
Check the SRS warning light Click here.
-
-
CHECK SEAT VIBRATION SYSTEM
-
Check the seat vibration system Click here.
-