REAR DOOR SPEAKER (for Long Body) REMOVAL

Tech Tips
-
Use the same procedure for the RH and LH sides.
-
The procedure listed below is for the LH side.
-
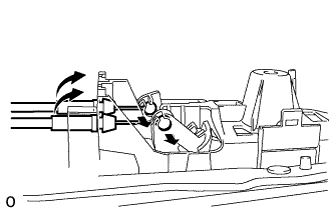
REMOVE REAR DOOR INSIDE HANDLE BEZEL PLUG LH
-
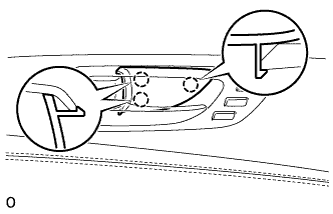
Using a screwdriver, detach the 3 claws and remove the rear door inside handle bezel plug LH.
Tech Tips
Tape the screwdriver tip before use.
-
-
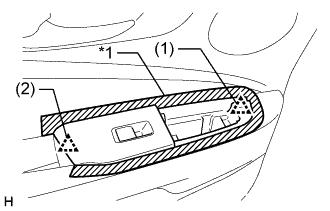
REMOVE REAR POWER WINDOW REGULATOR SWITCH ASSEMBLY WITH REAR DOOR ARMREST BASE PANEL
-
Apply protective tape to the area around the rear rear power window regulator switch assembly with rear door armrest base panel.
-
Using a clip remover, detach the 2 clips in the order shown in the illustration.
Text in Illustration *1 Protective Tape -
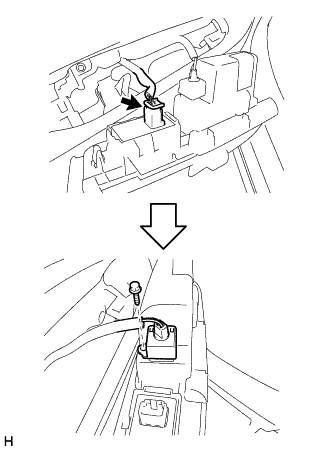
Disconnect the connector.
-
Remove the screw and illumination light.
-
Remove the rear rear power window regulator switch assembly with rear door armrest base panel.
-
-
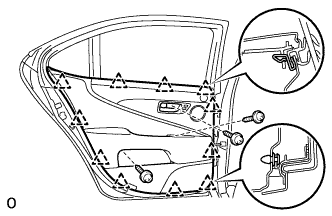
REMOVE REAR DOOR TRIM BOARD SUB-ASSEMBLY LH
-
for Long Body:
-
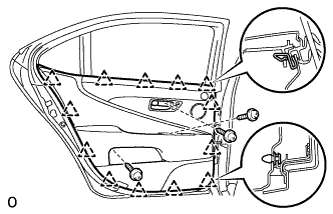
Remove the 3 screws.
-
Detach the 13 clips.
Note
Do not use a tool to detach the clips of the rear door trim board sub-assembly LH.
-
Disconnect the 2 cables from the inside handle.
-
Disconnect the connectors and remove the trim board.
-
-
for Standard Body:
-
Remove the 3 screws.
-
Detach the 11 clips.
Note
Do not use a tool to detach the clips of the rear door trim board sub-assembly LH.
-
Disconnect the 2 cables from the inside handle.
-
Disconnect the connectors and remove the trim board.
-
-
-
REMOVE REAR DOOR TRIM BOARD SUB-ASSEMBLY LH (w/ Rear Door Sunshade)
-
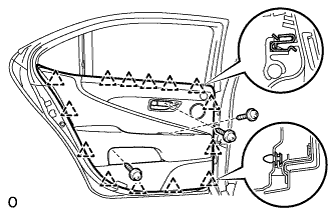
for Long Body:
-
Remove the 3 screws.
-
Detach the 14 clips.
Note
Do not use a tool to detach the clips of the rear door trim board sub-assembly LH.
-
Disconnect the 2 cables from the inside handle.
-
Disconnect the connectors and remove the rear door trim board sub-assembly LH.
-
-

for Standard Body:
-
Remove the 3 screws.
-
Detach the 12 clips.
Note
Do not use a tool to detach the clips of the rear door trim board sub-assembly LH.
-
Disconnect the 2 cables from the inside handle.
-
Disconnect the connectors and remove the rear door trim board sub-assembly LH.
-
-
-
REMOVE REAR NO. 1 SPEAKER ASSEMBLY
Note
Do not touch the cone of the speaker.
-
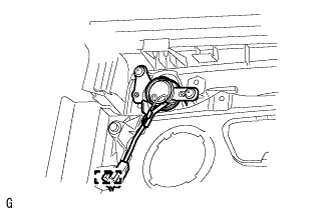
Disconnect the connector.
-
Remove the 2 screws.
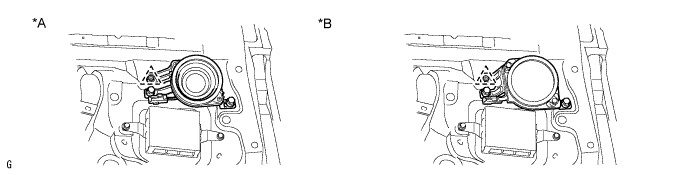
Text in Illustration *A for Standard *B for 19 Speakers -
Detach the clip and remove the rear No. 1 speaker assembly.
-
-
REMOVE REAR NO. 2 SPEAKER ASSEMBLY (for 19 Speakers)
Note
Do not touch the cone of the speaker.
-

Disconnect the connector.
-
Remove the 3 screws.
-
Detach the claw and remove the rear No. 2 speaker assembly.
-
-
REMOVE REAR NO. 3 SPEAKER ASSEMBLY (for 19 Speakers)
Note
Do not touch the cone of the speaker.
-
Disconnect the connector.
-
Detach the clamp, and remove the 2 screws and rear No. 3 speaker assembly.
-