WASHER MOTOR INSTALLATION

-
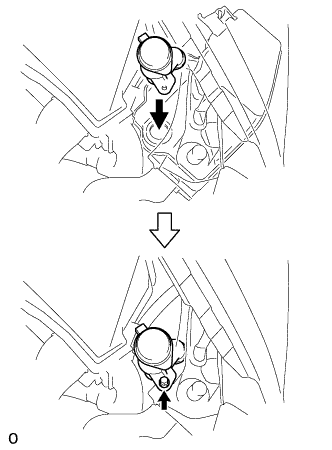
INSTALL LEVEL WARNING SWITCH ASSEMBLY
-
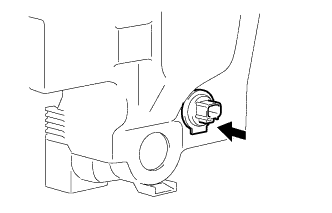
Install the level warning switch assembly.
-
-
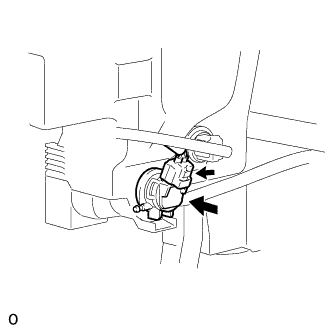
INSTALL HEADLIGHT CLEANER CONTROL RELAY
-
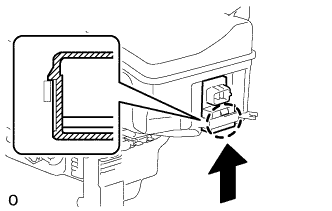
Attach the claw to install the headlight cleaner control relay.
-
-
INSTALL HEADLIGHT CLEANER MOTOR AND PUMP ASSEMBLY
-
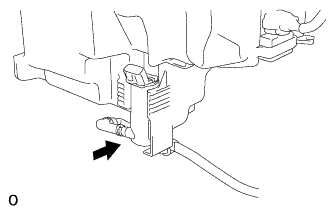
Install the headlight cleaner motor and pump together with the hose.
-
-
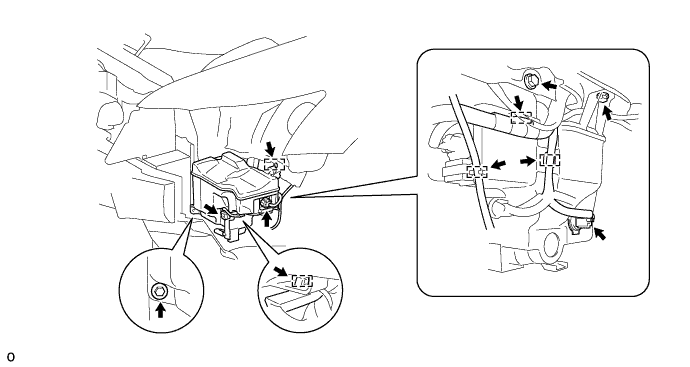
INSTALL WINDSHIELD WASHER JAR ASSEMBLY AND PUMP
-
Attach the guide to install the windshield washer jar and pump with the 3 bolts.
- Torque:
- 5.5 N*m { 56 kgf*cm, 49 in.*lbf }
-
Connect the 3 connectors and attach the 4 clamps.
-
-
INSTALL WASHER INLET SUB-ASSEMBLY
-
Install the washer inlet with the bolt.
- Torque:
- 5.5 N*m { 56 kgf*cm, 49 in.*lbf }
-
-
INSTALL HEADLIGHT ASSEMBLY LH
-
for HID Headlight assembly:
-
for HID Headlight assembly:
-
-
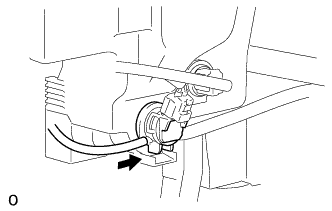
INSTALL WINDSHIELD WASHER MOTOR AND PUMP ASSEMBLY
-
Install the windshield washer motor and pump assembly.
-
Connect the connector.
-
-
FILL WINDSHIELD WASHER JAR AND PUMP ASSEMBLY WITH WASHER FLUID
-
Connect the washer hose to the windshield washer motor and pump, and fill the washer jar with washer fluid.
-
-
INSTALL FRONT FENDER LINER RH
-
Install the front fender liner LH with the 15 screws and 6 clips.
-
-
INSTALL FRONT FENDER WHEEL OPENING MOULDING LH
-
Attach the clip to install the moulding.
-
Install the 5 screws.
-
-
INSTALL FRONT FENDER MAIN SEAL LH
-

Push in the clip labeled A in the illustration in the upward direction of the vehicle and install the front fender main seal LH with the 3 clips.
-
-
INSTALL FRONT WHEEL LH
- Torque:
- 119 to 161 N*m { 1213 to 1642 kgf*cm, 88 to 119 ft.*lbf }
-
CONNECT CABLE TO NEGATIVE BATTERY TERMINAL
Note
When disconnecting the cable, some systems need to be initialized after the cable is reconnected Click here.
-
INSTALL COWL TOP VENTILATOR LOUVER RH
-

Install the 6 clips and cowl top ventilator louver RH.
Note
Be sure to install the cowl top ventilator louver RH properly. If it is not installed properly, water may enter the engine room and cause malfunctions.
-