FRONT SUSPENSION MEMBER (for 2WD) INSTALLATION

-
TEMPORARILY TIGHTEN FRONT NO. 2 SUSPENSION LOWER ARM ASSEMBLY LH
-
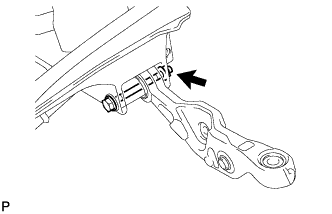
Insert the bolt from the front of the vehicle. Then temporarily install the front No. 2 suspension lower arm LH with the nut.
Tech Tips
Tighten the nut after the vehicle is stabilized.
-
-
TEMPORARILY TIGHTEN FRONT NO. 2 SUSPENSION LOWER ARM ASSEMBLY RH
Tech Tips
Use the same procedure described for the LH side.
-
TEMPORARILY TIGHTEN FRONT NO. 1 SUSPENSION LOWER ARM ASSEMBLY LH
-
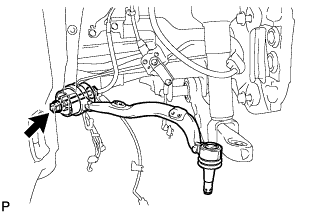
Insert the bolt from the back of the vehicle. Temporarily install the front No. 1 suspension lower arm LH with the nut.
Tech Tips
Tighten the nut after the vehicle is stabilized.
-
-
TEMPORARILY TIGHTEN FRONT NO. 1 SUSPENSION LOWER ARM ASSEMBLY RH
Tech Tips
Use the same procedure described for the LH side.
-
INSTALL FRONT ENGINE MOUNTING INSULATOR
Tech Tips
Perform this procedure only when replacement of the front engine mounting insulator is necessary.
-
Install the 2 front engine mounting insulators with the 2 nuts.
- Torque:
- 64 N*m { 653 kgf*cm, 47 ft.*lbf }
-
-
INSTALL ENGINE MOUNTING SPACER
-
Install the 2 engine mounting spacers.
-
-
INSTALL FRONT SUSPENSION CROSSMEMBER SUB-ASSEMBLY
-
Install the front suspension crossmember sub-assembly with the 2 nuts.
- Torque:
- 35 N*m { 357 kgf*cm, 26 ft.*lbf }
-
-
INSTALL ENGINE AND TRANSMISSION
-
for 1UR-FSE:
-
for 1UR-FE:
-
-
STABILIZE SUSPENSION (w/o Air Suspension)
-
Install the front tires.
- Torque:
- 140 N*m { 1428 kgf*cm, 103 ft.*lbf }
-
Lower the vehicle and bounce it up and down several times to stabilize the front suspension.
-
Remove the front tires.
-
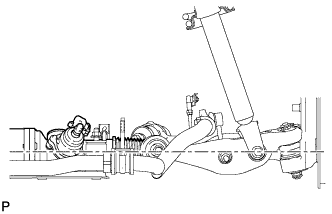
Jack up the front suspension lower arm with a wooden block between the jack and front suspension lower arm. Apply a load to the front suspension so that the front suspension lower arm is placed in a horizontal position.
-
-
STABILIZE SUSPENSION (w/ Air Suspension)
-
Install the front wheel.
- Torque:
- 140 N*m { 1428 kgf*cm, 103 ft.*lbf }
-
Lower the vehicle and start the engine. Then fill the pneumatic cylinder with front shock absorber assembly LH with air.
-
Bounce the vehicle up and down several times to stabilize the front suspension.
-
Remove the front wheel.
Note
Do not turn the engine switch on (IG).
-
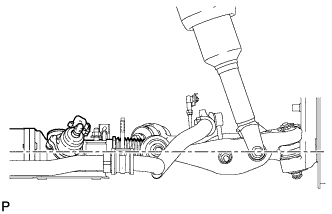
Jack up the front suspension lower arm with a wooden block between the jack and front suspension lower arm. Apply a load to the front suspension so that the front suspension lower arm is placed in a horizontal position.
-
-
TIGHTEN FRONT NO. 2 SUSPENSION LOWER ARM ASSEMBLY LH
-
Tighten the installation nut of the front No. 2 suspension lower arm assembly LH.
- Torque:
- 145 N*m { 1479 kgf*cm, 107 ft.*lbf }
-
-
TIGHTEN FRONT NO. 2 SUSPENSION LOWER ARM ASSEMBLY RH
Tech Tips
Use the same procedure described for the LH side.
-
TIGHTEN FRONT NO. 1 SUSPENSION LOWER ARM ASSEMBLY LH
-
Tighten the installation nut of the front No. 1 suspension upper arm assembly LH.
- Torque:
- 145 N*m { 1479 kgf*cm, 107 ft.*lbf }
-
-
TIGHTEN FRONT NO. 1 SUSPENSION LOWER ARM ASSEMBLY RH
Tech Tips
Use the same procedure described for the LH side.