FRONT DIFFERENTIAL CARRIER ASSEMBLY (for AWD) REMOVAL

-
PLACE FRONT WHEELS FACING STRAIGHT AHEAD
-
DRAIN DIFFERENTIAL OIL
-
Stop the vehicle on a level place.
-
for Front Differential:
-
Using a 10 mm hexagon wrench, remove the filler plug and gasket.
-
Using a 10 mm hexagon wrench, remove the drain plug and gasket, and drain the oil.
-
Using a 10 mm hexagon wrench, install a new gasket and the drain plug.
- Torque:
- 39 N*m { 398 kgf*cm, 29 ft.*lbf }
-
-

for Rear Differential:
-
Using a 10 mm hexagon wrench, remove the filler plug and gasket.
-
Using a 10 mm hexagon wrench, remove the drain plug and gasket, and drain the oil.
-
Using a 10 mm hexagon wrench, install a new gasket and the drain plug.
- Torque:
- 49 N*m { 500 kgf*cm, 37 ft.*lbf }
-
-
-
REMOVE ENGINE ASSEMBLY
-
Remove the engine assembly Click here.
-
-
INSTALL ENGINE ON ENGINE STAND
-
Install the engine onto an engine stand with the bolts.
-
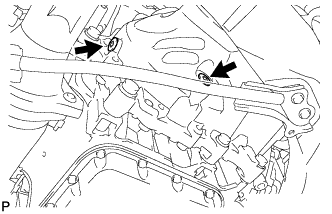
Remove the 2 bolts and 2 engine hangers.
-
-
REMOVE FRONT DIFFERENTIAL CARRIER ASSEMBLY
-
Support the front differential carrier assembly with a jack.
CAUTION:
As the front differential carrier assembly is very heavy, securely support it with the jack.
-
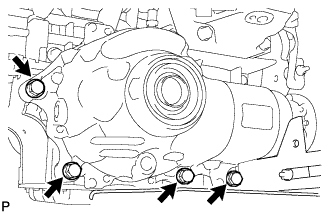
Remove the 4 bolts and front differential carrier assembly.
Note
-
Do not damage the installation surface when removing the front differential carrier assembly.
-
The remaining oil may leak out when removing the front differential carrier assembly.
-
-