AUTOMATIC TRANSMISSION ASSEMBLY REMOVAL

-
PRECAUTION
Note
After turning the engine switch off, waiting time may be required before disconnecting the cable from the battery terminal. Therefore, make sure to read the disconnecting the cable from the battery terminal notice before proceeding with work Click here.
-
DISCONNECT CABLE FROM NEGATIVE BATTERY TERMINAL
Note
When disconnecting the cable, some systems need to be initialized after the cable is reconnected Click here.
-
DRAIN AUTOMATIC TRANSMISSION FLUID
-
Remove the drain plug and gasket and drain the ATF.
-
Install a new gasket and the drain plug.
- Torque:
- 20 N*m { 204 kgf*cm, 15 ft.*lbf }
-
-
REMOVE ENGINE AND TRANSMISSION
-
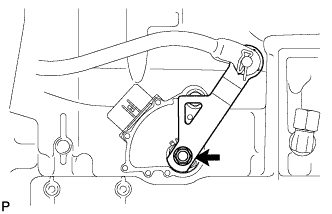
REMOVE TRANSMISSION CONTROL SHAFT LEVER RH
-
Remove the nut and transmission control shaft lever together with the floor shift gear shifting rod sub-assembly.
-
-
REMOVE EXHAUST MANIFOLD SUB-ASSEMBLY RH
-
REMOVE EXHAUST MANIFOLD SUB-ASSEMBLY LH
-
REMOVE STARTER ASSEMBLY
-
REMOVE REAR ENGINE MOUNTING MEMBER
-
Remove the 5 nuts, rear No. 3 engine mounting insulator and rear engine mounting member.
-
-
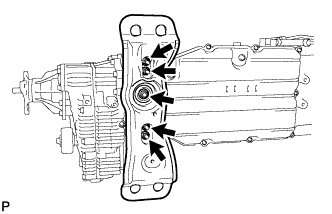
REMOVE REAR NO. 4 ENGINE MOUNTING INSULATOR
-
Remove the 2 bolts and rear No. 4 engine mounting insulator.
-
-
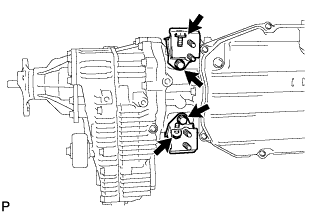
REMOVE REAR NO. 1 ENGINE MOUNTING INSULATOR AND REAR NO. 2 ENGINE MOUNTING INSULATOR
-
Remove the 4 bolts, rear No. 1 engine mounting insulator and rear No. 2 engine mounting insulator.
-
-
REMOVE FRONT PROPELLER SHAFT ASSEMBLY
-
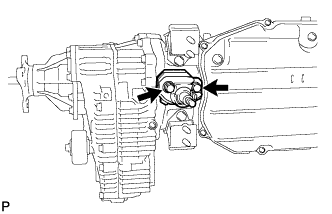
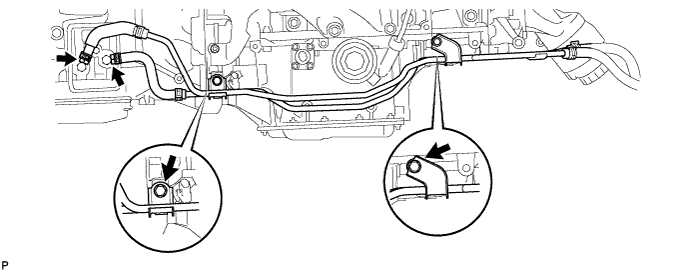
REMOVE NO. 1 OIL COOLER TUBE SUB-ASSEMBLY
-
Disconnect the 2 oil cooler hoses.
-
Remove the 2 bolts and No. 1 oil cooler tube sub-assembly.
-
-
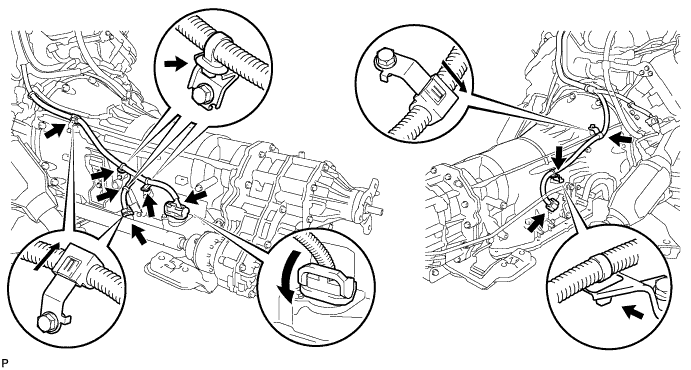
DISCONNECT WIRE HARNESS AND CONNECTOR
-
Disconnect the transmission wire connector and park/neutral position switch connector.
Tech Tips
Detach the claw, press down the lever, and then disconnect the transmission wire connector.
-
Detach the connector clamp and 6 harness clamps from the automatic transmission.
-
-
REMOVE DRIVE PLATE & TORQUE CONVERTER SETTING BOLT
-
Turn the crankshaft to gain access to the 6 torque converter setting bolts and remove each bolt while holding the crankshaft pulley bolt with a wrench.
-
-
REMOVE AUTOMATIC WITH TRANSFER TRANSMISSION ASSEMBLY
-
Using wooden blocks or equivalent, fix the transmission assembly in place so that it is level.
Note
-
Do not allow the wooden blocks or equivalent to contact the oil pan when lifting or supporting the transmission assembly, as the oil pan may be deformed as a result.
-
Support the engine assembly with a sling device and chain block while working.
-
Be sure to perform this procedure with several people as the transmission assembly is very heavy.
-
-
Remove the 10 bolts, and then remove the automatic transmission from the engine.
Note
To prevent damage to the knock pins, do not pry between the automatic transmission and engine.
-
-
SECURE ENGINE ASSEMBLY
-
Using wooden blocks or equivalent, set the engine on a flat surface.
Note
-
Place wooden blocks or equivalent so that the engine is level.
-
Do not allow the wooden blocks or equivalent to contact the oil pan when lifting or supporting the engine assembly, as the oil pan may be deformed as a result.
-
Perform this step while supporting the engine assembly using a sling device and chain block.
-
-
-
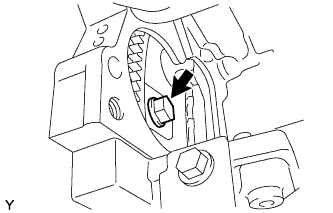
REMOVE TORQUE CONVERTER ASSEMBLY
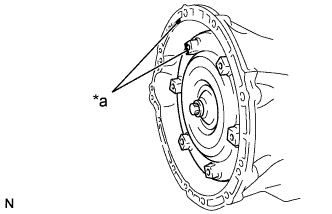
Text in Illustration *a Matchmark
-
Put matchmarks on the transmission case and torque converter.
-
Remove the torque converter from the automatic transmission.
-
-
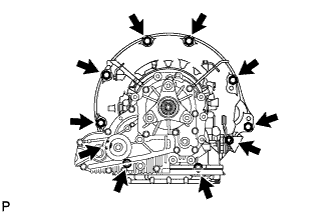
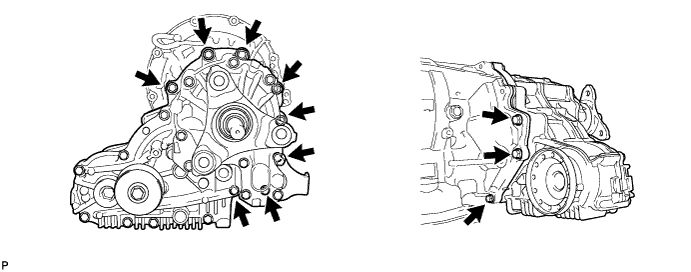
REMOVE TRANSFER ASSEMBLY
-
Remove the 11 bolts and transfer assembly.
Note
-
Be careful not to damage the oil seal.
-
Be careful not to drop the transfer assembly.
-
Be careful to prevent oil from leaking.
-
Be sure to perform this procedure with several people as the transfer assembly is very heavy.
-
-