FUEL INJECTOR (for Direct Injection) REMOVAL

-
PRECAUTION
CAUTION:
-
Do not smoke or be near an open flame when working on the fuel system.
-
Keep gasoline away from rubber or leather parts.
-
Do not allow fuel to spray when removing the pipe between the high pressure side fuel pump and the fuel injector. The fuel in the pipe is highly pressurized.
-
-
REMOVE FUEL PRESSURE PULSATION DAMPER ASSEMBLY
-
REMOVE NO. 3 FUEL PIPE SUB-ASSEMBLY
-
Remove the fuel pump connector.
-
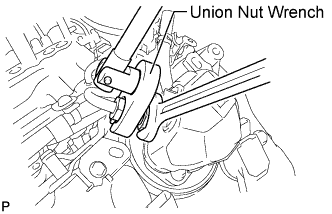
Fix the union bolt on the fuel pump side in place with a 21 mm wrench. Using a 19 mm union nut wrench, loosen the union nut and disconnect the fuel pipe from the fuel pump.
Note
Do not loosen the union bolt on the fuel pump side. If the union bolt is accidentally loosened, replace the fuel pump.
-
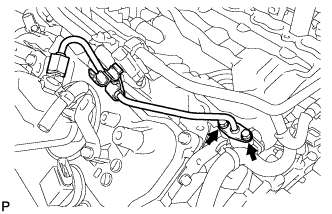
Remove the 2 bolts on the delivery pipe side and remove the fuel pipe.
-
Remove the O-ring, backup ring and E-ring from the fuel pipe.
-
-
REMOVE NO. 2 FUEL PIPE SUB-ASSEMBLY
Tech Tips
The removal procedures are the same as the No. 3 fuel pipe.
-
REMOVE NO. 1 ENGINE COVER SUB-ASSEMBLY
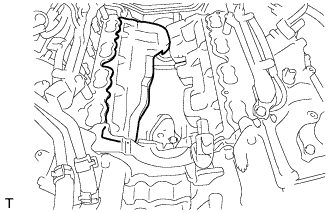
-
REMOVE NO. 2 ENGINE COVER SUB-ASSEMBLY
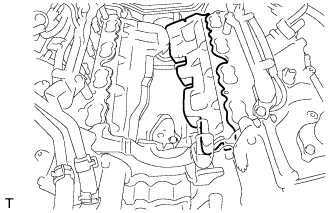
-
REMOVE NO. 2 ENGINE COVER SUB-ASSEMBLY LH
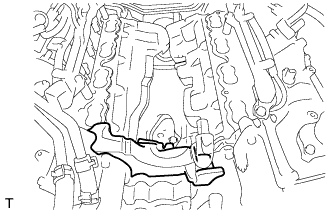
-
REMOVE NO. 4 FUEL PIPE SUB-ASSEMBLY
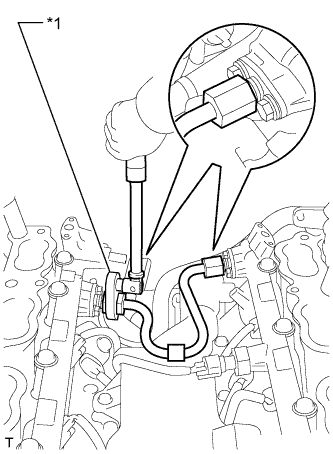
Text in Illustration *1 Union Nut Wrench
-
Using a 19 mm union nut wrench, remove the No. 4 fuel pipe sub-assembly.
-
-
REMOVE PCV HOSE
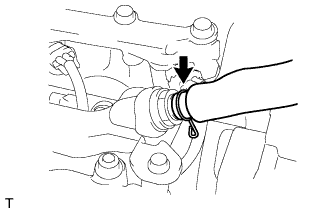
-
Remove the PCV hose from the PCV valve.
-
-
REMOVE NO. 2 FUEL DELIVERY PIPE
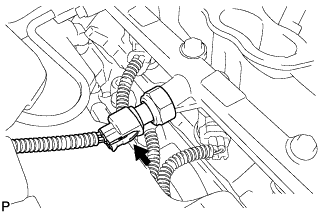
-
Disconnect the fuel pressure sensor connector.
-
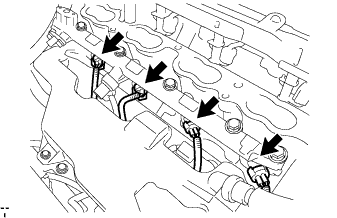
Disconnect the 4 fuel injector connectors.
-
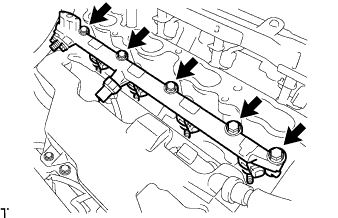
Remove the 5 bolts and No. 2 fuel delivery pipe from the cylinder head.
Note
-
Be extremely careful not to touch or strike the tips of the fuel injector assemblies.
-
Pull and remove the No. 2 fuel delivery pipe in a straight line without tilting it.
-
-
Remove the 4 injector vibration insulators from the cylinder head.
-
-
REMOVE FUEL DELIVERY PIPE
-
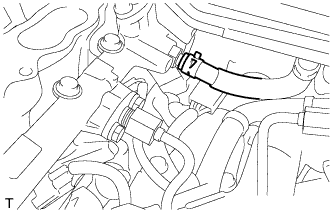
Disconnect the No. 3 fuel hose.
-
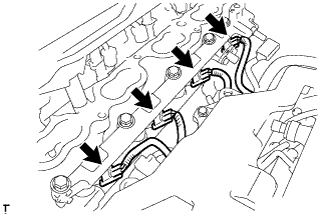
Disconnect the 4 fuel injector connectors.
-
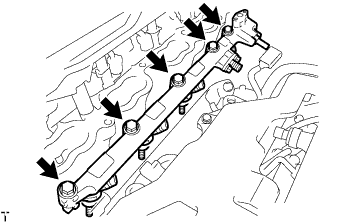
Remove the 5 bolts and fuel delivery pipe from the cylinder head.
Note
-
Be extremely careful not to touch or strike the tips of the fuel injector assemblies.
-
Pull and remove the fuel delivery pipe in a straight line without tilting it.
-
-
Remove the 4 injector vibration insulators from the cylinder head.
-
-
REMOVE FUEL INJECTOR ASSEMBLY
-
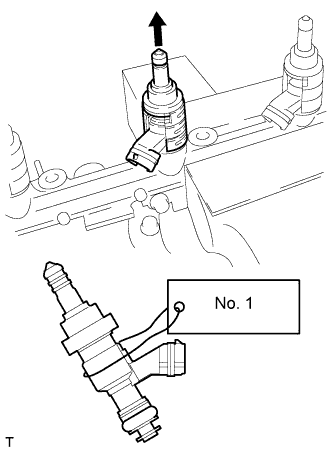
Secure the fuel delivery pipe between aluminum plates in a vise and pull out the fuel injector assembly in a straight line.
Note
-
Pull and remove the fuel injector assembly in a straight line to avoid damage to the seal surface of the fuel delivery pipe O-ring.
-
For reinstallation, attach a tag or label to the fuel injector assembly shaft.
-
-
Remove the nozzle holder clamp from the fuel injector assembly.
-
Remove the O-ring, No. 1 backup ring, No. 2 backup ring, No. 3 backup ring and E-ring from the fuel injector assembly.
-
-
REMOVE FUEL INJECTOR SEAL
-
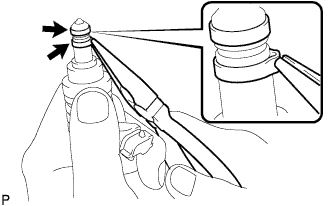
Using the tips of needle-nose pliers, pinch and pull one of the 2 fuel injector seals at several points to stretch it. Repeat this for the other fuel injector seal.
Note
-
Excessively pinching the fuel injector seal may damage the groove of the fuel injector assembly.
-
If a fuel injector assembly is dropped or the tip of the fuel injector assembly is struck, replace it with a new one.
-
-
Remove the 2 fuel injector seals from the fuel injector assembly.
-
-
REMOVE FUEL PIPE SUPPORT SUB-ASSEMBLY
-
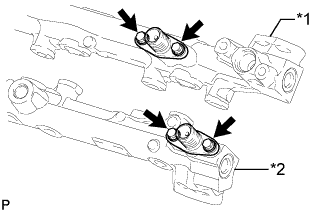
Text in Illustration *1 Fuel Delivery Pipe *2 No. 2 Fuel Delivery Pipe Remove the 4 bolts and 2 fuel pipe support sub-assemblies.
-
Remove the 2 O-rings, 2 No. 1 backup rings, 2 No. 2 backup rings and 2 E-rings from the 2 fuel pipe support sub-assemblies.
-
-
REMOVE FUEL DELIVERY PIPE PLUG
-
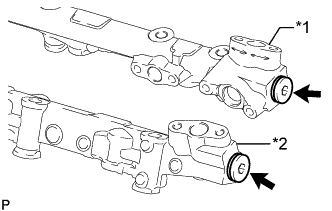
Text in Illustration *1 Fuel Delivery Pipe *2 No. 2 Fuel Delivery Pipe Using a 6 mm hexagon socket wrench, remove the 2 fuel delivery pipe plugs and 2 gaskets from the fuel delivery pipe and No. 2 fuel delivery pipe.
-