THROTTLE BODY REMOVAL

-
REMOVE V-BANK COVER SUB-ASSEMBLY
-
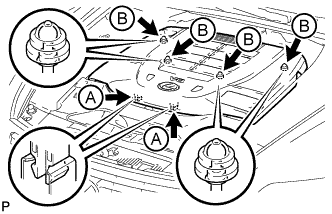
Using both hands, lift the rear side of the cover upwards to detach the 4 clips labeled B. Then slide the cover toward the front of the vehicle to detach the 2 clips labeled A and remove the V-bank cover sub-assembly.
Note
-
The V-bank cover sub-assembly may be damaged if its front and rear are lifted at the same time.
-
When detaching the clips labeled A, be sure to slide the cover toward the front of the vehicle.
-
-
-
REMOVE AIR CLEANER INLET COVER SUB-ASSEMBLY
-
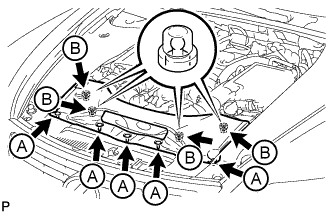
Remove the 5 clips labeled A.
-
Lift up the air cleaner inlet cover sub-assembly to detach the 4 clips labeled B, and remove the air cleaner inlet cover sub-assembly.
-
-
REMOVE NO. 1 AIR CLEANER INLET
-

Remove the 2 bolts.
-
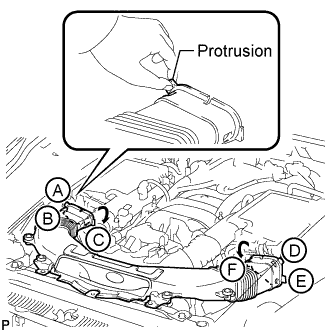
Hold the No. 1 air cleaner inlet by the protrusions labeled A and labeled B, and detach the connections.
-
Rotate the No. 1 air cleaner inlet as shown in the illustration to detach the protrusion labeled C.
-
Hold the No. 1 air cleaner inlet by the protrusions labeled D and labeled E, and detach the connections.
-
Rotate the No. 1 air cleaner inlet as shown in the illustration to detach the protrusion labeled F.
-
-
REMOVE FRONT WHEEL OPENING EXTENSION PAD LH (for AWD)
-
for 2WD:
Remove the 2 screws and front wheel opening extension pad LH.
-
for AWD:
Remove the 5 screws and front wheel opening extension pad LH.
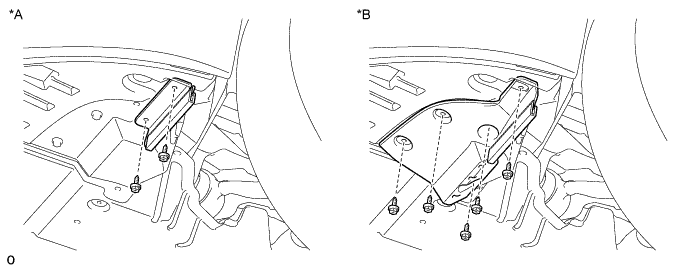
Text in Illustration *A for 2WD *B for AWD
-
-
REMOVE FRONT WHEEL OPENING EXTENSION PAD RH (for AWD)
Tech Tips
Use the same procedure described for the LH side.
-
REMOVE NO. 1 ENGINE UNDER COVER
-
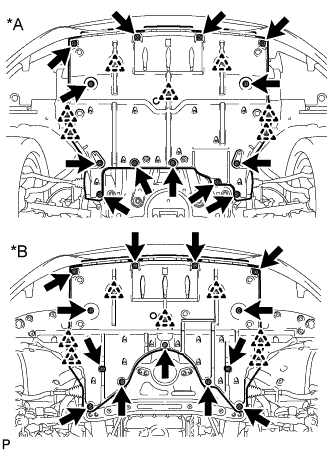
Text in Illustration *A for 2WD *B for AWD Remove the 13 screws, 7 clips and No. 1 engine under cover.
-
-
DRAIN ENGINE COOLANT
CAUTION:
Do not remove the radiator reservoir cap and vent plug while the engine and radiator are still hot. Pressurized, hot engine coolant and steam may be released and cause serious burns.
-
Loosen the radiator drain cock plug.
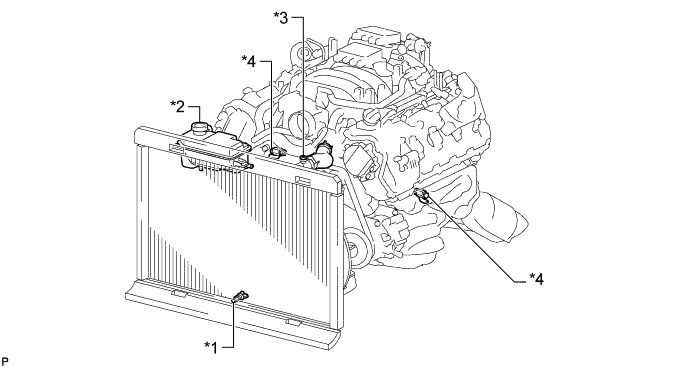
Text in Illustration *1 Radiator Drain Cock Plug *2 Radiator Reservoir Cap *3 Vent Plug *4 Cylinder Block Drain Cock Plug Tech Tips
Collect the coolant in a container and dispose of it according to the regulations in your area.
-
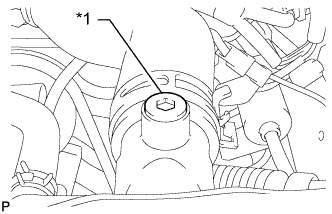
Text in Illustration *1 Vent Plug Remove the radiator reservoir cap, and using a 6 mm hexagon wrench, remove the vent plug.
-
Drain coolant.
-
Loosen the 2 cylinder block drain cock plugs.
-
-
REMOVE INTAKE AIR CONNECTOR PIPE
-
Disconnect the No. 1 and No. 2 ventilation hoses from the intake air connector pipe.
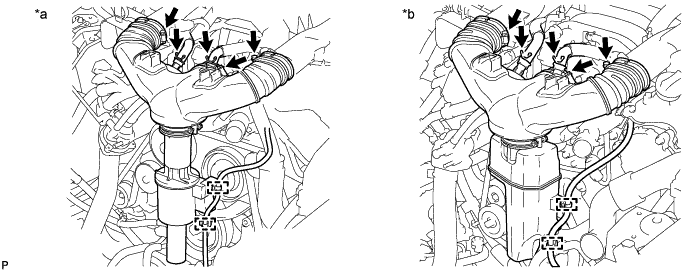
Text in Illustration *a w/ Intake Air Sound Creator *b w/ Intake Air Resonator -
Using a clip remover, detach the 2 wire harness clamps.
-
Loosen the 3 hose clamps, and remove the intake air connector pipe.
-
Remove the intake air sound creator.
Tech Tips
Only perform this procedure when replacement of the intake air sound creator is necessary.
-
Loosen the hose clamp and remove the intake air sound creator.
-
-
-
REMOVE THROTTLE BODY ASSEMBLY
-
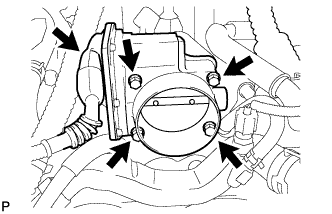
Disconnect the throttle motor connector.
-
Remove the 4 bolts and throttle body assembly.
-
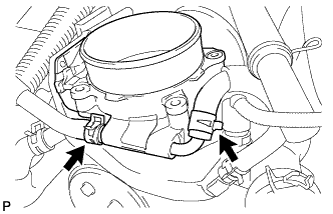
Disconnect the No. 4 and No. 5 water by-pass hoses from the throttle body assembly.
-
Remove the gasket from the intake manifold.
-