REAR BUMPER REMOVAL

-
DISCONNECT CABLE FROM NEGATIVE BATTERY TERMINAL
-
REMOVE REAR BUMPER COVER
-
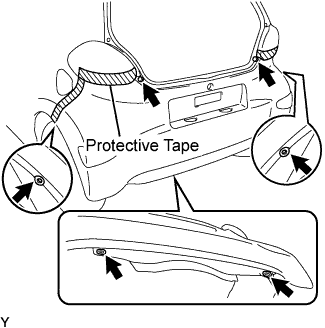
Apply protective tape to the outer circumference of the rear bumper cover, as shown in the illustration.
-
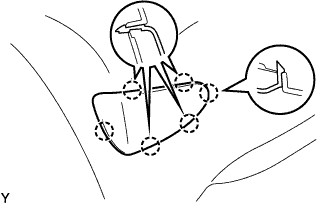
Using "Torx" socket wrench T30, remove the 2 rear bumper reinforcement stoppers.
-
Using a clip remover, remove the 2 clips.
-
Remove the 2 clips.
-
Disengage the 14 claws and remove the rear bumper cover.
-
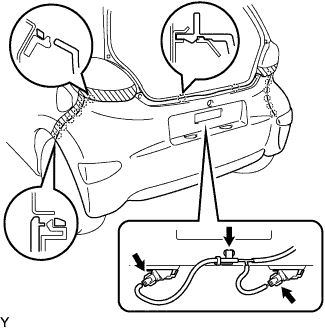
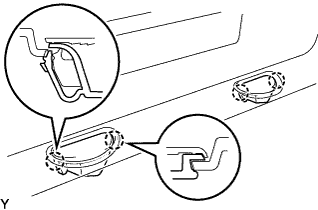
Using a clip remover, remove the wire harness clamp.
-
Disconnect the 2 license plate lamp connectors.
-
-
REMOVE REAR BUMPER SIDE RETAINER LH
-
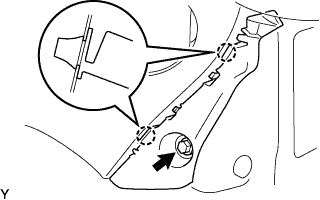
Remove the screw.
-
Disengage the 2 claws and remove the rear bumper side retainer.
-
-
REMOVE REAR BUMPER SIDE RETAINER RH
Tech Tips
Use the same procedure as for the LH side.
-
REMOVE REAR BUMPER REINFORCEMENT SUB-ASSEMBLY
-
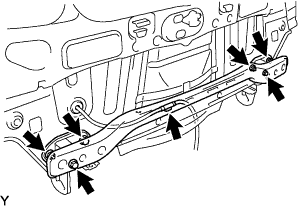
Using a clip remover, remove the wire harness clamp.
-
Remove the 4 bolts, 2 nuts and rear bumper reinforcement.
-
-
REMOVE REAR BUMPER SIDE MOULDING LH
-
Disengage the 6 claws and remove the rear bumper side moulding.
-
-
REMOVE REAR BUMPER SIDE MOULDING RH
Tech Tips
Use the same procedure as for the LH side.
-
REMOVE LICENSE PLATE LIGHT ASSEMBLY
-
Disengage the 4 claws and remove the 2 license plate lights.
-
-
REMOVE BACK DOOR NAME PLATE NO. 6
-
Apply protective tape to the outer circumference of the back door name plate.
-
Using an infrared light, heat the back door name plate.
Heating Temperature Item Temperature Back Door Name Plate No. 6 40 to 60°C (104 to 140°F) -
Using a scraper wrapped in protective tape, gradually peel the adhesive surface and remove the back door name plate.
-
-
REMOVE BACK DOOR NAME PLATE NO. 2
-

Apply protective tape to the outer circumference of the back door name plate.
-
Using an infrared light, heat the back door name plate.
Heating Temperature Item Temperature Back Door Name Plate No. 2 40 to 60°C (104 to 140°F) -
Using a scraper wrapped in protective tape, gradually peel the adhesive surface and remove the back door name plate.
-