FRONT DOOR BELT MOULDING INSTALLATION

Tech Tips
-
Use the same procedure for the RH and LH sides.
-
The procedure listed below is for the LH side.
-
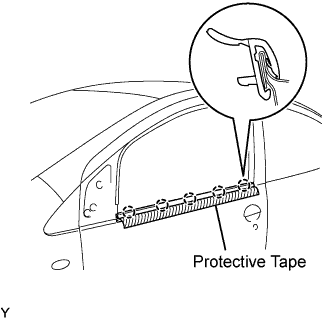
INSTALL FRONT DOOR BELT MOULDING (for 5 Door)
-
Engage the 5 claws and install the front door belt moulding.
-
Remove the protective tape.
-
-
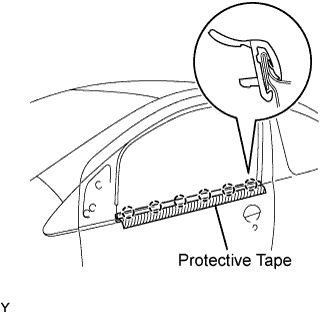
INSTALL FRONT DOOR BELT MOULDING (for 3 Door)
-
Engage the 6 claws and install the front door belt moulding.
-
Remove the protective tape.
-
-
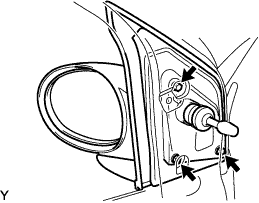
INSTALL OUTER REAR VIEW MIRROR
-
Install the outer rear view mirror assembly LH with the 3 screws.
- Torque:
- 7.0 N*m { 71 kgf*cm, 62 in.*lbf }
Note
-
Do not tighten the screws to more than the specified torque.
-
Before tightening the screws to the specified torque, provisionally tighten the screws by hand to fit the threads. Do not remove and reinstall the screws more than twice, when reusing a mirror.
-
-
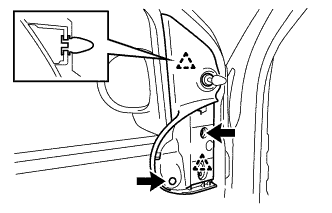
INSTALL FRONT DOOR LOWER FRAME BRACKET GARNISH
-
Engage the 2 clips and install the front door lower frame bracket.
-
Install the 2 screws.
-
-
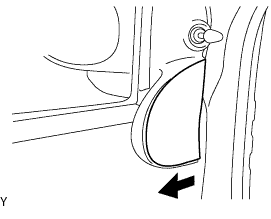
INSTALL FRONT DOOR FRONT LOWER FRAME COVER UPPER
-
Install the front door front lower frame upper cover in the direction shown in the illustration.
-